IMPULS #08 Luminous Flora

Project Team:
Dragana Maksimovic, Karolina Malec, Antonia Muszi, Bernadette Pößnicker, Katharina Rauch, Vanessa Stöckel, Stefanie Weber

Concept

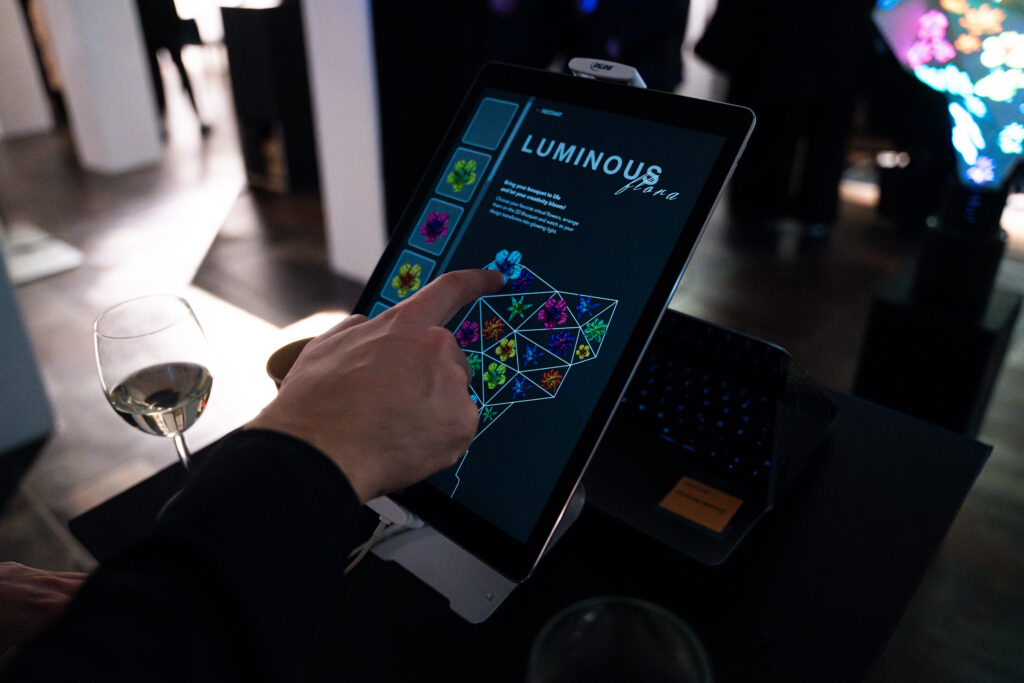
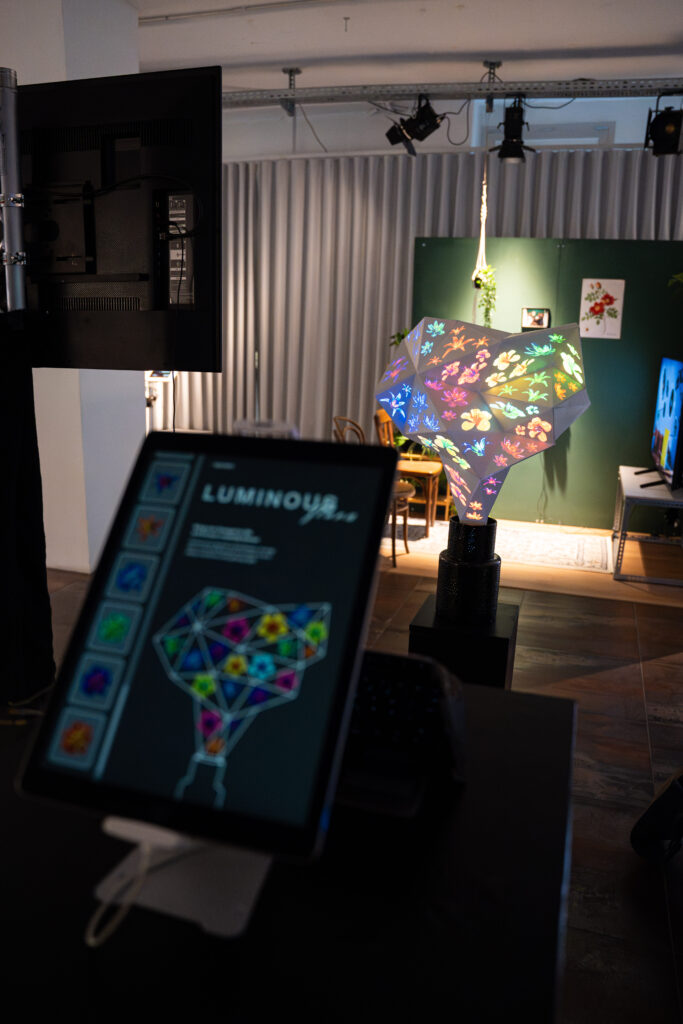
Luminous Flora is a captivating, interactive installation that invites visitors to create their own personalized flower arrangements, combining creativity with advanced technology. By using a tablet interface, participants can select and arrange virtual flowers, choosing from various colors and shapes to craft a unique bouquet. The flowers are carefully designed in a 3D program, ensuring that they feel life-like, with textures, colors, and shapes that bring them to life in a digital space. The final creation is then projected onto an abstract custom-made polygonal bouquet, which adds a tangible, three-dimensional aspect to the digital design. This process not only merges art and technology but also empowers participants to explore their creative potential in a completely new way.

The original idea for this project was to collaborate with Blumen B&B, a florist business located in Eggenberg. The goal was to offer an innovative and engaging way for customers to interact with floral arrangements. Visitors could experiment with designing digital bouquets that reflected their personal tastes, providing inspiration for real-world bouquets. This interactive experience was aimed at sparking new ideas and interest in floral design, with the hope that visitors would translate their digital creations into real-world purchases. While the project’s initial concept also included printing a tangible version of each digital bouquet, this was eventually left out due to logistical challenges. Instead, the focus remained on the interactive and immersive nature of the installation, offering visitors a creative and engaging experience through digital technology.

The project highlights the fusion of art and technology, showcasing how digital design can be used to create an interactive, visually stunning experience. Through the use of a tablet interface, participants design their bouquets and see them projected in real-time onto a physical abstract flower bouquet. The app, developed using Protopie and Figma, served as the primary interface for user interaction, and the mapping and projection of the floral designs were achieved with the help of Resolume, ensuring that the digital flowers blended seamlessly into the physical object. The communication between the app and the projector was achieved using OSC messages, enabling the projected design to update in real-time as the user interacted with the tablet interface. This seamless integration of digital and physical elements created a unique experience.


Software and Tools:
App: Figma & Protopie
3D Flowers and Animations: Blender and Adobe After Effects
3D Flower Bouquet Model: Blender, Adobe Illustrator, Lasercutter
Mapping and Projection: Resolume
OSC Messages: Interaction between App and Projector
Physical Setup: Flower Bouquet Sculpture, Bouqet Stand, Bouqet Vase, Beamer Stand, Tablet Stand
Hardware: iPad, MacBook, Beamer, external router, HDMI Cables, power Cables

Project Workflow:
Concept Development
Design Process (App, 3D Flowers, physical Bouquet)
Software Implementation (Protopie, Resolume)
Construction of the Flower Bouquet Sculpture
Construction of the stands
Testing
Hardware Setup
Troubleshooting
Final Adjustments
Supervising and Restarting the Installation during the exhibition
Evaluation

Challenges and Solutions:
Communication and collaboration issues within the group
Technical issues with video rendering and file sizes
Overheating and insufficient airflow for MacBook (and Beamer)
Network connectivity problems (fixed with external router)

Reflection & Challenges

The development and execution of Luminous Flora involved multiple technological and artistic components. The app, which was created using Figma and Protopie, served as an intuitive interface for visitors to design their virtual bouquets. Through a drag-and-drop system, users could select flowers designed in Blender and After Effects, then customize them by changing colors and positions. These virtual bouquets were mapped and projected onto a custom-made polygonal 3D flower bouquet, which acted as the canvas for the projections. The Resolume software was used to map the flowers onto the physical structure, with OSC messages facilitating the communication between the tablet and the projector.

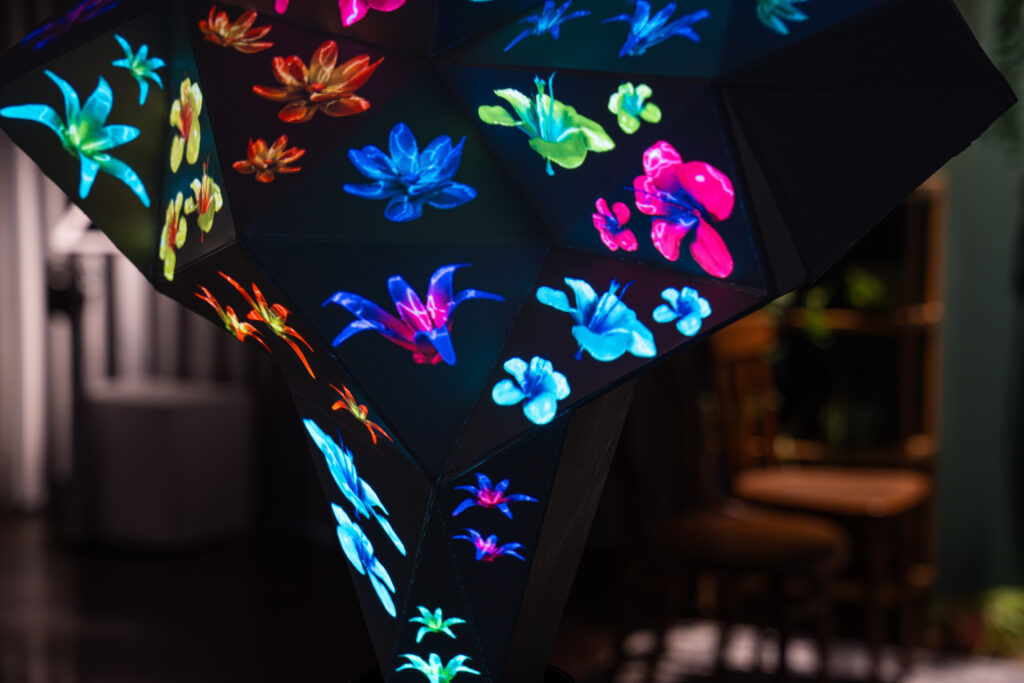
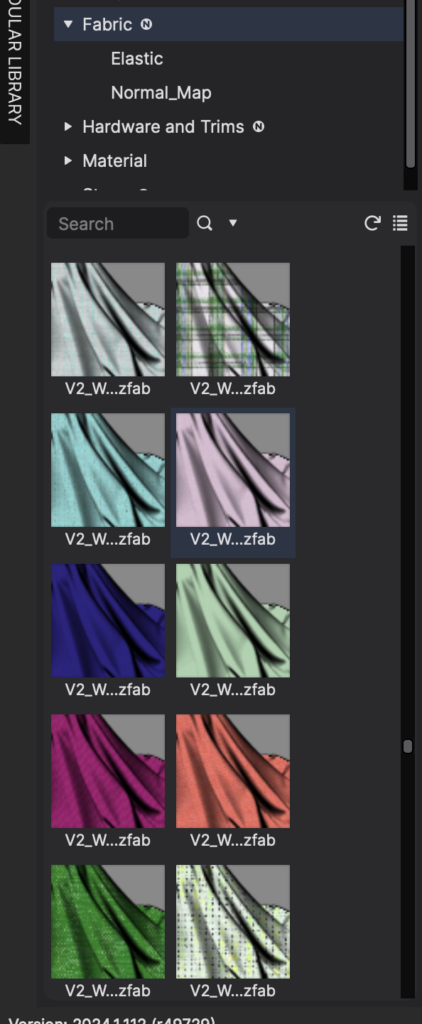
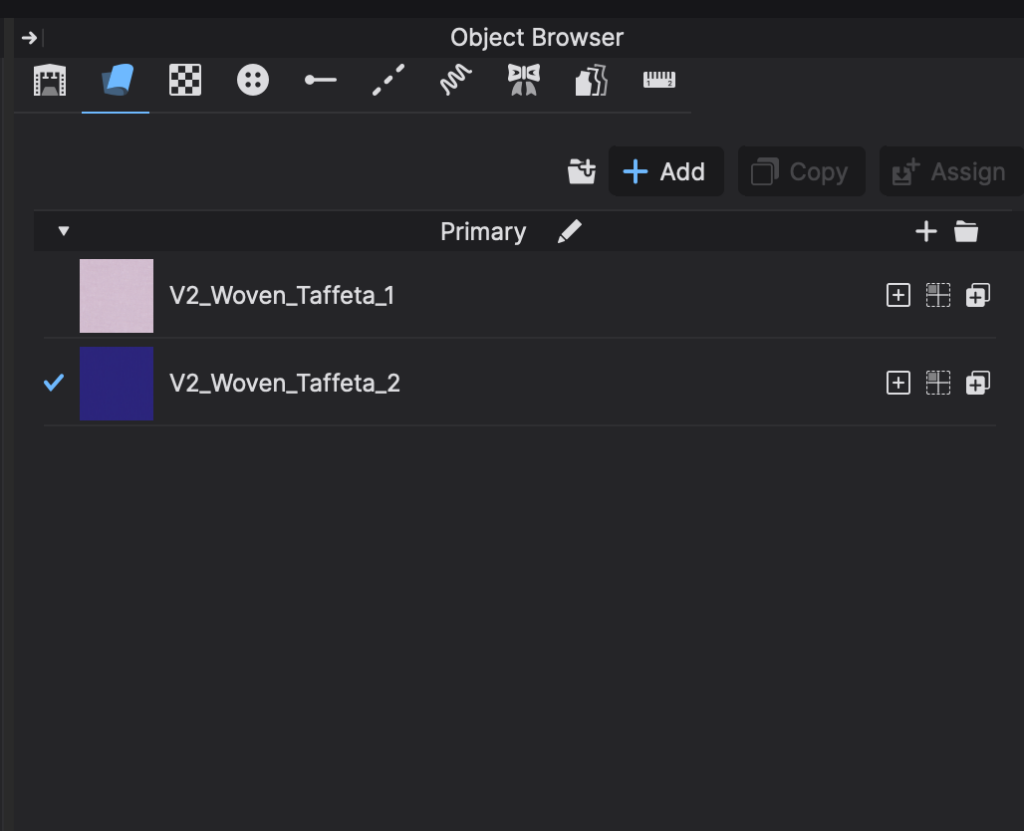
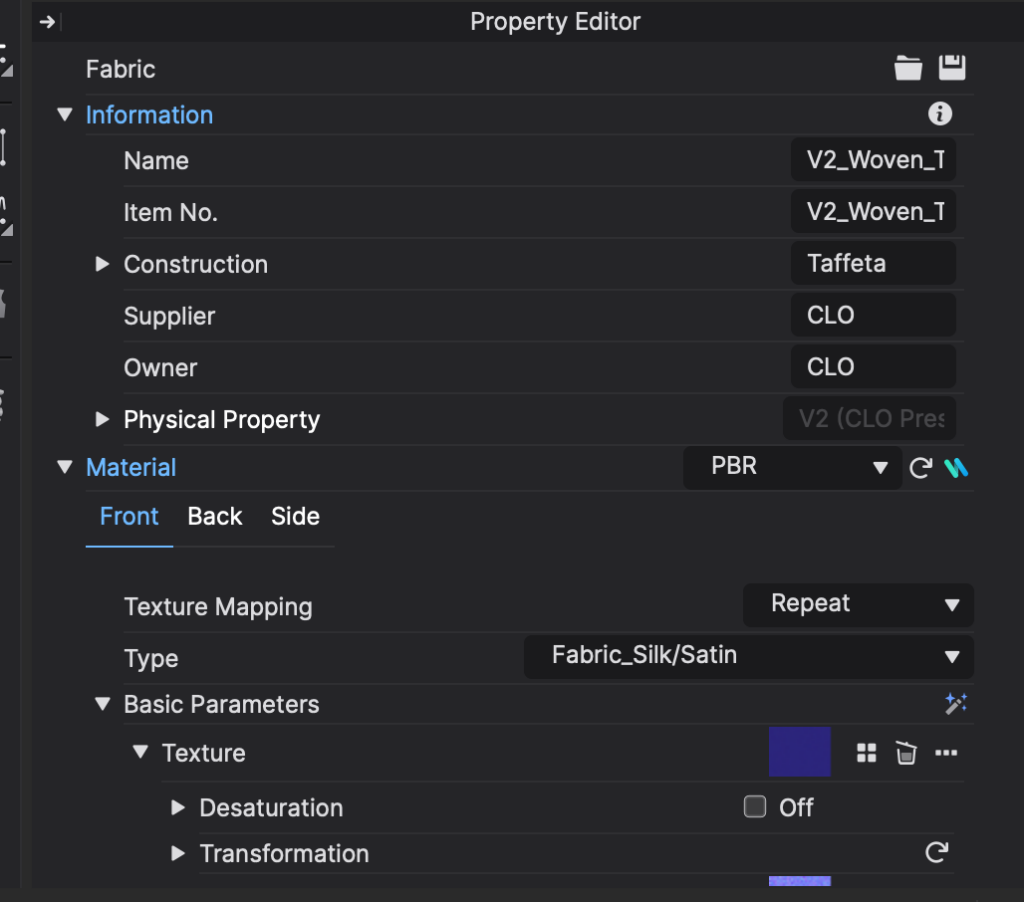
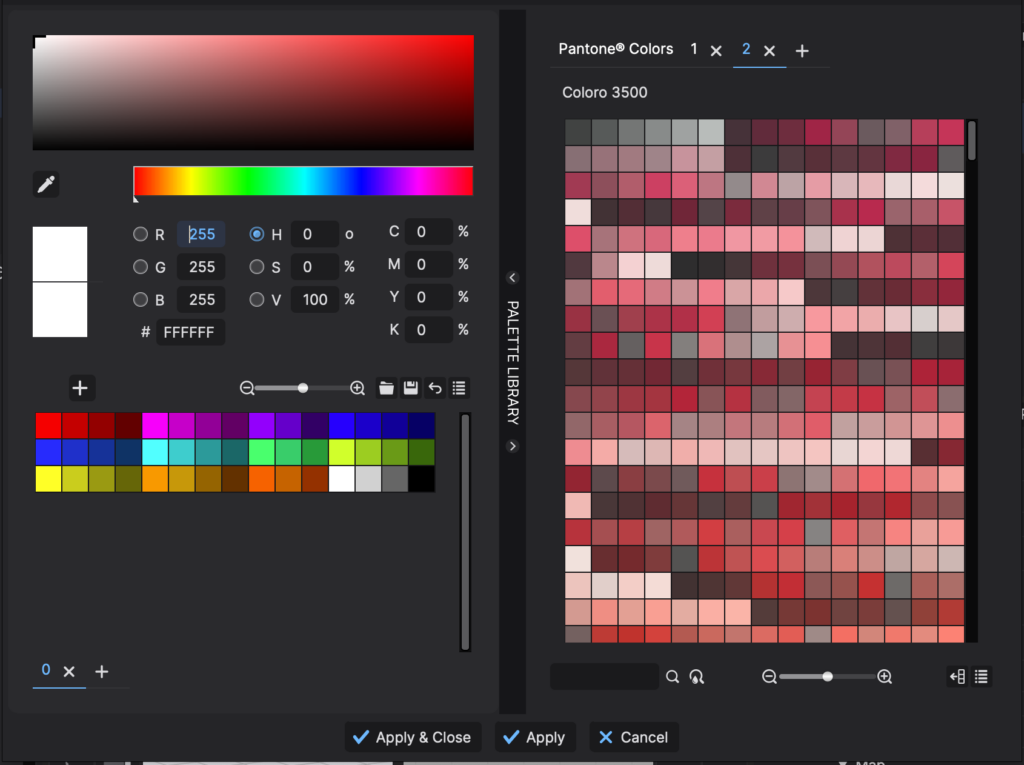
The flower visuals were created mainly in Blender, as the software was used to model the flowers, creating texture, animating the dancing light and rendering the PNG sequences. Each of the three flowers has been rendered in four different colors and from two different camera perspectives. We rendered the PNG sequences in a small resolution (one third of full HD) as suggested in one feedback session. Nevertheless the rendering of the 24 (short) videos took a lot of time as the computer rooms at FH are meanwhile unfortunately locked during the holidays and we used our private laptops. After rendering the sequences we went on to place the flowers into the triangles of the polygon flower bouquet. We used an SVG of the UV unwrapped polygon structure in Adobe After Effects and placed the flowers. To create additional movement and dynamic we added multiple light effects and movement effects onto the videos. At first we rendered the resulting videos in 4K which we discovered later was unnecessary and used full HD videos for the final installation.

The lowpoly bouquet was scribbled by hand and then built in Blender as a 3D model. Based on this model we built the polygon shaped flower bouquet out of bookbinding cardboard. For it to become the lowpoly sculpture in the end, we used the laser cutter to cut different pieces, mainly triangles. These pieces would then fit together in the end to form a big polygon. In the beginning we made latches in order to glue the pieces together. The latches were also a couple millimetres thick and made the shapes not fit together in the end due to their added height. Therefore we had to cut the latches off by hand, and laser cut additional small latch-like pieces with which it was possible to connect the shapes together on the inside. After constructing the sculpture the 3D model for the app was adjusted to the real life model, so the exact same shape is shown in the app.

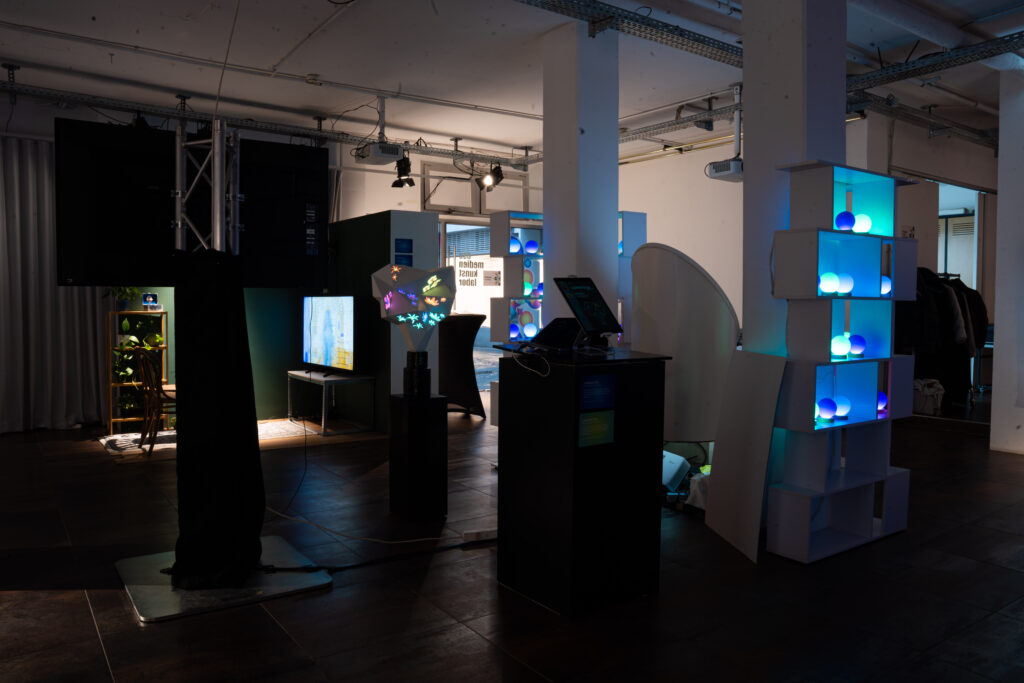
The physical setup was also an essential part of the experience. A dedicated stand for the tablet ensured that users could interact with the app comfortably, while at the same time it served for the beamer, allowing an optimal positioning of the projections. The polygonal flower bouquet was placed on the opposite and in the center of the room, creating a focal point for the projections and adding depth to the digital designs.

As with any complex project, there were some challenges that arose throughout the development process. One of them was the communication within the group. Since it was a large group and each team member (each major) was responsible for different aspects of the project (e.g., app development, building the polygon flower bouquet, 3D flower design, mapping), we experienced moments where the lack of clear role definitions led to confusion and delays for some people in the group.

From a technical perspective, we faced rendering challenges related to the size of the files used in Resolume. Due to the large number of animations and video files required for the projections, we encountered issues with file sizes that were too large for the software to process efficiently. However, by compressing and converting the files into formats compatible with Resolume, we were able to resolve the issue and maintain the quality of the visual experience. Additionally to avoid reaction errors while dragging the flowers into the different triangle shapes in the app, a good solution would have been to make the entire triangular area in the app responsive, rather than just a selected part.

Another technical problem that arose was the overheating of the MacBook used to run the app and projection system. The stand was not optimal designed for that, leading to insufficient airflow and causing it to overheat. While we managed to temporarily solve this issue during the installation, better planning regarding ventilation and device placement and/or choice is necessary for future setups to avoid overheating. In addition, we faced network connectivity problems when the app was running through the cloud. The Wi-Fi signal was weak, which caused delays in communication. This issue was resolved by using an external router, which significantly improved the connection and allowed the system to function smoothly.

Despite these challenges, the final result was a great success. The project provided an engaging and visually striking experience for participants, combining creativity with technology in a way that encouraged exploration and interaction. The projections were seamless, and the digital bouquets were vibrant and life-like, enhancing the immersive nature of the installation. While there were moments of frustration and technical difficulties, the outcome exceeded our expectations.

Looking back, we recognize that some of the challenges could have been addressed earlier in the process. However, the overall experience was immensely rewarding, both for the team and the visitors. The project allowed us to blend traditional floral design with cutting-edge technology, creating a unique and memorable interactive installation. The envisioned collaboration with Blumen B&B added another layer of relevance to the project, linking the digital and physical worlds of floral design.

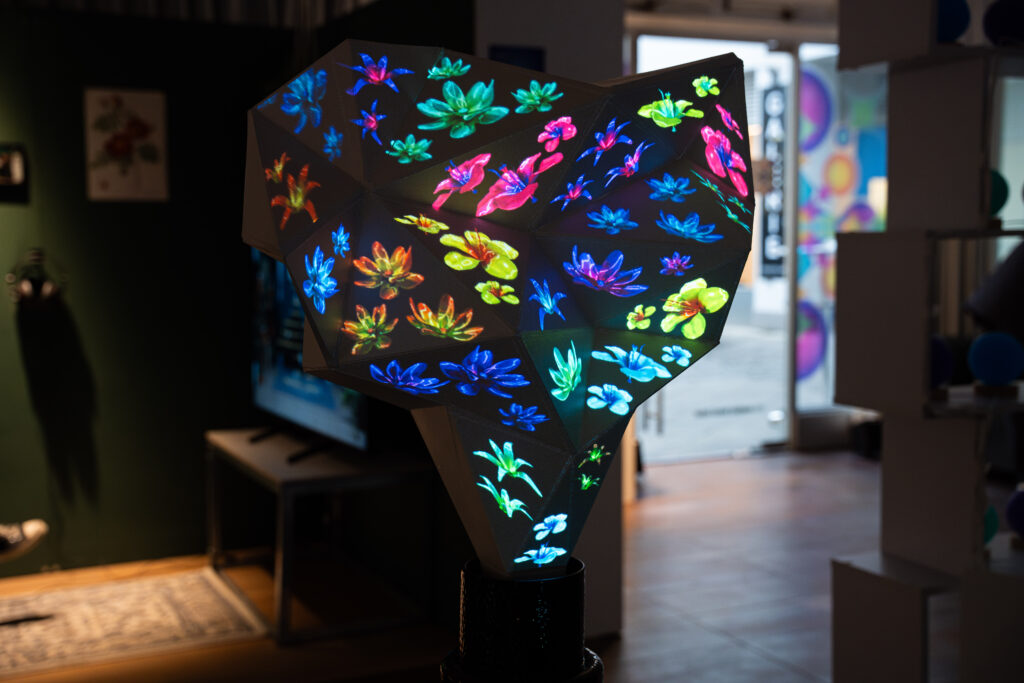
Pictures of the final installation:

IMPULS #05 Pina

Der Film „Pina“ von Wim Wenders präsentiert die Choreografien der TänzerInnen des Tanztheaters Wuppertal in einer filmischen Umsetzung, die stark mit räumlichen und filmischen Mitteln arbeitet. Die Tanzszenen entstehen sowohl auf der klassischen Theaterbühne als auch in urbanen und natürlichen Außenräumen, wodurch sich eine besondere Verbindung zwischen Tanz und Umwelt ergibt. Der Film beginnt mit der Inszenierung von „Le Sacre du Printemps“, einer Choreografie von Pina Bausch, die auf einer Bühne mit Torfboden getanzt wird. Die Kamera bleibt größtenteils statisch oder bewegt sich langsam, um die kollektive Dynamik der Gruppe zu erfassen. Durch das gedämpfte Licht und gezielte Spotlights auf die TänzerInnen wird eine rohe, archaische Atmosphäre geschaffen, die die physische Intensität der Choreografie unterstützt. Der Kontrast zwischen der dunklen Erde und den hellen Kostümen betont die Körperlichkeit der TänzerInnen und die starke Bodenverbundenheit des Stücks.

In der Sequenz von Café Müller wechselt die Kamera zu einer deutlich subjektiveren Perspektive. Hier werden viele Nahaufnahmen eingesetzt, die das Innenleben der TänzerInnen widerspiegeln. Die Choreografie spielt mit wiederholten, fast traumartigen Bewegungsmustern, die durch die Positionierung der Kamera verstärkt werden. Dabei folgt die Kamera den TänzerInnen oft in langsamen, fließenden Bewegungen durch den Raum, wodurch eine Intimität zwischen den Akteuren und dem Publikum erzeugt wird. Das Bühnenbild ist mit Stühlen und Tischen überladen, was eine klaustrophobische Stimmung schafft. Die TänzerInnen bewegen sich durch diesen engen Raum, stoßen an Möbelstücke oder lassen sich fallen, was die expressive, oft schmerzhafte Emotionalität des Stücks unterstreicht. Die Beleuchtung ist bewusst schummrig gehalten und unterstützt die melancholische, introspektive Stimmung.

Eine ganz andere filmische Herangehensweise zeigt sich in den Szenen von Kontakthof, die in einem neutralen, fast sachlichen Bühnenraum gefilmt sind. Die Kamera bleibt hier oft auf Distanz und fängt die TänzerInnen in einem breiteren Blickfeld ein. Dabei werden viele Gruppenbewegungen gezeigt, die in ihrer Strenge und Wiederholung fast mechanisch wirken. Im Gegensatz zu anderen Stücken, die stark mit emotionaler Expressivität arbeiten, konzentriert sich diese Szene auf formale Abläufe und zwischenmenschliche Interaktionen. Die Beleuchtung ist hier weitgehend gleichmäßig und sachlich, ohne dramatische Schatten oder Farbkontraste, sodass die Konzentration allein auf den Körperbewegungen liegt.

In der Sequenz zu Vollmond kommt eine sehr dynamische Kameraführung zum Einsatz, die die Energie des Tanzes direkt aufgreift. Die Szene spielt in einer künstlichen Naturlandschaft mit einem großen Felsen und einer Wasserfläche auf der Bühne. Die TänzerInnen interagieren physisch mit diesen Elementen, rennen durch das Wasser, springen über den Felsen oder lassen sich ins Wasser fallen. Die Kamera bewegt sich mit der Bewegung der TänzerInnen mit, oft in unruhigen, fast dokumentarisch wirkenden Handkameraeinstellungen, die das Spontane und Unvorhersehbare dieser Szene betonen. Besonders in den Momenten, in denen das Wasser aufgewirbelt wird, entstehen eindrucksvolle visuelle Effekte, die durch gezielte Lichtsetzung verstärkt werden. Im Gegensatz zu anderen Szenen, die eine eher theatrale Inszenierung haben, wirkt Vollmond fast wie ein Ausschnitt aus einer naturalistischen Performance im Freien, obwohl es sich um eine Bühneninszenierung handelt.

Neben diesen zentralen Sequenzen des Films gibt es eine Vielzahl weiterer Tanzszenen, die teilweise in urbanen Räumen, in Industrieanlagen oder in der freien Natur gefilmt wurden. Diese Szenen brechen mit der klassischen Bühnensituation und betonen die Alltagsnähe des Tanzes. In diesen Passagen setzt Wenders häufig ungewöhnliche Kameraperspektiven ein, darunter Luftaufnahmen, Kamerafahrten entlang von Gebäuden oder intime Nahaufnahmen der TänzerInnen in Bewegung. Dabei gelingt es dem Film, den Ausdruck und die Philosophie von Pina Bauschs Tanztheater nicht nur dokumentarisch festzuhalten, sondern in eine eigenständige filmische Sprache zu überführen, die den Tanz über die reine Bühnendarstellung hinaus erweitert.

Ein besonders auffälliges Stilmittel in Pina ist der Einsatz von 3D-Technologie, die Wenders bewusst nutzt, um die räumliche Tiefe der Choreografien erfahrbar zu machen. Durch die dreidimensionale Darstellung wirken die TänzerInnen nicht nur als zweidimensionale Silhouetten auf einer flachen Bühne, sondern erhalten eine Körperlichkeit, die den Zuschauer fast physisch in die Performance hineinzieht. Dies verstärkt das immersive Erleben der Tanzszenen und hebt den Film von herkömmlichen Tanzdokumentationen ab.

Zusammenfassend lässt sich sagen, dass Pina ein Film ist, der Tanz nicht nur dokumentiert, sondern in eine spezifische filmische Form übersetzt. Die verschiedenen Tanzszenen nutzen unterschiedliche filmische Mittel – von statischen Totalen bis zu dynamischen Handkameraaufnahmen, von melancholischer Dunkelheit bis zu leuchtenden Bühnenbildern –, um die Vielfalt und Ausdruckskraft des Tanztheaters Wuppertal einzufangen. Dabei gelingt es Wenders, den Geist von Pina Bauschs Choreografien nicht nur festzuhalten, sondern durch die filmische Inszenierung weiterzuentwickeln und für ein breites Publikum zugänglich zu machen.

20 | Designing A Digital Fashion Garment – The Final Project

For my final project, I decided to draft a pattern for pants in CLO3D. I am following a tutorial for the basic shape and will modify the garment according to my design preferences.

Preparing the Avatar

To begin the process, I decided to modify one of the default avatars from the CLO library to my own measurements. This was relatively easy and it’s a quick method to get a fairly accurate representation of your body in the digital space. However, the problem with this method is that body proportions vary greatly from person to person and the distribution of certain measurements creates a very different base shape of the body. Even though CLO allows you to input a lot of specific measurements, such as knee, leg and calf circumference, it does still calculate the spaces between the input custom measurements automatically, resulting in certain idiosyncratic body shapes to be lost in the process. For example, the difference between my high and low hip measurement is quite substantial and creates a dip at the hip area but there is no way (that I could find) to represent the shape between those two measurements inside the avatar editor. So to get a very accurate representation of your own body, you would have to make a custom model from scratch and load it into the program. For this project, I decided to go with the approximately correct model achieved by modifying the default avatar.

Drafting the Pattern

After the Avatar was prepared, I started developing the pants pattern according to this tutorial. 

First, I had to calculate some measurements as listed below.

Pants measurements

Avatar:
Hip: 97 cm  (31.2in)
Half hip: 48,5 cm (19in)
Waist: 65 cm (25.6in)
Outseam: 95cm (37.4in)
Inseam: 75cm (29.5in)
Knees: 18in
Ankles: 13.75in

Measurement Percentages (of half hip in inches):
21% 3.99in
55% 10.45in
47% 8.93in
10% 1.9in
20% 3.8in

Math:
Front Waist: 25.6 / 4 + .375 = 6.775
Back Waist: 25.6 / 4 – .375 = 6.025
Front Knee: 18 / 2 +.75 = 9.75
Front Ankle: 13.75 / 2 – .375 = 6.5
Back Ankle: 13.75 / 2 + .375 = 7.25 

The pattern drafting process was very similar to the analog process on paper and gave me lots of flashbacks to pattern drafting class. Especially when following an instruction with different measurements, there can be some confusing moments in the process and my lack of practice over the last years definitely showed while I was developing the pattern. 

Following the tutorial was a very helpful way of getting familiar with all the tools in the 2D Pattern drafting window. Some of them I found to be less intuitive than I originally thought while going though them in the overview tutorial series. For example, the curving tools don’t respond in the way that I would expect and the way I know these types of tools from other programs, so they were challenging to use in the drafting process. 

At the end, I did manage to construct the pattern and I could move on to arranging the pieces on the avatar and sew and simulate the garment.

Fit Issues, Modifications and Fabric Choices 

I tried to correct this issue by re-measuring the inseam of my avatar, going back to the pattern in the 2D window and comparing the measurement to the inseam on the pattern. By gradually editing the curvature and approximating it to the inseam measurements, I managed to somewhat resolve the issue, although the result was still not perfect. 

After sewing, I noticed some significant bunching  issues around the crotch area, a typical issue in pant patterns.

After I was mostly happy with the base pattern, I started modifying it by changing the leg shape, adding a waistband and a zipper. I also experimented with the fabric options from the CLO library and settled on a black woven cotton fabric for the final pant model. 

Sewing Issues and Draping

After I made my modifications, I simulated the sewing again and ran into some issues, especially resulting from new pattern pieces on the waistband and zipper fly that where supposed to be sewn over top of each other. As you can see in the screen capture below, the program was confused as to how to arrange the overlapping seam lines and unfortunately, I was not yet able to find a solution for this issue. Another problem I had was with the developing of the waistband, which was not included in the pattern pieces from my original pattern so I had to develop it myself and as mentioned before, my lack of practice showed once again. The waistband could be improved, especially in the curvature on the side seams.

After the sewing, I draped the garment on the avatar, which was fun but also confusing sometimes, because the mesh of the avatar sometimes interacts strangely with the mesh of the garment model.

When I was happy with the draping, I took the garment model into the final processing step in CLO.

Animation, Render and Import into Blender

As a final step in CLO I took the model into the animation workspace. This workspace is quite easy to use and intuitive for anyone who has used a similar 3D program before.

I chose a preset walk cycle from the CLO library, which worked very well and smooth. For the final render, I went with the invisible avatar render. I exported the model, including the walk cycle animation as an alembic (.abc) file. I then loaded the model into Blender, where I had some issues with the fabric of the model not translating well from CLO. Because I wasn’t able to find the cause of the issue, I decided to use a similar cotton fabric material from Blenderkit for the pants model. Finally, I created a little scene, animated some camera movement and rendered the model with Cycles.

Final Product

Final Thoughts

I really enjoyed the process of getting familiar with CLO3D. During the initial phase of learning the basic functions of the program, I had the impression that it would be quite easy to work out the final project. However, while working on my final piece, I realized which functions of the program are still not as clear to me as I thought and which features I need more practice with. Additionally, I learned that there are other methods of developing pattern in CLO, as I have seen some tutorials where users cut out and drape on the 3D model in a more free-form approach. This is something I would like to try out in future projects, because I realized while developing the pattern in the „traditional“ way, that my knowledge on pattern development is quite rusty and I need to either brush up on it or find other methods for reaching a good end product. Another aspect I would like to work more on in the future is the fabric export and modification options because I had some issues with this in my final project.

Overall, I will definitely keep learning more about CLO and hopefully get better and figure out solutions to probelms I was not able to fix this time around.

18 | Designing A Digital Fashion Garment – Preset Fabrics, Materials, Presentation and Customization in CLO3D

I decided to skip some sections of the tutorial series in my blogposts as they are only relevant for internal processes in CLO and would not be relevant to discuss outside of the application context they are used in. Instead, I decided to move to the final part of the tutorial series and explain about fabrics, materials, presentation and customization options in CLO. 

CLO comes with a very extensive catalogue of preset fabrics you can use through your subscription. It also allows you to load fabrics purchased from online libraries. Further, you can customize the default or loaded fabrics in the fabric property editor. 

Using and applying the fabrics is very easy and intuitive. You simply have to select a fabric from the library and drag and drop it into the object browser, from where you can apply it to the entire garment or just individual parts of the garment. This can be done in multiple ways, all of which are very intuitive. 

Customization can be applied to default fabrics and offers the standard modification settings that are used in most 3D softwares in which you can model fabrics. The color editor, in which you can customise your fabrics exact color lets you choose either a self determined color value or it lets you pick from exact Pantone color catalogue. This can be useful for translating the garment from digital to analog as Pantone colours are frequently used as references in fabric production and dying processes. 

Apart from colours, CLO also allows you to import and apply your own pattern designs and customise various things about it like scale and position. There is also an option for applying graphics to garments, which comes with lots of customisable settings, from normal maps to roughness maps and other modification possibilities. Trims and hardware can also be selected from the CLO preset library or imported as OBJs if they were modelled in a different software.  

17 | Designing A Digital Fashion Garment – Cloth Simulation in CLO3D

In the tutorial series of the CLO3D software on YouTube, there is a dedicated tutorial all about the basics of the cloth simulation function and the particle distance setting in CLO. Having used other 3D software before, I am familiar with the terminology of these settings, but until now, I have not yet fully understood how they work and what exactly they mean for cloth simulation. 

The CLO3D tutorial is limited to the basic simulation settings offered inside CLO and only briefly explained what particle distance does in the garment settings. But even this small explanation is already very helpful in understanding the purpose of the setting. 

One aspect of CLO that is interesting to mention in contrast to other 3D programs is that the standard mesh construction uses triangular shapes rather than square or rectangular mesh. This is because the triangular shapes are better suited to creating fabric that is meant to drape over the body. CLO offers the function of changing this setting but it is advised to keep it at the triangular setting for optimal performance. 

Another point that is addressed in the tutorial is the issue of collision. Since 3D objects are constructed of mesh, they can entangle and pass through each other, which is important to know when draping garments in CLO. 

Finally, CLO offers several simulation settings that each have their different pros and cons for different use cases. The settings can affect the accuracy of the garment draping as it is being simulated.  

16 | Designing A Digital Fashion Garment – Critical Pattern Components and Modification Options

In the last blogpost, we learned how to develop patterns from scratch in CLO3D. In this post, we will explore some critical pattern components and the most common way of pattern modification – the dart. 

Previously, we established that there are two basic ways of developing a pattern for a garment in CLO, that is, working with geometric base shapes or using the free drawing polygon tool. As mentioned in the last post, it takes some experience to know what the base shape of a pattern piece should even look like, which is why I remarked that at this point of the learning process of CLO, we have arrived at the point where I would expect people without prior pattern drafting experience would start struggling. To demonstrate the challenges that might come up at this point, I will use the example of a seemingly simple garment to develop – a basic sleeveless top.

Even with an apparently simple base shape, there are critical pattern parts which require some knowledge of pattern drafting to get right. Notoriously, the armhole is one such critical point. The anatomy of the human body makes it difficult to navigate this area since there are a lot of curves and a lot of movement is expected, so patterns must accommodate for adequate mobility in this area of the garment.

In classic pattern drafting, there are usually mathematical formulas that tell you where to place lines and curves using the measurements of your model’s body. When drawing the shape of the pattern freehand with the polygon tool in CLO, you are bound to run into issues as the freehand drawing is simply not precise enough and will lead to messy armhole shapes if you don’t have a lot of experience and a good feeling for developing the shape in the 2D window.  

The most common way of modifying patterns to accommodate curves in the body is the so-called dart. A dart is a small added seam in the garment that takes in parts of the fabric and allows the garment to better fit the shape of the body. CLO also has a dart drawing feature, which is simple enough to use but will be another case of functions that might be too confusing for users without previous pattern drafting experience. 

Dart placement and shaping is another of those notoriously difficult things to learn in pattern drafting. The functions in CLO will certainly offer a lot of help to users experienced in pattern drafting, but might have their limits as well, since darts are sometimes a matter of shaping the mockup garment directly on the body. They not only depend on the individual body shape of the client for whom the garment is made but can also be influenced by the undergarments that are expected to be worn underneath the garment. To put it simply, dart placement and shaping is a whole science in itself and could fill many many blogposts on its own.   

15 | Designing A Digital Fashion Garment – Pattern Drawing from Scratch 

After the last Blogpost, where we saw how already existing patterns are placed on the Avatar, this time, we will start drawing patterns from scratch in CLO3D.  

In CLO, if you want to draw a pattern from scratch, you have several drawing tools that are similar to the tools found in programs like Adobe Illustrator, Photoshop or InDesign. The program offers the option of drawing predefined shapes like rectangles or ellipses, or you can draw free shapes. 

The rectangle tool is the most useful for pattern drafting, as most shapes in standard clothing patterns are developed from rectangular base shapes with curves added to accommodate the shapes of the body. But  the free drawing polygon tool is also useful because it with a little practice, you can directly develop the base shape of the pattern piece without making the detour of modifying a rectangle shape. The polygon tool also comes with the function of drawing bezier curves while left-clicking and dragging when drawing the shape. This is useful for users who have previous experience with digital drawing programs but might take some getting used to for users who are not familiar with this mode of drawing yet. 

As with all the program’s tools, CLO also offers a wide variety of functions for drawing specific measurements to fit a premeasured shape. In the previous blogpost about pattern development, I talked about how I believe the 2D + 3D layout of CLO would make it easier to understand patterns for users without previous knowledge of sewing and pattern drafting. In this case, I think it might be the opposite case. I believe users without prior pattern drafting knowledge will find the process of developing patterns from shapes or even drawing them free hand very daunting and confusing. Even though CLO has many useful features to make the process easy, I can see how these functions might overwhelm people who are new to the process of pattern drafting. 

In the next Blogpost, we will take a look at critical pattern components and pattern modification options.  

Episode #6 from the series: New things I learned this semester – 360 GoPro HDR

Creating HDR images using a GoPro Max 360 camera can significantly elevate the lighting quality in Blender projects, enhancing realism and immersion. The GoPro Max, known for its ability to capture panoramic views, allows you to create HDR images by taking multiple bracketed photos at different exposure levels.

To start, set up your GoPro Max on a stable tripod in the desired location. Unlike some cameras, the GoPro Max doesn’t have a built-in HDR bracketing mode, so you’ll need to manually adjust exposure settings. Take a series of photos varying from underexposed to overexposed, ensuring you capture the full range of light in your scene.

Once you’ve captured your bracketed photos, transfer them to your computer for processing. Use HDR software such as Adobe Photoshop, Photomatix, or Luminance HDR to merge these photos into a single HDR image. This process involves aligning the photos to compensate for any slight movement during the capture, then merging them to retain details across both the darkest shadows and brightest highlights.

After merging, adjust the tone mapping settings in your HDR software to fine-tune the appearance of the HDR image. This step ensures that your HDR image looks natural and realistic, maintaining a balance between light and dark areas.

Save the final HDR image in a format compatible with Blender, such as .hdr or .exr, to preserve its high dynamic range properties. In Blender, use the HDR image as an environment texture in the World settings. This allows the HDR to influence the lighting and reflections in your 3D scenes, enhancing their visual fidelity and realism.

By utilizing HDR images captured with a GoPro Max 360 camera, you can achieve sophisticated lighting effects in Blender, making your renders more dynamic and true-to-life.

14 | Designing A Digital Fashion Garment – Understanding Pattern Pieces, Pattern Layouts and Pattern to Garment Relationships

In the previous blogpost, we discussed the preset avatar options and settings and the avatar editor in CLO3D and their implications for 3D body representation in digital fashion design. In this post, we will turn to the two-dimensional side of fashion design – the pattern. We will take a look at how the pattern is laid out in CLO3D, how the pattern representation relates to the garment pieces and how CLO helps to understand the relationship between 2D and 3D representation.  

In dressmaking education, learning how to construct patterns and how to translate design sketches into a pattern and how that pattern and its pieces relate to the finished garment are some of the most challenging skills to learn. It takes a while to understand the relationships and logic between the two-dimensional pattern and how the curves and darts translate to the fit of the garment on the body. 

Interestingly, the practice of drafting two-dimensional patterns comes from the tradition of male tailoring. In women’s dressmaking (also referred to historically as mantua making), tradeswomen would drape a mockup fabric or muslin directly on the clients body to form shapes of the garment rather than constructing a paper pattern first.1 The practice of draping is still in use today. Some fashion designers work exclusively with draping in the design stage, especially for custom pieces, whereas for mass production, the pattern would be translated into a two-dimensional paper pattern. 

After this short excursion into the history of pattern making practices, let’s take a look at the CLO3D interface and how it deals with the sewing pattern.

CLO by default has a workspace layout with two display windows next to each other – one for the avatar and the 3D representation of the garment, one for the 2D sewing pattern. 

In the 3D window, the pattern pieces can be arranged around the three-dimensional body of the avatar, making it easier to understand how the curves of the pattern correspond to the shapes of the body.  Arrangement points can be displayed on the 3D avatar, making the placement of individual pattern pieces easier. 

In the 2D window, the garment pieces are laid out flat and symmetrically arranged. When selected, pattern pieces in the 2D window are highlighted, as well as the corresponding garment piece in the 3D window. This is another immensely helpful feature that helps you understand how the two relate to each other. It is especially useful for more intricate and complicated pattern arrangements and elaborate pattern constructions that are not obviously easy to understand. 

Speaking from my own experience, the CLO arrangement makes it way easier to understand pattern drafting. However, it might be that because I already have the background knowledge of how pattern pieces work, I find it easier to understand the setup of the program than someone with no prior knowledge. But I think this way of learning pattern drafting, or at least using CLO or a similar digital fashion program along with traditional teaching methods to teach pattern drafting could be immensely helpful for people learning the skill.

1Abby Cox, „Alexander McQueen & The Patriarchy Problem in Modern Fashion“ October 20, 2023, online video, 9:58, https://youtube.com/watch?v=OVwhg8LZnlc. 

13 | Designing A Digital Fashion Garment – Avatars, Body Representations and the Avatar Editor in CLO3D

In todays blogpost, I will discuss the preset avatar options and settings and the avatar editor in CLO3D. 

Preset Avatar options in CLO3D

The program comes with a set of preset avatars – male, female, adults and children. These preset avatars can be edited in different ways. CLO has presets for several aspects of the avatars, like hair, poses and several market standard sizing for US and European sizing models. This already offers a wide range of possibilities to design for a variety of body types.

In case you want to design for a particular body shape that is not covered by the preset options in CLO, the program also offers a very extensive avatar editor. In this editor, you can modify every relevant body measurement and create an avatar that responds precisely to your individual body. 

One aspect that is not covered in this editor are body configurations that are outside the able bodied norm (for example amputated limbs, curved spines due to scoliosis). However, CLO also allows you to import a custom avatar as well, which would allow users to cover these needs as well.

These functions cover an impressive range of needs. In fashion design, it is often challenging to design for a variety of body shapes, and being able to cover so many different shapes in a digital program can be an immense step towards more inclusive fashion design practices. 

In my personal experience, patterning and shaping garments for your own body can be a big challenge, as you can not drape on yourself well. Especially when it comes to marking alterations on the body in the muslin mockup patterning stage, you need another person to assist you when you are making clothes for yourself. There are options of making dress forms with your own measurements, but they tend to be very expensive and additionally, your body changes sometimes, so a dress form made five years ago might not correspond to your current body anymore. 

Digital avatars could be a great solution to this issue, as you can model them after your current body shape quite easily and make adjustments quickly if your body changes. 

The Avatar Editor in CLO3D