To be able to user test my concept, I want to create a prototype with a certain technical functionality. Based on ease of use and personal prior knowledge, I decided to use Arduino to test the desired functions.
Required equipment
- Arduino Uno
- Battery pack
- Breadboard
- Buttons
- LED lights
- NeoPixel ring
- Electret microphone
- Piezo speaker
- Wires
- Resistors
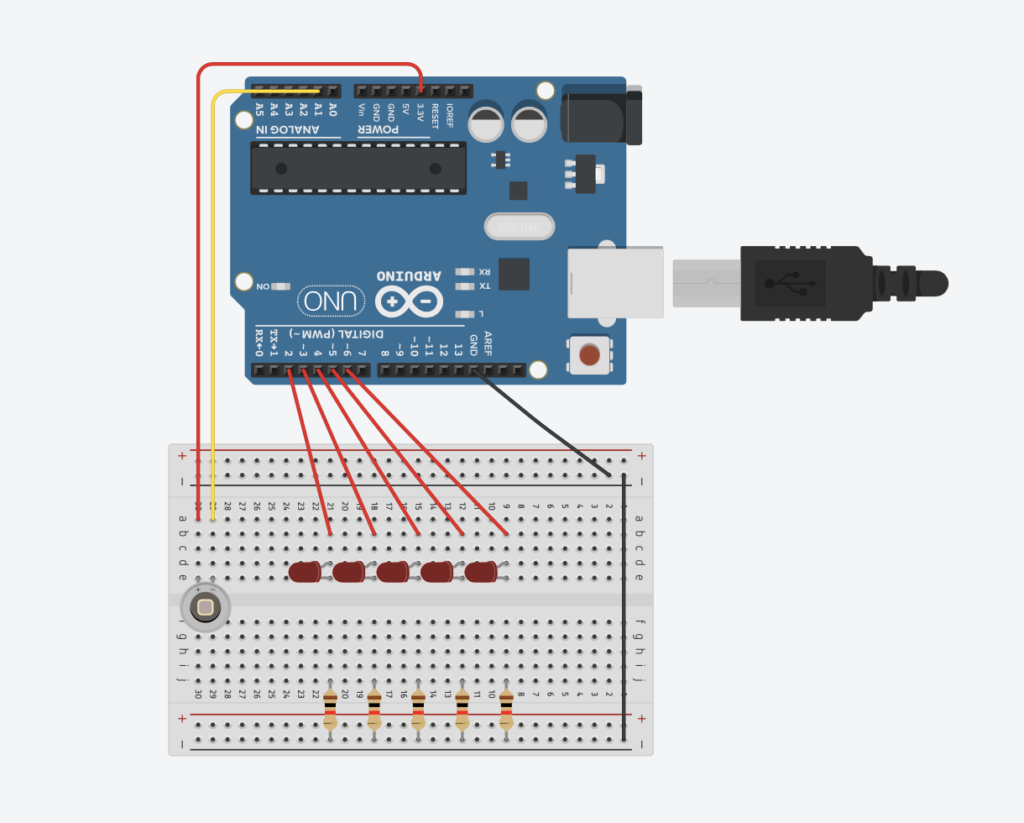
To begin the prototyping, I watched this tutorial on YouTube: https://www.youtube.com/watch?v=bMs5J4bJOD0. It shows how to connect a microphone to LED lights for instant feedback in an Arduino setup. I thought this was a good way of starting the building of my prototype, because it contains some of the major functionalities of my concept.
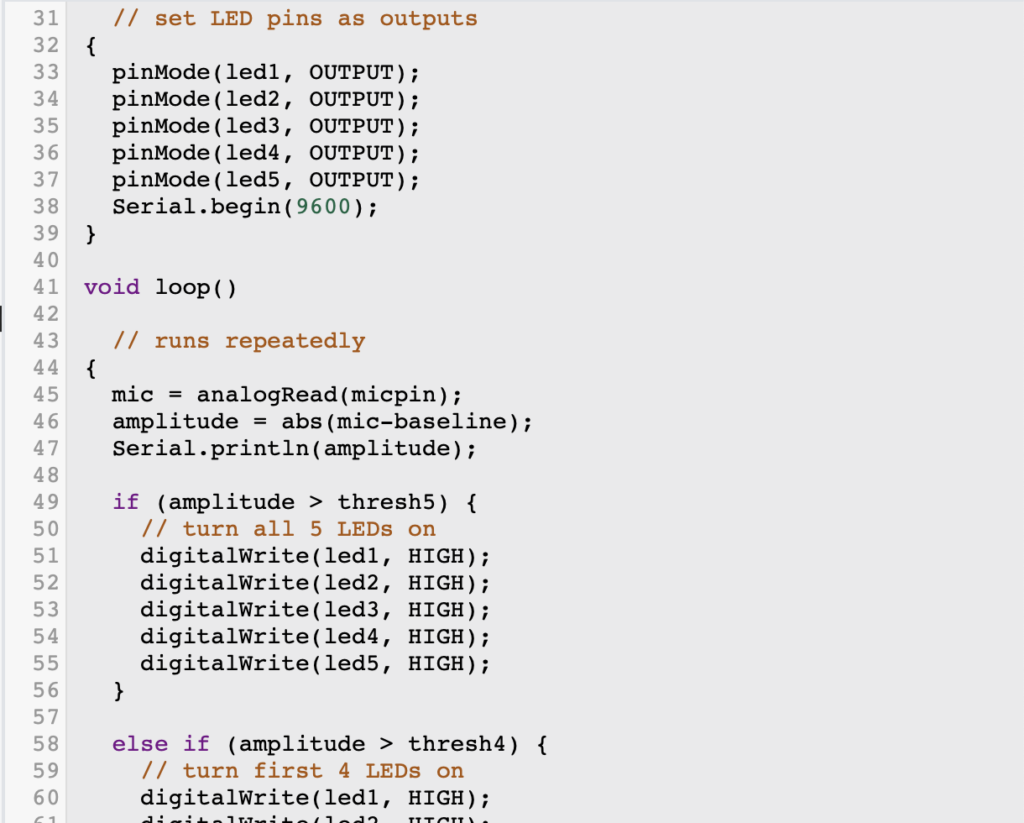
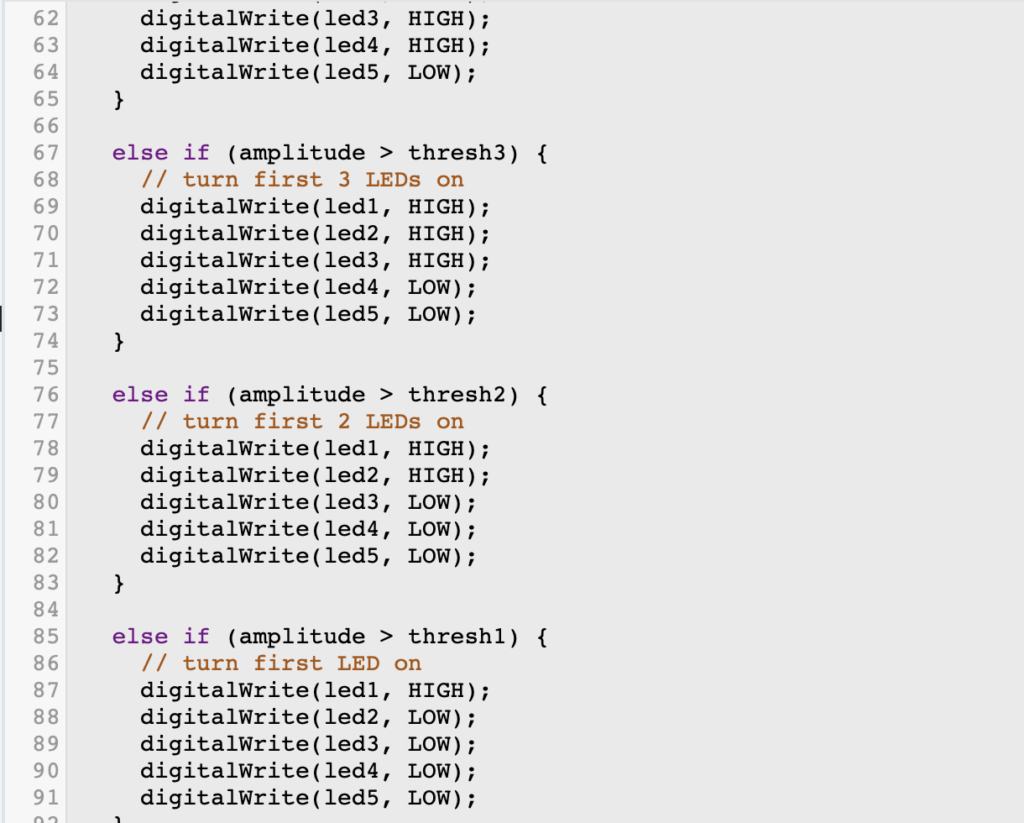
I used the online web-based tool on tinkercad.com to build my Arduino setup and write the code. This is how it looks like so far:


In the next step, I will research how to add a speaker. This tutorial shows a setup with both a microphone and speaker: https://www.youtube.com/watch?v=nIDhkvomrcg. It will hopefully help me on the way. If I can access the required equipment, I will also attempt to build it in a physical format.
Further, I need to figure out how to generate random melodies and play them on the Arduino speaker. This website shows examples on how the melodies could sound: https://random-music-generators.onrender.com/melody. I ideally want the tempo parameter to be around 70, and the number of notes to be 4.
For visual purposes, I also want to build a non-technical prototype to demonstrate the indented design in the end. The two prototypes will complement each other, and optimally be merged together in the final prototype video.