Over the past few weeks, I have been developing a technical prototype. I explored various options considering the available equipment and project timeline. After many iterations and debugging, I created a functional prototype ready for user testing.
The prototype is a simplification of my concept. It can be used to illustrate the main functionalities, but does not work exactly how I vision my finished product. I chose to follow the advice of making a low effort prototype with high indented impact on learning outcome.
Main components:
- Random melodies generated out of four tones (C, D, E, F)
- Four buttons for user input (C, D, E, F)
- Green LED light for positive feedback
- Red LED light for negative feedback
- Piezo buzzer playing melodies, user input and feedback sounds
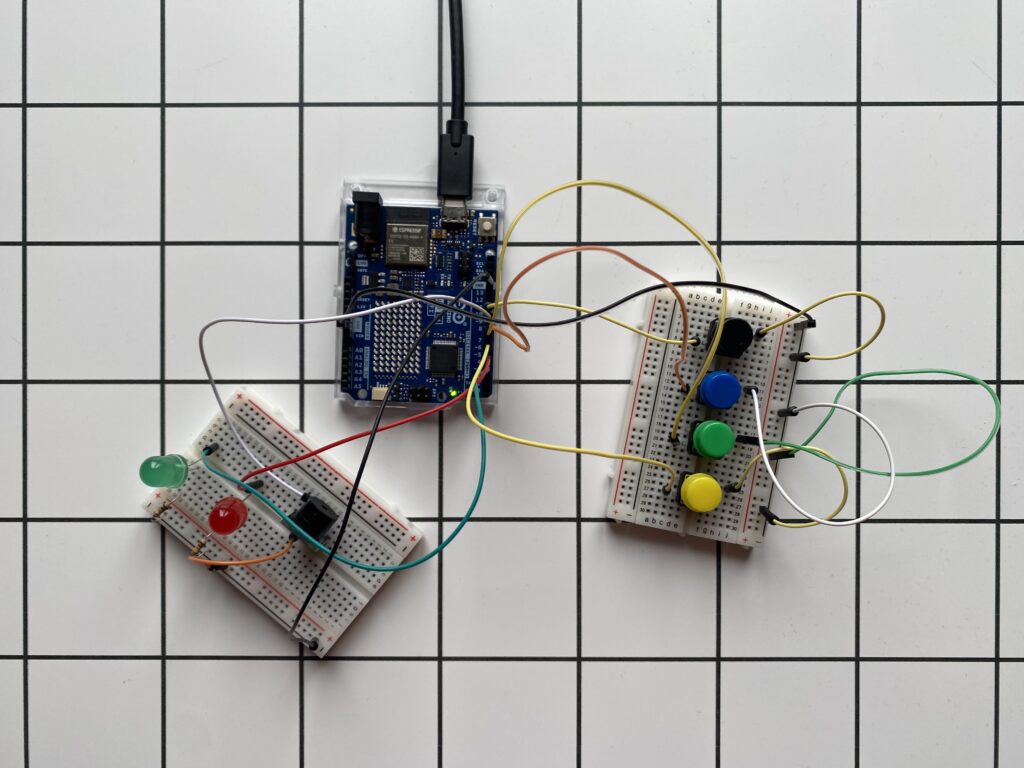
How does it work?
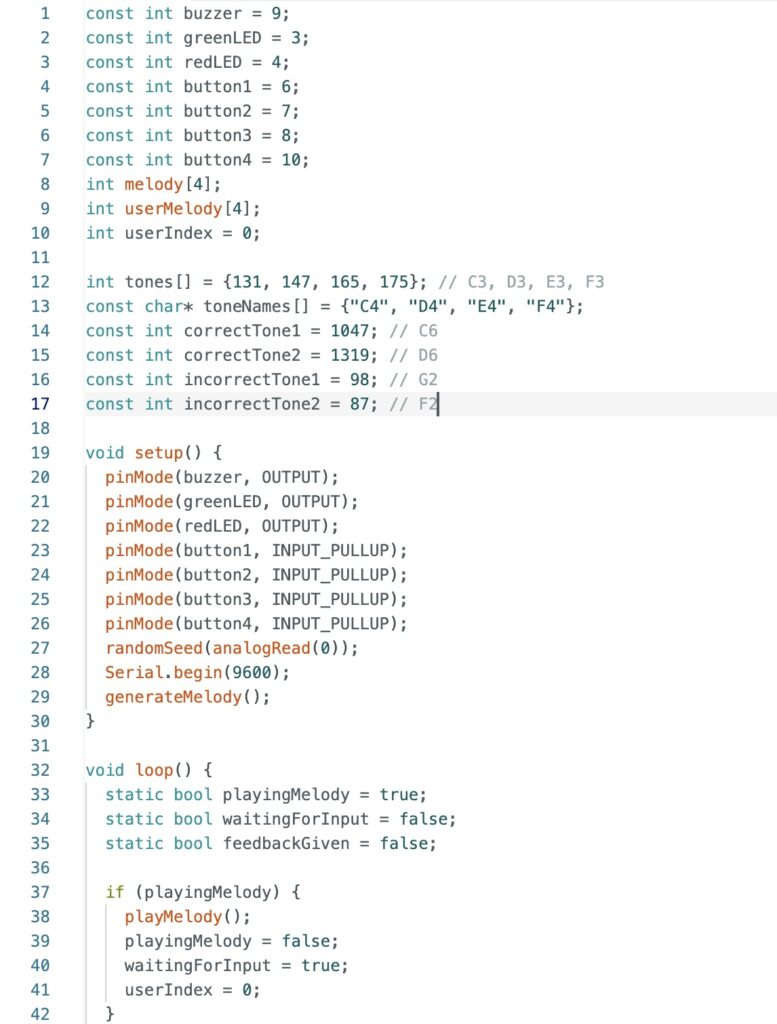
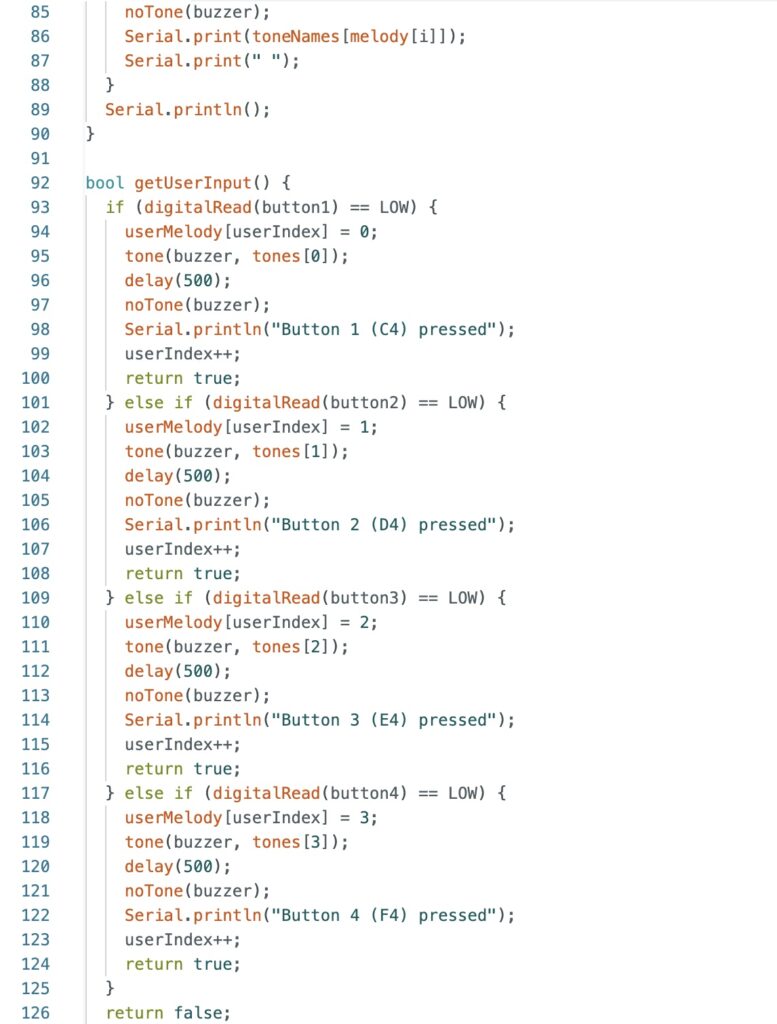
Instead of using a microphone for user input, I decided to work with buttons. A piezo buzzer (speaker) plays a random melody composed of four tones, and the user can use buttons to replicate the melody. In my programmed prototype, I used the tones C3, D3, E3, and F3. Each melody consists of four tones, which is always a random combination of the above. The buttons represent one tone each:
Yellow button: C3
Green button: D3
Blue button: E3
Black button: F3
Operation flow
- Melody playback: The speaker plays a random melody consisting of four tones.
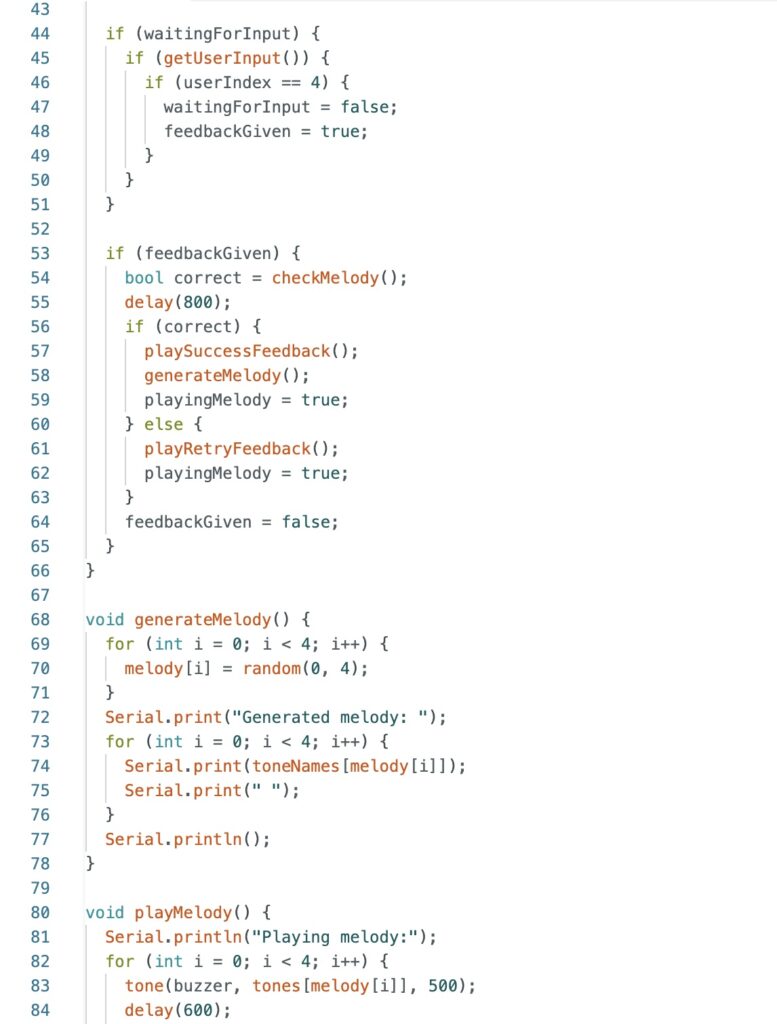
- User interaction: After the melody finishes, the user can replicate it by pressing the corresponding buttons.
- Feedback mechanism:
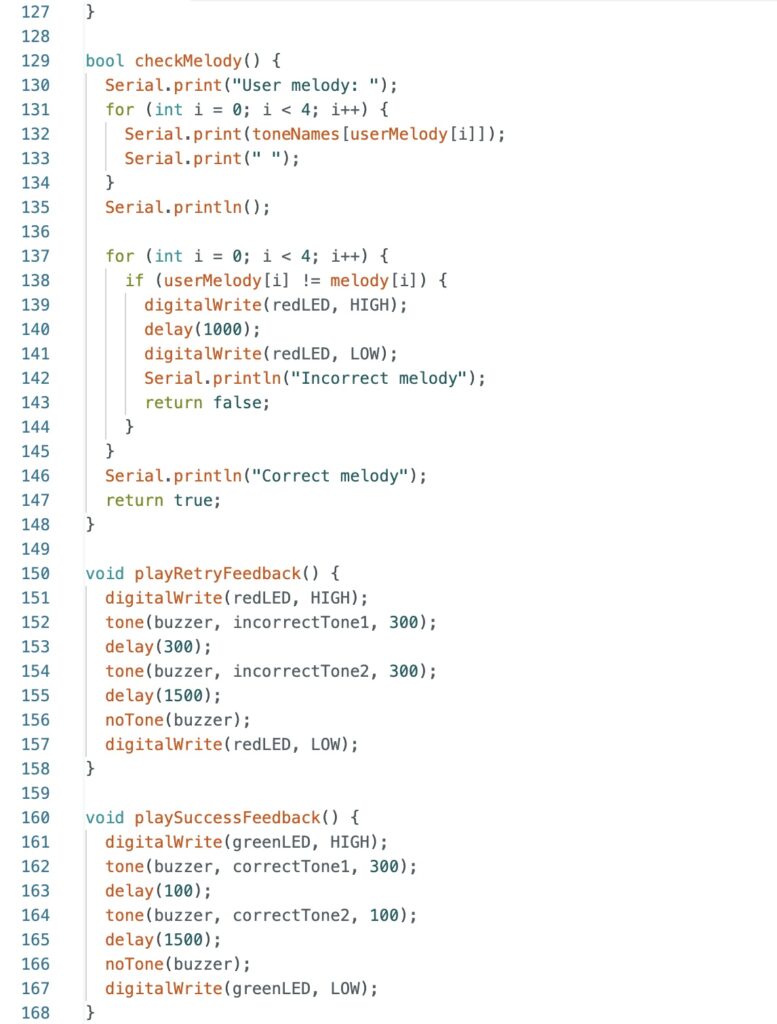
Correct replication: A short positive sound is played, and the green LED lights up, signaling success. A new random melody then follows.
Incorrect replication: A negative sound is played, and the red LED lights up. The same melody is repeated until the user successfully replicates it.
Code written in Arduino IDE:
