16 | Designing A Digital Fashion Garment – Critical Pattern Components and Modification Options

In the last blogpost, we learned how to develop patterns from scratch in CLO3D. In this post, we will explore some critical pattern components and the most common way of pattern modification – the dart. 

Previously, we established that there are two basic ways of developing a pattern for a garment in CLO, that is, working with geometric base shapes or using the free drawing polygon tool. As mentioned in the last post, it takes some experience to know what the base shape of a pattern piece should even look like, which is why I remarked that at this point of the learning process of CLO, we have arrived at the point where I would expect people without prior pattern drafting experience would start struggling. To demonstrate the challenges that might come up at this point, I will use the example of a seemingly simple garment to develop – a basic sleeveless top.

Even with an apparently simple base shape, there are critical pattern parts which require some knowledge of pattern drafting to get right. Notoriously, the armhole is one such critical point. The anatomy of the human body makes it difficult to navigate this area since there are a lot of curves and a lot of movement is expected, so patterns must accommodate for adequate mobility in this area of the garment.

In classic pattern drafting, there are usually mathematical formulas that tell you where to place lines and curves using the measurements of your model’s body. When drawing the shape of the pattern freehand with the polygon tool in CLO, you are bound to run into issues as the freehand drawing is simply not precise enough and will lead to messy armhole shapes if you don’t have a lot of experience and a good feeling for developing the shape in the 2D window.  

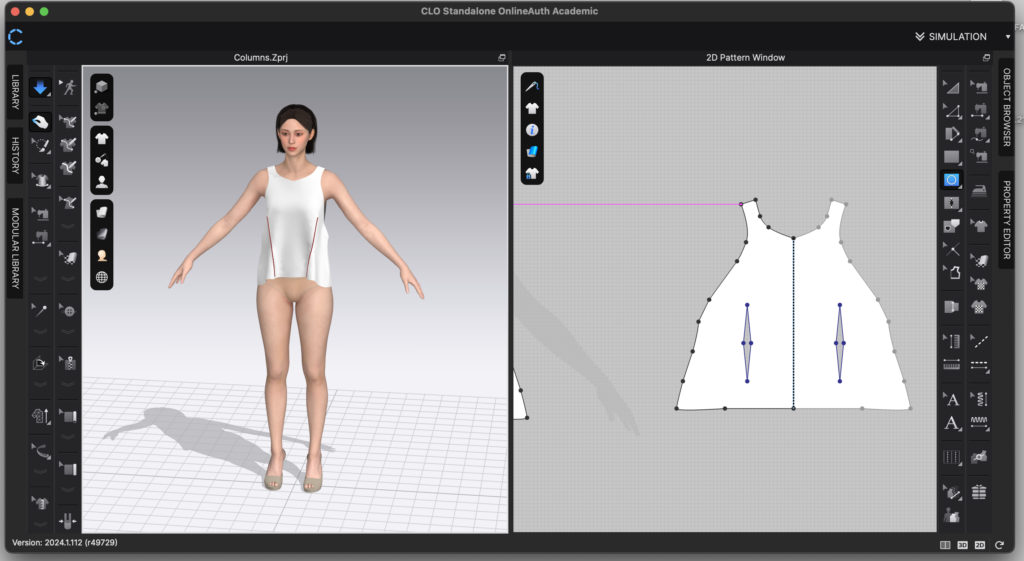
The most common way of modifying patterns to accommodate curves in the body is the so-called dart. A dart is a small added seam in the garment that takes in parts of the fabric and allows the garment to better fit the shape of the body. CLO also has a dart drawing feature, which is simple enough to use but will be another case of functions that might be too confusing for users without previous pattern drafting experience. 

Dart placement and shaping is another of those notoriously difficult things to learn in pattern drafting. The functions in CLO will certainly offer a lot of help to users experienced in pattern drafting, but might have their limits as well, since darts are sometimes a matter of shaping the mockup garment directly on the body. They not only depend on the individual body shape of the client for whom the garment is made but can also be influenced by the undergarments that are expected to be worn underneath the garment. To put it simply, dart placement and shaping is a whole science in itself and could fill many many blogposts on its own.   
15 | Designing A Digital Fashion Garment – Pattern Drawing from Scratch 

After the last Blogpost, where we saw how already existing patterns are placed on the Avatar, this time, we will start drawing patterns from scratch in CLO3D.  

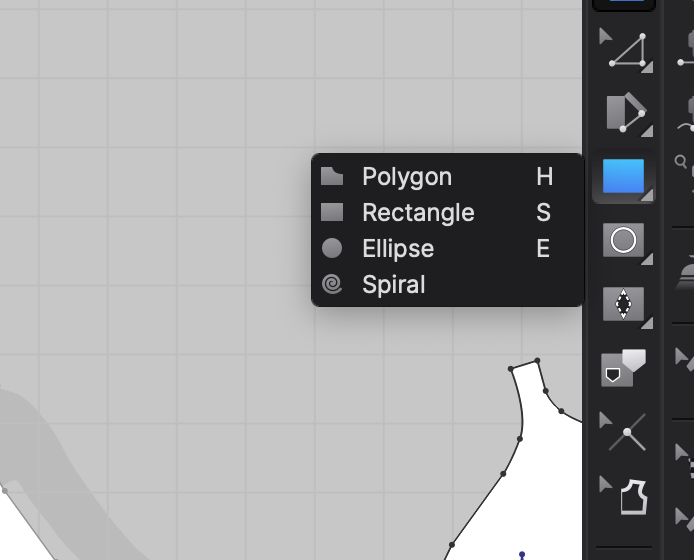
In CLO, if you want to draw a pattern from scratch, you have several drawing tools that are similar to the tools found in programs like Adobe Illustrator, Photoshop or InDesign. The program offers the option of drawing predefined shapes like rectangles or ellipses, or you can draw free shapes. 

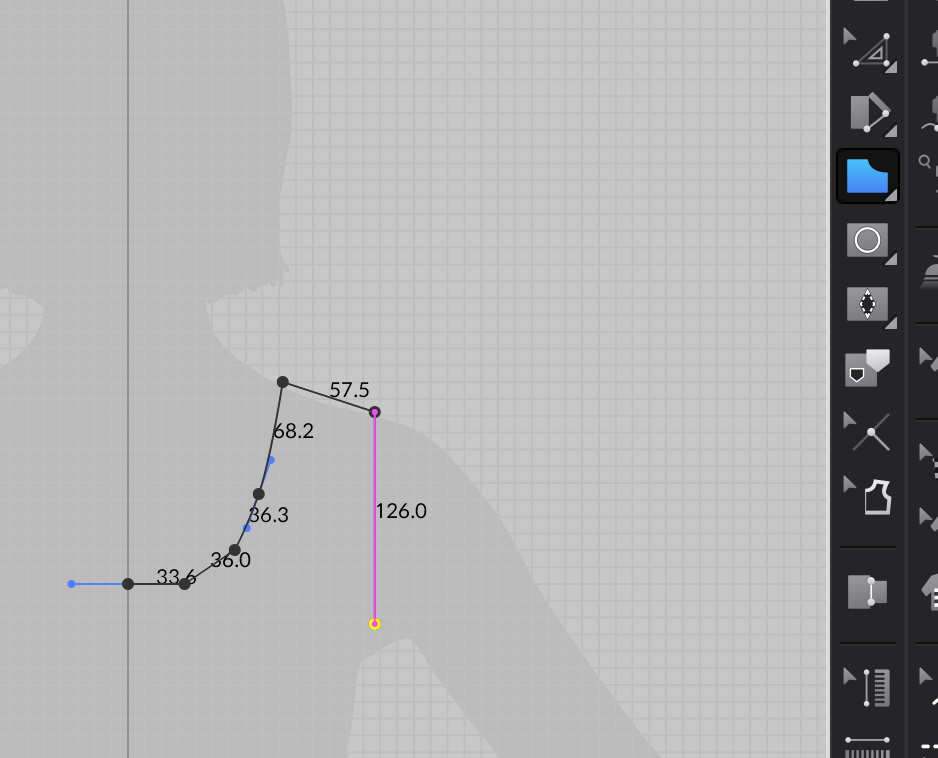
The rectangle tool is the most useful for pattern drafting, as most shapes in standard clothing patterns are developed from rectangular base shapes with curves added to accommodate the shapes of the body. But  the free drawing polygon tool is also useful because it with a little practice, you can directly develop the base shape of the pattern piece without making the detour of modifying a rectangle shape. The polygon tool also comes with the function of drawing bezier curves while left-clicking and dragging when drawing the shape. This is useful for users who have previous experience with digital drawing programs but might take some getting used to for users who are not familiar with this mode of drawing yet. 

As with all the program’s tools, CLO also offers a wide variety of functions for drawing specific measurements to fit a premeasured shape. In the previous blogpost about pattern development, I talked about how I believe the 2D + 3D layout of CLO would make it easier to understand patterns for users without previous knowledge of sewing and pattern drafting. In this case, I think it might be the opposite case. I believe users without prior pattern drafting knowledge will find the process of developing patterns from shapes or even drawing them free hand very daunting and confusing. Even though CLO has many useful features to make the process easy, I can see how these functions might overwhelm people who are new to the process of pattern drafting. 

In the next Blogpost, we will take a look at critical pattern components and pattern modification options.  

14 | Designing A Digital Fashion Garment – Understanding Pattern Pieces, Pattern Layouts and Pattern to Garment Relationships

In the previous blogpost, we discussed the preset avatar options and settings and the avatar editor in CLO3D and their implications for 3D body representation in digital fashion design. In this post, we will turn to the two-dimensional side of fashion design – the pattern. We will take a look at how the pattern is laid out in CLO3D, how the pattern representation relates to the garment pieces and how CLO helps to understand the relationship between 2D and 3D representation.  

In dressmaking education, learning how to construct patterns and how to translate design sketches into a pattern and how that pattern and its pieces relate to the finished garment are some of the most challenging skills to learn. It takes a while to understand the relationships and logic between the two-dimensional pattern and how the curves and darts translate to the fit of the garment on the body. 

Interestingly, the practice of drafting two-dimensional patterns comes from the tradition of male tailoring. In women’s dressmaking (also referred to historically as mantua making), tradeswomen would drape a mockup fabric or muslin directly on the clients body to form shapes of the garment rather than constructing a paper pattern first.1 The practice of draping is still in use today. Some fashion designers work exclusively with draping in the design stage, especially for custom pieces, whereas for mass production, the pattern would be translated into a two-dimensional paper pattern. 

After this short excursion into the history of pattern making practices, let’s take a look at the CLO3D interface and how it deals with the sewing pattern.

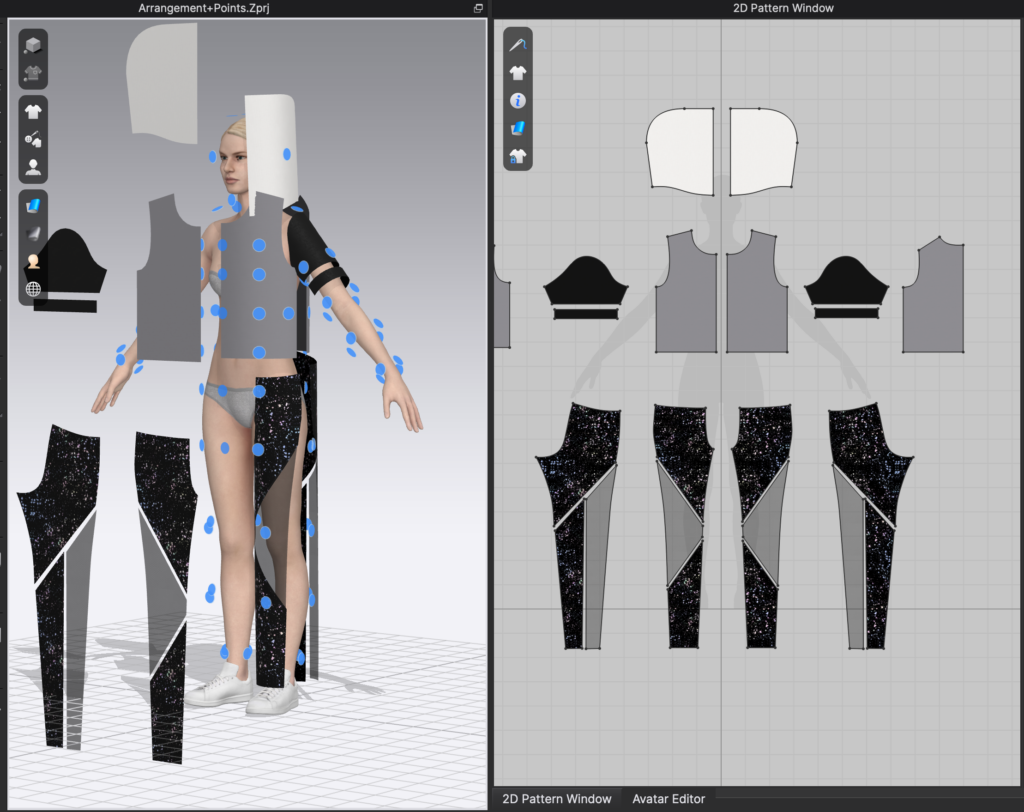
CLO by default has a workspace layout with two display windows next to each other – one for the avatar and the 3D representation of the garment, one for the 2D sewing pattern. 

In the 3D window, the pattern pieces can be arranged around the three-dimensional body of the avatar, making it easier to understand how the curves of the pattern correspond to the shapes of the body.  Arrangement points can be displayed on the 3D avatar, making the placement of individual pattern pieces easier. 

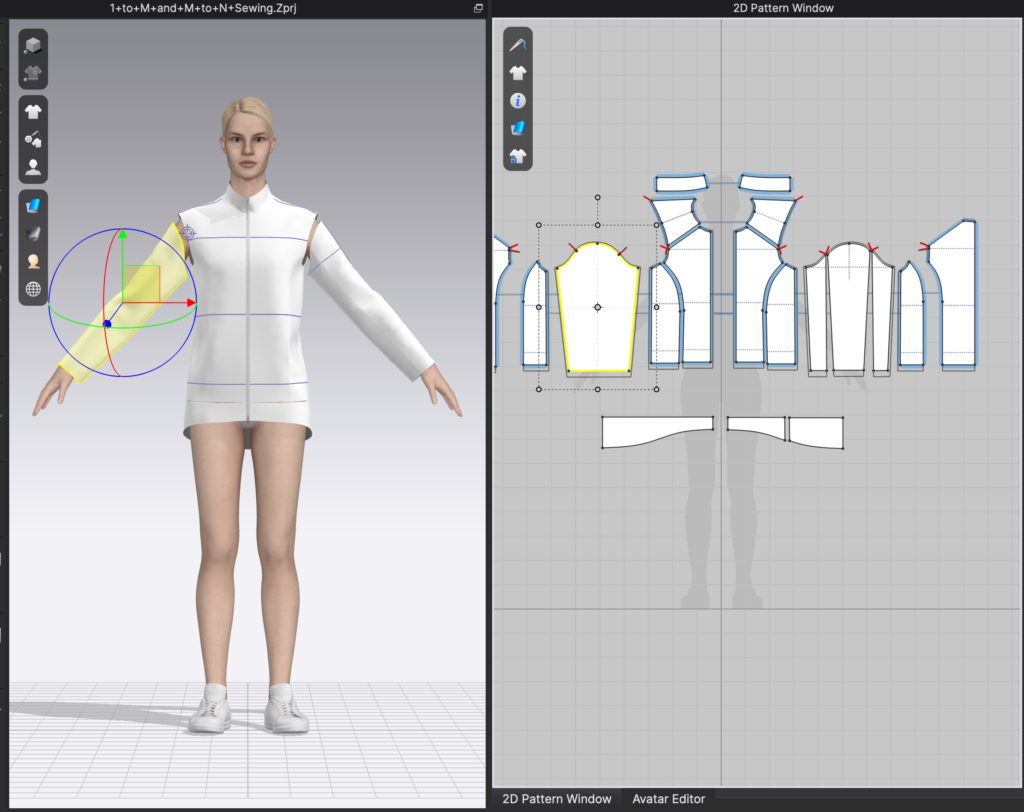
In the 2D window, the garment pieces are laid out flat and symmetrically arranged. When selected, pattern pieces in the 2D window are highlighted, as well as the corresponding garment piece in the 3D window. This is another immensely helpful feature that helps you understand how the two relate to each other. It is especially useful for more intricate and complicated pattern arrangements and elaborate pattern constructions that are not obviously easy to understand. 

Speaking from my own experience, the CLO arrangement makes it way easier to understand pattern drafting. However, it might be that because I already have the background knowledge of how pattern pieces work, I find it easier to understand the setup of the program than someone with no prior knowledge. But I think this way of learning pattern drafting, or at least using CLO or a similar digital fashion program along with traditional teaching methods to teach pattern drafting could be immensely helpful for people learning the skill.

1Abby Cox, „Alexander McQueen & The Patriarchy Problem in Modern Fashion“ October 20, 2023, online video, 9:58, https://youtube.com/watch?v=OVwhg8LZnlc. 

Calm Technology // 03

Usually calm communication patterns describe a way of expressing oneself without blaming others, shutting down dialogue and avoiding escalation of conflict. In Calm Technology it describes a way of calming the communication of an otherwise overwhelming or disruptive interface. So in a way they both describe the same thing, just one in human to human interaction and the other in human to computer interaction. But ultimately they both want the same thing, which is to avoid conflict or disruption and to keep communication open and as positive as possible for the people involved.

So what are these patterns of calm communication?

In her book on Calm Technology, Amber Case explains, differentiates and lists them in the following four categories:

01. Status Indicators
Most of the time it is not necessary for technology to tell us that something has happened in the form of pop-ups, written or spoken text. These forms take up too much of the user’s attention bandwidth and require active engagement. Instead, other forms of indicators can be used to convey the same information in a calmer and less intrusive way.

A. Visual Status Indicators
Red light in induction or ceramic hotplates that indicates on/off status and the temperature of the plates.

B. Status Tones
Samsung’s washing machines play a melody at the end of a cycle instead of an annoying alarm. This can even lead to a more positive attitude towards necessary chores such as laundry.

C. Haptic Alerts
The LUMOBack Sensor is a small wearable device that beeps every time you slouch. It fights back problems and helps you maintain good posture without you having to think about it or someone else telling you all day.

D. Status Shouts
These signals are designed to disrupt, grab your attention and, at best, communicate in multiple channels, because their information is immediate and time-sensitive, like the sirens of an emergency vehicle in action.

02. Ambient Awareness
The communication pattern of Ambient Awareness largely refers to and repeats Principle III of quiet technology using the periphery. This can happen through something as simple and low-tech as an inner office window. By extending the peripheral vision of the person inside out into the corridor, it can communicate that it is lunchtime via the visible movements of many passing colleagues, without having to emit an active signal itself. Or something a little more technological, like the toilet signs on aeroplanes. By simply glowing red in our peripheral vision, we know that it is occupied, without having to investigate or ask for the information ourselves.

03. Contextual Notifications
This is a type of information that is communicated to you only when the context of your surroundings makes it useful to you, rather than all the time or whenever it occurs. This method can reduce the amount of information communicated to you by an interface at any given time and improve the calmness of your mental state. For example, the context of a notification could be location-based, such as a reminder to buy milk a few streets away from the supermarket on your way home. This frees your mind for other tasks by not having to think about that particular task all the time.

04. Persuasive Technology
This method describes how technology can be used to change our behaviour and thoughts through the communication of technology. There is a dark and a bright side to this persuasive technology, but when used correctly it can greatly enhance not only human-computer interactions, but also our lives. Used in the wrong or dark way, it can be used to trick people into buying things they do not want or need (for more information and examples, see Dark Patterns). How it works in the bright way is best described by this quote.

A good persuasive technology largely depends on taking what was formerly invisible (behaviors, decisions, unseen consequences) and making it visible.
____________
Amber Case

A good example of this is the product GlowCap. This is a pill bottle cap with a light built into it. The cap then glows when it is time to take your medication, and can even indicate which medication to take by using different colours of light. The light only goes out when the bottle is unscrewed and comes back on when it is time to take the medication again. This simple device has been shown to increase the likelihood of taking medication on time by 86%.

Amber Case, Calm Technology, O´Reilly, December 2015