#18 Thinking through the whole process
The goal of this blog post is to explore the entire process of creating a gamified application for use in therapy. I will examine the implementation of gamified physical therapy, from identifying the target group to maintaining long-term motivation.
Understanding the Target Group:
The benefits of gamified physical therapy can extend to various demographics, including children, adults recovering from surgery, and elderly patients. Each group has unique needs and preferences:
- Children: Engaging games can make therapy feel less like a chore and more like play.
- Adults recovering from surgery: Structured challenges can help them regain strength and mobility.
- Elderly patients: Gentle, gamified exercises can improve balance and prevent falls.
Conditions such as stroke rehabilitation, chronic pain management, and musculoskeletal injuries are particularly well-suited to gamified therapy.
Designing the Gamified Therapy Program:
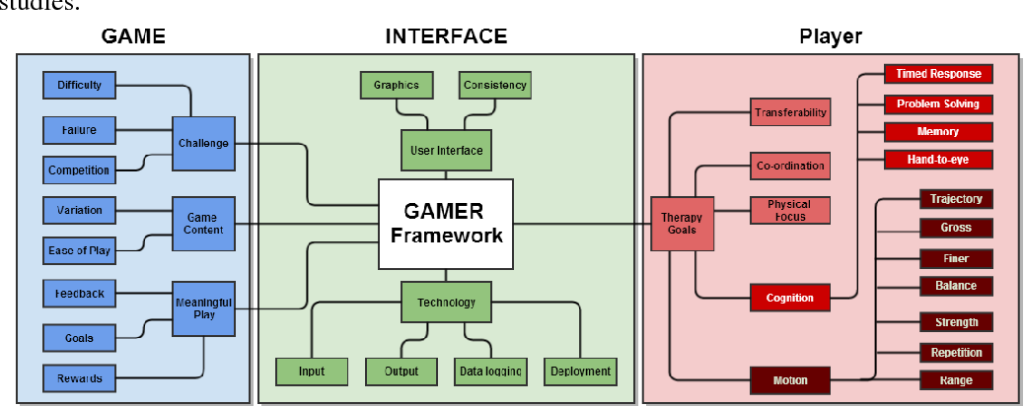
Designing a gamified therapy program requires careful consideration of the specific requirements of both the exercise and the user. Several design frameworks, specifically tailored for therapeutic applications, can aid in this endeavor. Examples include the GAME and PACT (People, Aesthetics, Technology, Context) frameworks. Traditional game design frameworks, such as the well-known MDA (Mechanics, Dynamics, Aesthetics), are also applicable and can help in making design decisions. However, the more specified frameworks provide a more nuanced perspective.

Initial Consultation with a Specialist:
The process begins with a consultation with a physical therapist, who assesses the patient’s condition, sets realistic goals, and determines if a gamified approach is suitable. Customization is key, as the gamification elements must align with the patient’s specific needs and preferences.
Training During Therapy Sessions:
During therapy sessions, patients engage in gamified exercises under the guidance of their therapist. Immediate feedback is crucial, as it helps patients correct their movements and stay motivated. For instance, a VR game might involve reaching and grasping objects to improve hand-eye coordination and strength.
Encouraging Patients to Train in Their Free Time:
Consistency is key in physical therapy, and gamified approaches can help patients stay engaged even outside of scheduled sessions. Mobile apps and home-based VR systems are effective tools for encouraging continued practice. Examples of successful home-based exercises include:
- Balance Games: Using a balance board and a connected app to navigate obstacles.
- Strength Training: Gamified exercises where patients perform repetitions to defeat virtual enemies or complete challenges.
- Coordination Drills: Interactive games that require precise movements to score points.
Maintaining Long-term Motivation:
One of the biggest challenges in physical therapy is maintaining long-term motivation. Gamification addresses this by:
- Setting Achievable Goals: Breaking down the rehabilitation process into small, attainable milestones keeps patients motivated.
- Leaderboards and Social Sharing: Friendly competition and sharing achievements with a community can boost motivation.
- Regular Updates and New Challenges: Introducing new games and challenges prevents monotony and keeps the therapy engaging.
Evaluating the Effectiveness of Gamified Therapy:
To ensure the effectiveness of gamified therapy, it’s important to regularly evaluate progress. Methods include:
- Patient Feedback: Gathering qualitative data on the patient’s experience and engagement.
- Progress Tracking: Using the data from apps and devices to monitor improvements in strength, mobility, and endurance.
- Clinical Outcomes: Assessing functional gains and comparing them to traditional therapy methods.
Research supports the efficacy of gamified approaches. For example, studies have shown that VR-based therapy can improve motor function and cognitive recovery in stroke patients more effectively than conventional methods.
Future Directions and Innovations:
The future of gamified physical therapy looks promising with emerging technologies and ongoing research. Potential innovations include:
- AI and Machine Learning: Personalizing therapy programs based on individual progress and adapting exercises in real-time.
- Wearable Technology: Integrating sensors to provide more precise feedback and data tracking.
- Mixed Reality (MR): Combining VR and AR for more immersive and interactive therapy experiences.
Conclusion:
Gamified approaches in physical therapy offer a compelling solution to increase patient engagement, motivation, and ultimately improve outcomes. By leveraging game design elements and cutting-edge technology, therapists can create more effective and enjoyable rehabilitation programs. If you or a loved one is undergoing physical therapy, consider discussing gamified options with your specialist to enhance your recovery journey.
Sources:
🟦 08_Prototype
After analyzing the audio-reactive visuals, I wondered how I could apply these outcomes practically. While creating an app might seem like an easy route, I wanted to explore how it would look and function in this context.
App Prototype
I designed a demo app prototype using Figma:
- Home Screen: Native Language Selection
- Users start by selecting their native language.
- Language Learning Selection
- Next, users choose the language they want to learn. This screen ensures that the app tailors the visualizations and pronunciation guides to the selected language.
- Start Pronunciation Practice
- The final page displays the data visualized video that I made in TouchDesigner. There is a simple prompt: „Hold to Pronounce.“ This allows users to practice pronunciation and see the visual feedback in real-time.

I made a quick prototype because for me the process and learnings from TouchDesigner was more challenging and interesting.
Next Step
I plan to write about my learnings and reflect on the overall process.
#20 | Demonstration video & reflections
At the end of this semester I would like to give a short demonstration of how my prototype works. Therefore I created a short video that shows the functionality of the prototype.
Reflections
All in all, I enjoyed the process of Design & Research this semester. This time the work was more hands-on, consolidating my research from the first semester into a rough prototype. I was able to overcome my initial doubts as to how I could make a valuable contribution to my chosen topic, as there are already existing solutions. The potential I saw in my idea was confirmed by the feedback interview I conducted with the Institut für Epilepsie in Graz.
As one can see, this prototype is at a very early stage. It needs to be refined based on future feedback, in it’s interaction logic and real content, as well as in the sound and visual design to address emotional perception as well. This prototype could be an test object in evaluation practices such as expert reviews, interviews and tests to further develop this concept.
Resources
Freesound.org. Downtown Vancouver BC Canada by theblockofsound235. Retrieved June 26, 2024, from https://freesound.org/people/theblockofsound235/sounds/350951/
Freesound.org. VIZZINI_Romain_2018_2019_Emergency alarm by univ_lyon3. Retrieved June 26, 2024, from https://freesound.org/people/univ_lyon3/sounds/443074/
Freesound.org. Busy cafeteria environment in university – Ambient by lastraindrop. Retrieved June 26, 2024, from https://freesound.org/people/lastraindrop/sounds/717748/
#17 Prototype Ideas
In my last blog post, I discussed the technical aspects required to create a basic functioning digital prototype. In this post, I want to delve deeper into what a potential first prototype could look like.
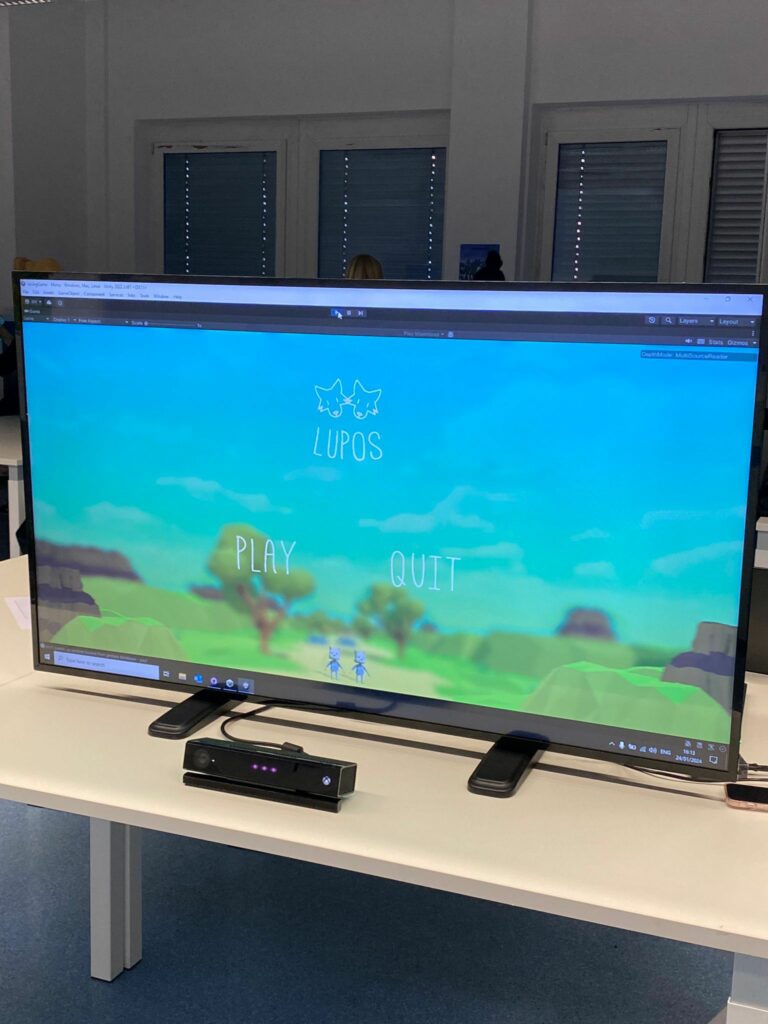
Before I speculate on the prototype, I want to mention a game we made last semester called “Lupos,” a simple 3D jump ‘n’ run game. Its distinctive feature was its control method: we used an Xbox Kinect to track the player’s body position and gestures. Leaning left or right steered the player character, while raising both arms above the head made the character jump. Since it was a cooperative game, the gestures had to be made in unison. I mention this game because it shares similarities with games used in rehabilitation and therapy. Using body movements to control in-game avatars can be a form of physical exercise, especially actions like raising hands, which require significant flexibility and range of motion.

As mentioned in my previous blog posts, there are different approaches to gamification. One consideration is whether the service should be used during sessions with a medical professional or during the patient’s own training time.
Another decision is whether the gamification should focus on the exercise itself (turning the exercise into a game) or provide user motivation outside of these exercises (e.g., with leaderboards, visualizations, etc.). These approaches can also be combined.
For a first prototype, I will focus on creating an application that can reliably measure a specific movement and track how many repetitions a user has completed. Additionally, I will explore how this information is presented.
I do not yet fully know the direction I want to take this idea, but I plan to explore it naturally through the prototype development process.
The next step is to build a low-fidelity prototype, focusing on functionality rather than aesthetics. Accurately detecting repetitions without accidental triggers will likely be the most challenging aspect.
Calm Technology // 20
End of the semester and end of my prototyping journey with Tap in the field of Calm Technology for now. After finishing a polished interface to control Tap, I created an explanatory video about the process of prototyping on Tap and the final working features, which you can watch below. Overall it was a fun experience to dive into this prototyping process and learn a thousand little things along the way, from running stepper motors to writing code for Arduino and that failure is part of the process. Now that it is all done, I would like to thank ChatGPT for helping me, a non-programmer, to code and DeepLWrite for turning my quickly scribbled blog post scripts into easily readable blog posts. Making this whole project possible.
Showcase
#16 Further Research
For this blog post, I explored various materials that might be relevant to my research, including articles, papers, books, and more. While I aimed to prioritize scientific sources, I did not limit myself exclusively to them.
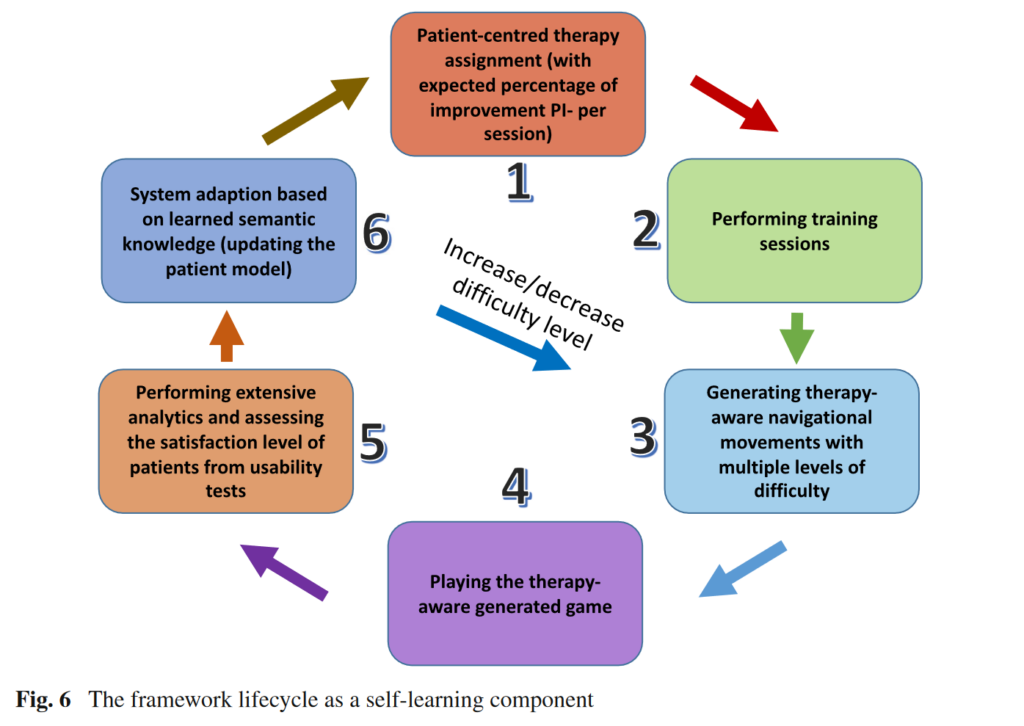
The first source I examined was a paper titled “A Therapy-Driven Gamification Framework for Hand Rehabilitation.” This paper presents an innovative e-health framework that uses adaptive serious games to facilitate hand rehabilitation for individuals with disabilities. Their end product was a serious game where players control an airplane or spaceship using the rotation and movements of their hands. What I found particularly intriguing was that the system accommodates users with vastly different levels of hand flexibility. According to the paper, the normal range for wrist flexion is 75°, but some individuals may only be able to flex their wrist up to 20°. The system can register these varying levels of flexibility and then devise a plan to gradually improve the patient’s ability through multiple steps. Additionally, I was interested to see that they used Leap Motion as the controller, a piece of technology we received a workshop on.
“Digitale Gesundheitsinterventionen” was an extensive and challenging read. It covers various digital health interventions and options, with gamification being more of a side topic. The main focus is on IMIs, or “internet- und mobilbasierte Interventionen” (internet- and mobile-based interventions). Nonetheless, it was insightful to browse through the book as it addresses a wide range of health problems. There are also dedicated chapters on specific target groups, such as the peculiarities of childhood and adolescence. I found the chapters on “Persuasive Design” and “Ethische Risiken” (ethical risks) particularly insightful.
The paper “Gamification in Musculoskeletal Rehabilitation” caught my interest because it focused on analyzing the general usefulness of gamified approaches. Seven articles were analyzed, and the results showed that gamification can be genuinely beneficial and is not just a novel idea without real merit. Since I am considering this topic for my master’s thesis, it was important to me to find data that provides a solid basis for argumentation.
I also read passages from “Making Points the Point: Towards a History of Ideas of Gamification,” “Rethinking Gamification,” and “Actionable Gamification” by Yu-Kai Chou. These reads focused more on gamification in general and less on health. I skimmed through them, reading passages that seemed interesting. However, I am not yet sure whether I will include them in my further research as they did not seem as directly applicable as others might.
I believe it is important to continue conducting traditional research alongside these more hands-on explorations.
Sources:
- Afyouni, Imad, Faizan Ur Rehman, Ahmad Muaz Qamar, Sohaib Ghani, Syed Osama Hussain, Bilal Sadiq, Mohamed Abdur Rahman, Abdullah Murad, and Saleh Basalamah. “A Therapy-Driven Gamification Framework for Hand Rehabilitation.” User Modeling and User-Adapted Interaction 27, no. 2 (June 2017): 215–65. https://doi.org/10.1007/s11257-017-9191-4.
Video and Final Thoughts
This is my final prototype and video.
This has been a very fun project to explore, and i have learned a lot about conducting research through the last two semesters. For my final learnings from this, I could have spent more time conducting interviews with people in the field, and have finished testable prototypes earlier, so that i could have conducted more in-depth user-testing.
However I am still happy with the end result, as can be seen in the video above.
#15 Prototype Technical Aspects
In this blog post, I want to explain my process behind starting the prototyping phase.
A lot of considerations and decisions had to be taken into account for this project. Since it wasn’t clear to me what I wanted to do exactly, I started with a technical feasibility-first approach. It was clear that regardless of what I decided to do, I needed a way to track data and then utilize it somehow. Therefore, I decided to start by getting data from a tracking device to a game engine. I chose to use OSC (Open Sound Control) to transfer information from one device to another since we have been using it extensively during our studies, and I already have a good grasp of the concept.
For the tracking device, I chose my phone (Samsung Galaxy S23, running One UI 6.1, Android 14) and the app Sensors2OSC (not available on the Play Store, but the .apk can be downloaded from their website https://sensors2.org/osc/, and it can also be installed via F-Droid). For the game engine, I chose Unity because I am already familiar with it, whereas something like Unreal would require time to get used to.
To get the OSC data into Unity, I used an external framework. After some research, I narrowed it down to these two choices:
- keijiro/OscJack: Lightweight C# implementation of OSC server/client
- Iam1337/extOSC: extOSC is a tool dedicated to simplifying the creation of applications in Unity with OSC protocol usage
Ultimately, I decided on OscJack for several reasons. It was very lightweight (unlike extOSC, which comes with a lot of features), well-documented, and relatively new. Furthermore, keijiro has a good reputation in the GitHub/Unity community.
With this settled, I started to create a simple technical proof of concept in Unity.
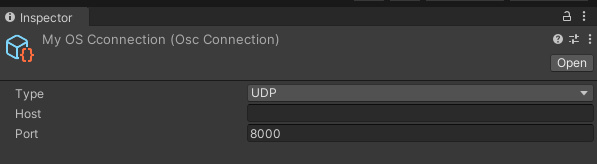
OscJack comes with an OSC Connection component where you can define the type of message, host address, and port. The host is left empty because it is acting as a receive-only connection right now.
The scene in Unity is very simple. The only necessary object is the GameObject titled “OSC Event Handler,” which has the OSC Event Receiver script attached to it.

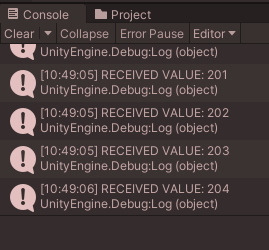
This script allows you to receive data and invoke a Unity Event that utilizes this data. For testing purposes, I created a simple script that outputs a text message and the value to the console. In this case, I used a simple int, but other data types such as Vector3 are also supported.

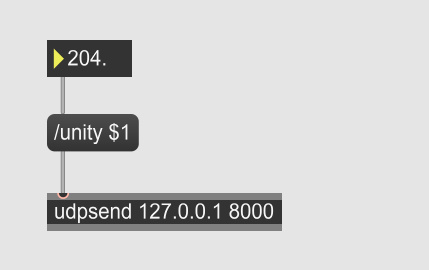
To quickly test if the setup was working, I created a Max8 file that sends an integer to Unity. It worked almost instantly without much troubleshooting.
It should also be noted that a dedicated OSC monitor exists, which may prove very helpful for debugging in the future. Also if anybody is wondering why my Unity windows appear reddish – it is because I set it up so the colors is changed while in play mode. Can definitely recommend so that no changes are lost.
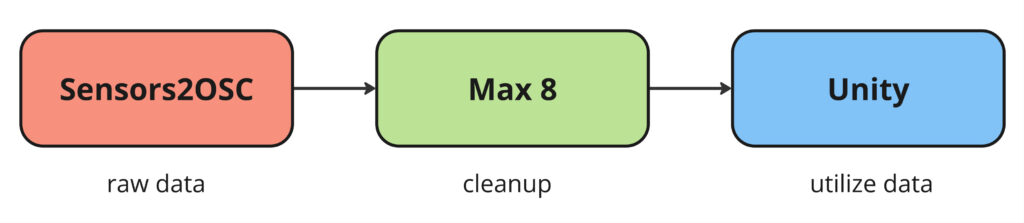
In the final step, I added my phone to the process. I sent the data from my phone into Max8 and from there into Unity.

I probably could have done this without Max8 as an intermediary, but it is a very useful tool as it allows for rapid prototyping and easy cleanup of the data before handing it to Unity.
To have a backup system in place and to also allow me to work on multiple devices (as I work on both a laptop and a PC), I set up a GitHub repository for this project.
This was an important first step in getting a functional prototype working. In my next blog posts, I want to explore the concept and idea behind a potential prototype rather than focusing on technical details.
#08 Creative Color Grading in DaVinci Resolve
Color Grading ist, das ein gutes Video zu einem großartigen macht, und das Programm DaVinci Resolve in diesem Bereich hervor. Mit seinen professionellen Werkzeugen und der intuitiven Benutzeroberfläche bietet DaVinci Resolve FilmemacherInnen und VideoeditorInnen die Möglichkeit, ihre Kreativität voll auszuleben und ihre Visionen zum Leben zu erwecken. Folglich vielleicht ein kurzer Leitfaden, wie man das kreativen Color Grading angehen kann.
Bevor man in die kreativen Aspekte eintauchst, ist es wichtig zu verstehen, was Color Grading überhaupt ist. Im Gegensatz zur Farbkorrektur, die Farbfehler behebt, geht es beim Color Grading darum, eine Stimmung, einen Stil oder einen visuellen Ton zu schaffen. Es ist der Schritt, bei dem du deinem Filmmaterial Persönlichkeit und Emotionen verleihst, um es ansprechender und visuell beeindruckender zu machen.
Warum DaVinci Resolve?
DaVinci Resolve wird von Profis wegen seiner leistungsstarken Funktionen und der Flexibilität des node-basierten Workflows geschätzt. Diese Software bietet fortschrittliche Farbkorrekturwerkzeuge, umfangreiche Scopes für genaue Farbkontrolle und eine breite Palette von LUTs (Look-Up Tables), die es dir ermöglichen, vordefinierte Looks schnell anzuwenden oder eigene zu erstellen.
Schritte zum kreativen Color Grading
Grundlegende Farbkorrektur:
Starte mit der Balance deiner Aufnahmen. Passe Belichtung, Kontrast und Weißabgleich an, um eine neutrale Basis zu schaffen. Verwende die primären Farbregler, um ein natürliches Aussehen zu erzielen.
Verwendung von Nodes:
Das node-basierte System von DaVinci Resolve ermöglicht es dir, verschiedene Anpassungen nicht-destruktiv zu schichten und zu kombinieren. Nutze serielle Nodes für einen sequentiellen Prozess oder parallele Nodes für komplexe, gleichzeitige Anpassungen.
Erstellen des Looks:
Experimentiere mit Farbreglern und Kurven, um das Gesamtgefühl zu formen. Schiebe die Farben, um einen warmen, vintage Look oder eine kühle, moderne Ästhetik zu erzeugen. Verwende sekundäre Korrekturen, um bestimmte Teile des Bildes zu isolieren und zu bearbeiten. Verstärke den Himmel, bringe Details in den Schatten hervor oder hebe das Gesicht einer Person hervor.
Feinabstimmung und Details:
Achte auf die kleinen Details. Verwende Werkzeuge wie den Qualifier, um Hauttöne zu verfeinern, oder den Tracker, um deine Gradings bei bewegten Aufnahmen konsistent zu halten. Füge eine Vignette hinzu oder passe die Schärfe an, um die Aufmerksamkeit auf Schlüsselbereiche zu lenken.
Konsistenz und Kohärenz:
Stelle sicher, dass dein Grading im gesamten Projekt konsistent ist. Nutze die Galerie-Funktion, um Standbilder zu speichern und Gradings auf mehrere Clips anzuwenden.
Generelle Tipps:
Das Verwenden Referenzbildern oder Filmen, um deinen Grading-Prozess zu leiten, hilft, einen konsistenten Stil beizubehalten und den gewünschten Look zu erreichen. Organisiert bleiben ist eines der wichtigsten Dinge, dass macht man, indem man seine stetig Nodes beschriftet und die Timeline effizient verwaltet. Generell würde ich sagem, dass man nicht zögern sollte mutige Farbentscheidungen zu treffen. Kreatives Color Grading ist eine Kunst, und manchmal bringen die unerwartetsten Entscheidungen die besten Ergebnisse. Aber eines der wichtigsten Dinge ist es beim Color Grading Pausen einzulegen, denn die Augen gewöhnen sich an Farben und Lichtstimmungen. Footage, das man am Vormittag gegraded hat, kann Abend direkt anders wirken und aussehen. Genau aus diesem Grund ist beim Color Grading eine Kontrolle nach einige Zeit essenziell.
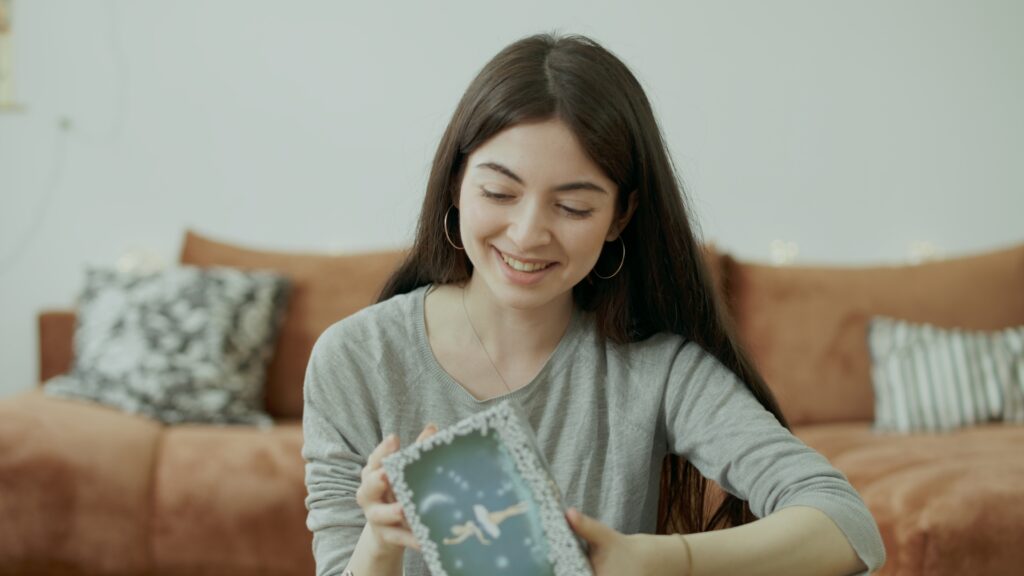
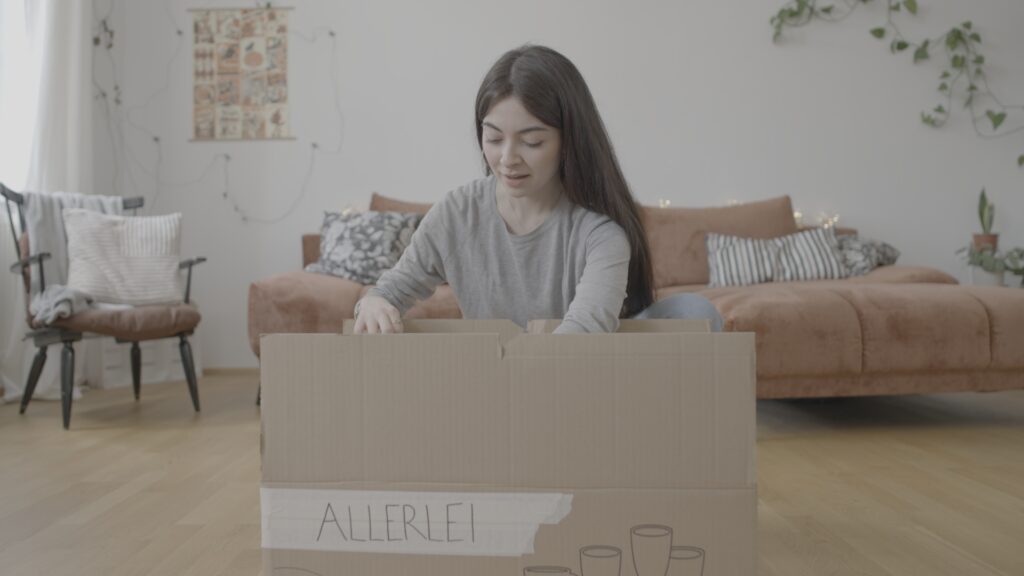
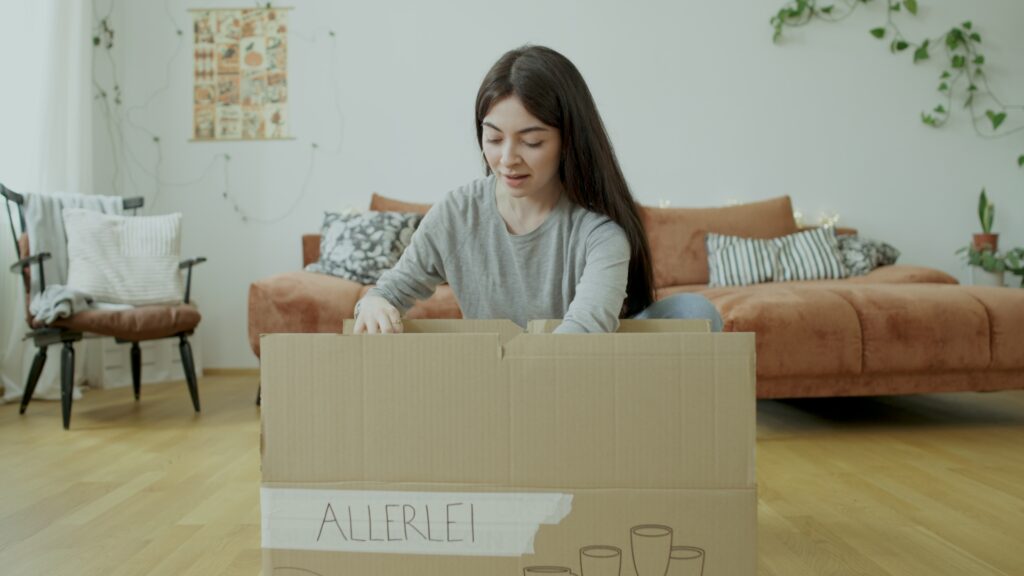
Spieluhr Projekt
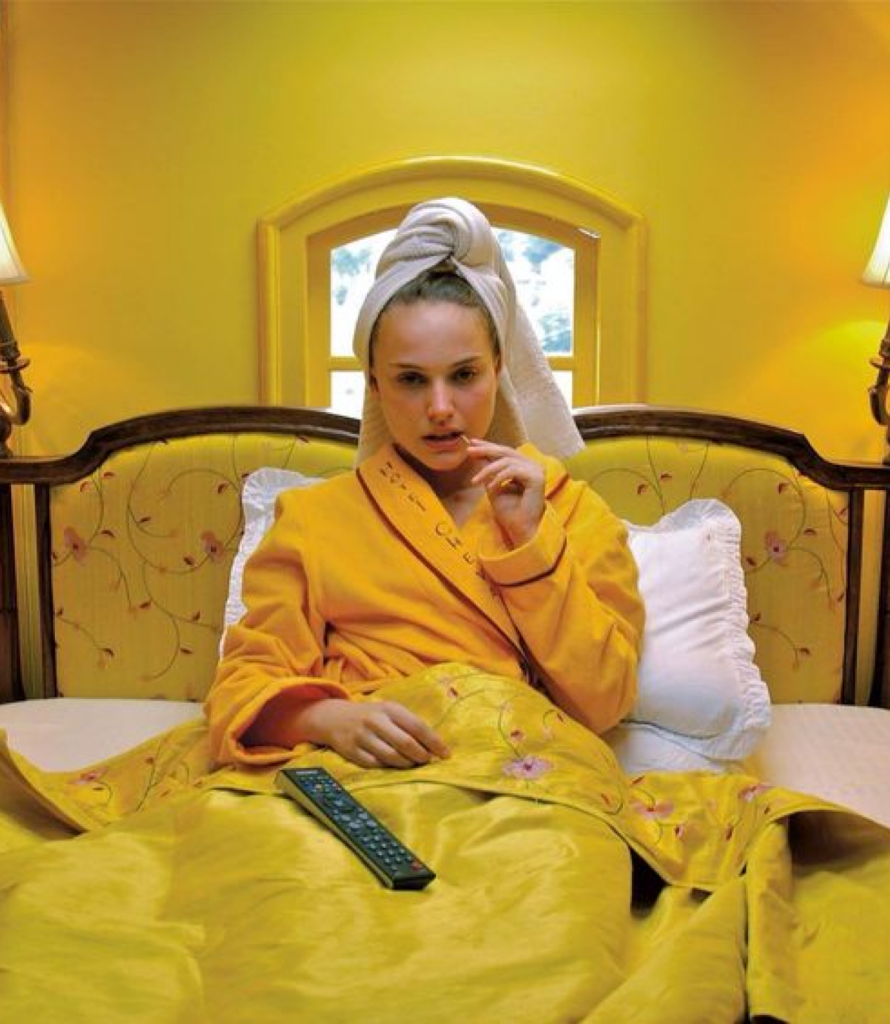
Bei dem Projekt Spieluhr habe ich das Color Grading gemacht und ich habe mir hierbei das erste Mal bei einem etwas kreativeren Look versucht. Besonders wir wollten für die Endszenen ein Wes Anderson inspired Color Grading. Bei dem Wes Anderson Look ist mir definitiv aufgefallen, dass es einen Unterschied macht, wie das Footage gefilmt ist. Dieser Stil ist so spezifisch bezüglich Schatten, Kontrast, Farben etc. das rein mit dem Color Grading es nie so aussehen wird wie ein Wes Anderson Film. Rein das „kopieren“ der Farbkorrektur war auch sehr schwer, da es schnell falsch aussehen kann, aber ich habe mich dennoch an meine Referenz-Bilder gehalten. Ich bin der Meinung es sieht zumindest so aus als würde sie weiter entfernt in der gleichen Welt sein von der Farbkorrektur, was ich schon als Achievement sehe!
Referenzbilder für den 1. Look:
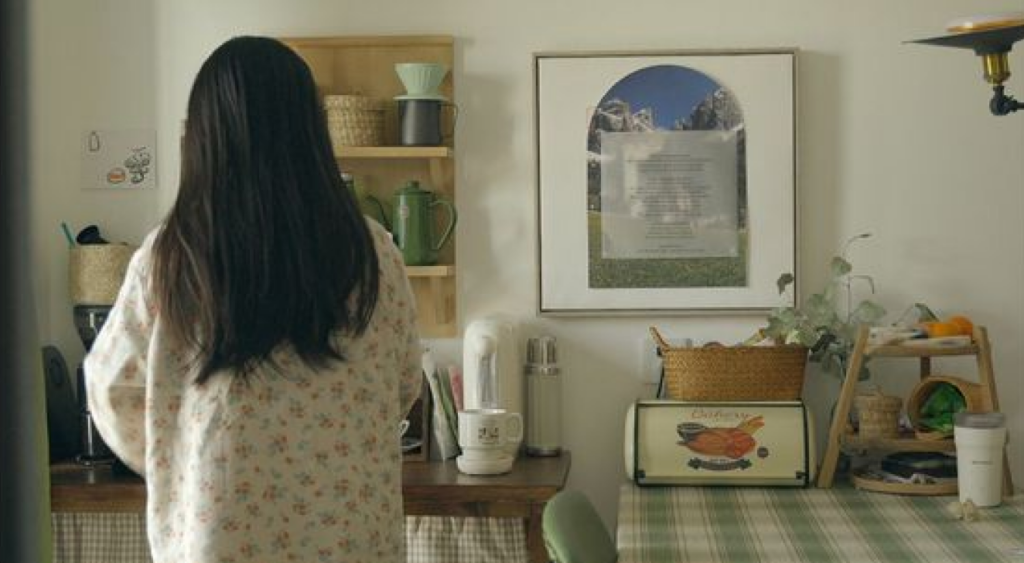
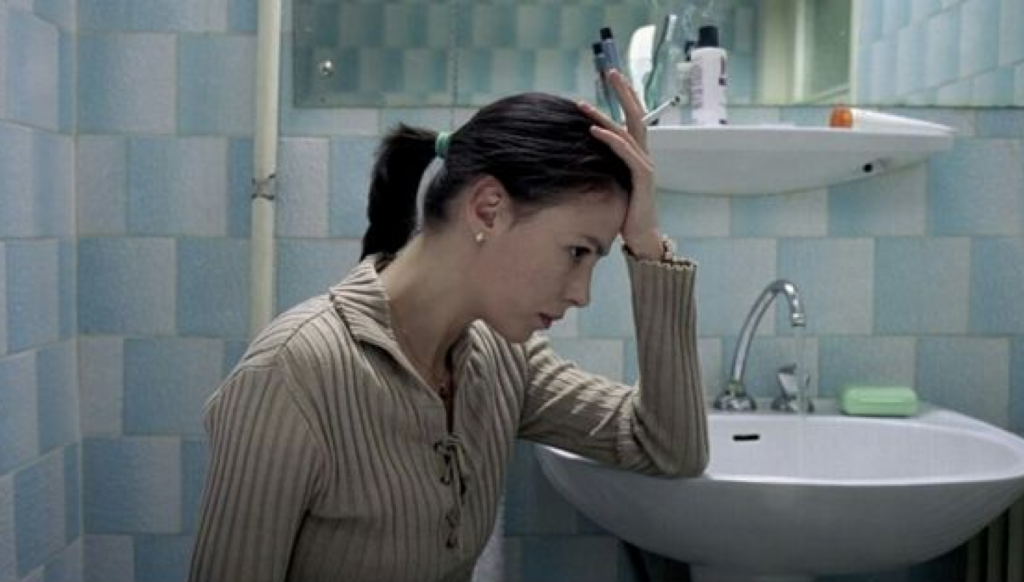
Outcome:
(links before – rechts after)


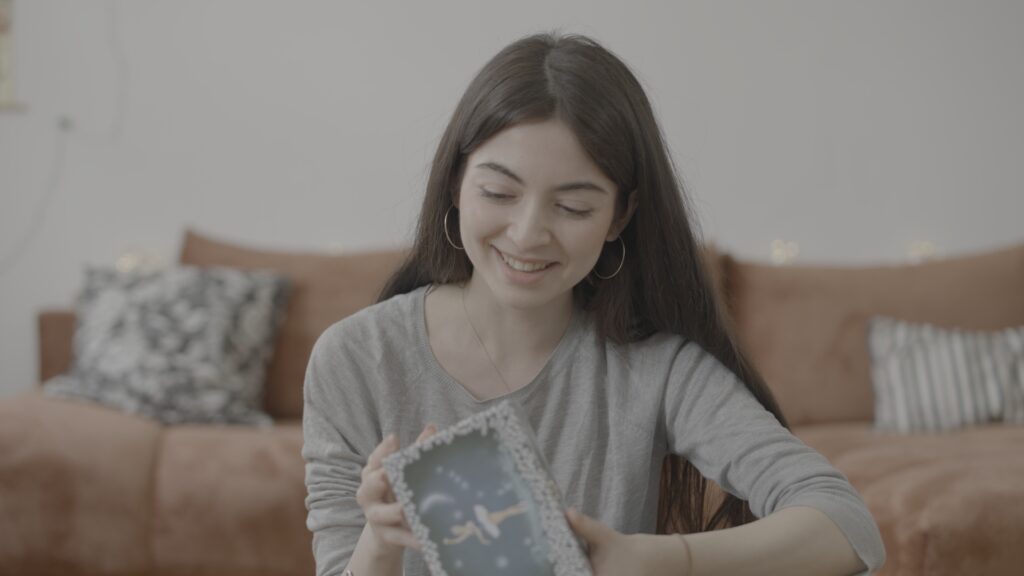
Referenzbilder für den 2. Look (Wes Anderson inspired):
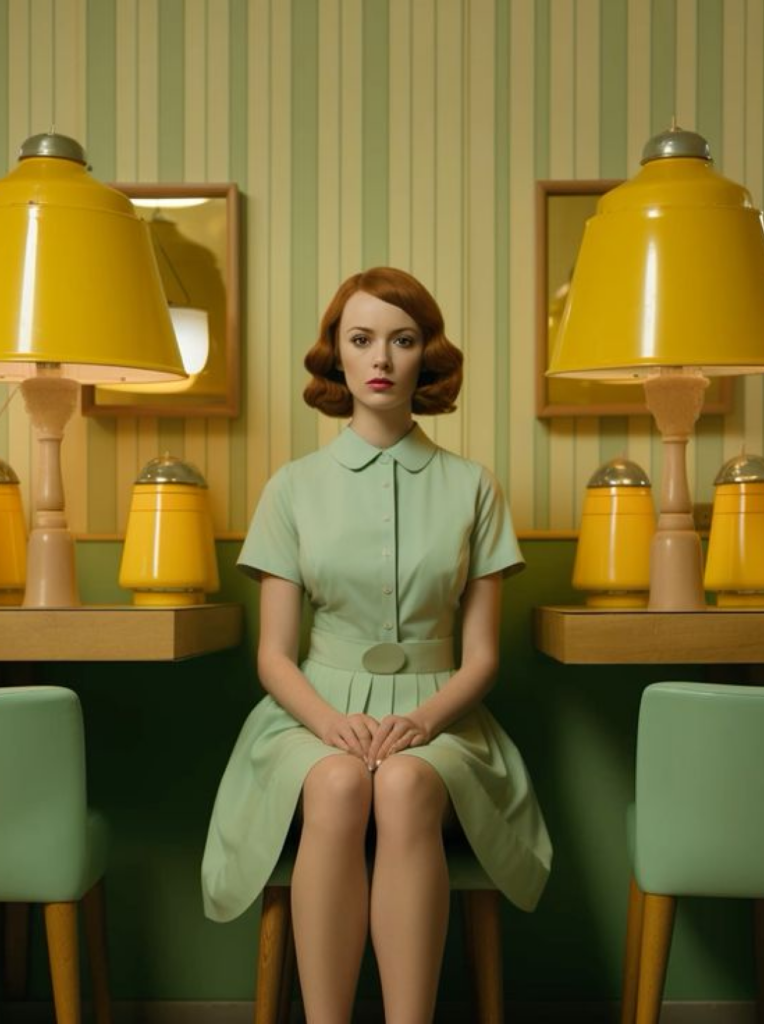
Outcome: