→ Impulse_04 | Technisches Museum Wien

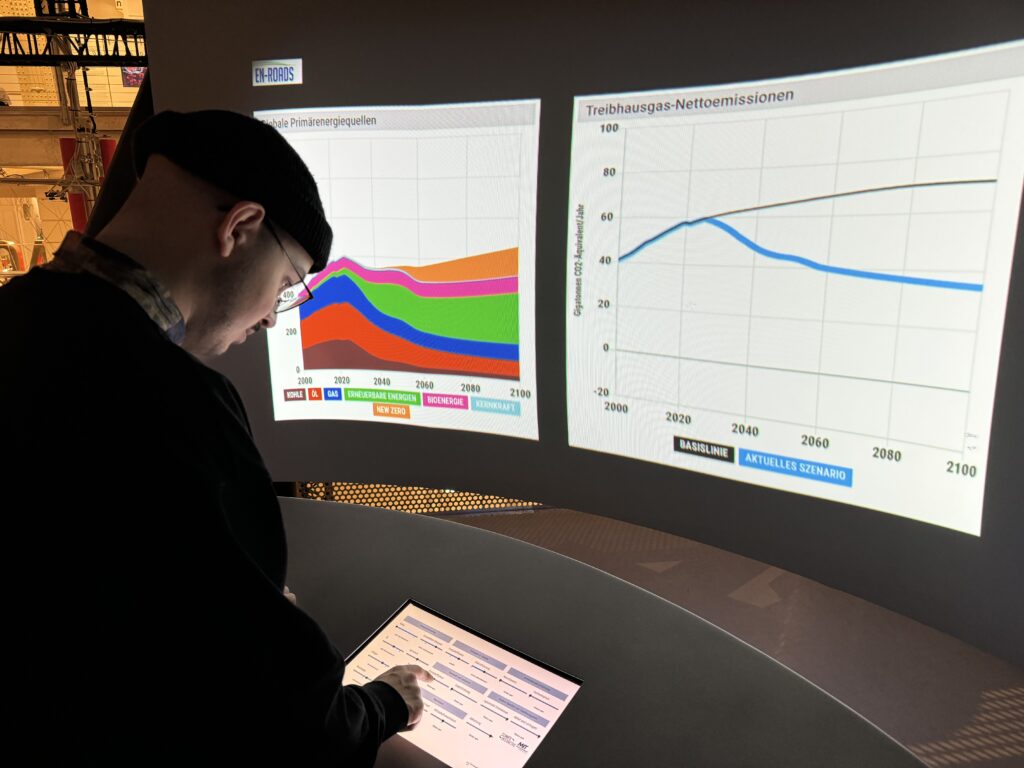
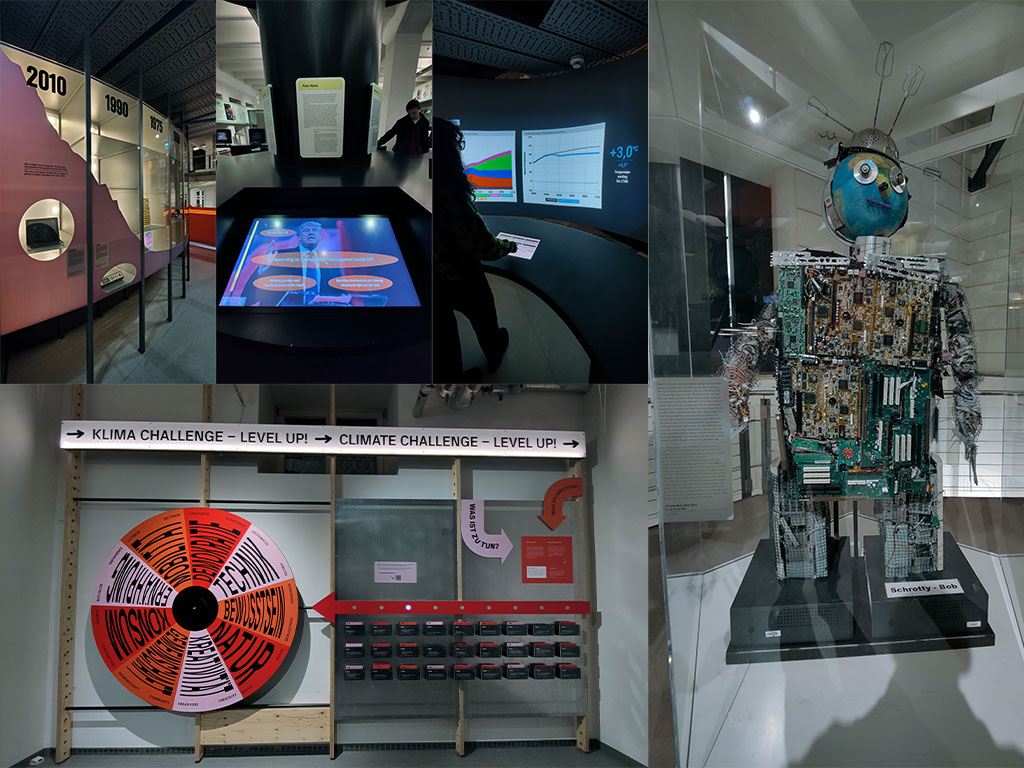
On November 30th, Mert and I visited the Technisches Museum Wien. There were several exhibitions, and luckily, we found some that fit our thesis topics. I was especially interested in how they designed the different exhibitions with different themes using interactive screens and installations. Even though some of them looked old, they were still inspiring!

One artwork that stood out to me was from the Musical Instruments exhibition. It showcased creativity, craftsmanship, experimentation, tradition, and the unique sounds of different instruments. The exhibit had a microphone hanging from the ceiling that captured the sound of the instruments and turned it into visuals. This was a great example of real-time data visualization, which really caught my attention.

Another inspiring part was the Media Worlds exhibition, which explored the history of media and its impact on society. It covered everything from early communication tools like the post and telegraph to modern inventions like computers and the internet. I had the chance to closely examine how interfaces and ways of interaction have evolved over time. There were also some interactive games, which I really enjoyed.

Also, the Energiewende exhibition and some others had very good examples of data visualization, even though they were not interactive. These examples showed how complex data could be made easier to understand through simple, effective visual representations. It was a reminder of how powerful data visualization is in communicating ideas and information clearly and effectively.

The visit to the Technisches Museum Wien gave me some inspos into interactive design and data visualization. I thought again how combining sound and visuals can create an engaging, real-time experience, and how effective data visualization can make complex information more accessible. The exhibitions helped me to have an idea about how I can apply these concepts to my thesis.

Overall, the museum visit was very fun with Mert! We spent almost 4 hour there, it was tiring yet so interesting!! Luckily, we got inspired about our future thesis!

Impulse 04 // Crash Course Protopie Part 2

ProtoPie 101 Crash Course | ProtoPie School

After completing the first half of the ProtoPie Crash Course, I was motivated to dive into the second half because of the quick learning and skills I had already gained in the first part of the course. With three more lessons this time about advanced techniques, I gained a deeper understanding of ProtoPie’s capabilities. The content this time was Conditional Logic and Triggers, Variables and Functions & a Wrap Up to summarise and review all the learning from the whole course.

The fourth lesson introduced me to conditional logic and advanced triggers. These features allowed me to create interactions that responded intelligently to user inputs. This was a significant step up from the basic interactions we learned earlier.

Conditional Logic

We started by creating a password validation interaction using conditionals. This exercise showed me how to add logic to prototypes without needing to write a single line of code. By setting conditions, I was able to create a prototype that checked whether a password met specific criteria and provided real-time feedback to the user.

Chain and Range Triggers

Next, we explored the Chain Trigger, which is used for creating navigation aids. I designed an interaction where tapping on different sections of a menu smoothly scrolled to the corresponding part of the page. The Range Trigger was another great too which I used to create an auto-play video carousel that responded dynamically as the user scrolled. Both triggers added a new layer of sophistication to my prototypes.

The fifth lesson was all about harnessing the full power of ProtoPie by using variables, functions, and components. These features gave me access to the possibilities of creating complex, yet manageable, prototypes.

Variables and Functions

I started by learning how to use variables and formulas to store and manipulate data within a prototype. This was a game-changer for me, as it allowed for dynamic interactions. For example, I created a camera focus point interaction where users could tap anywhere on the screen to adjust the focus dynamically. Using variables made the interaction feel incredibly realistic.

Custom Greetings and Smart Light Control

Next, I built a customized greeting interaction that displayed the user’s name based on their input. This feature demonstrated how ProtoPie could personalize experiences. We also designed a smart light control prototype where users could adjust the brightness and color of a light bulb. This exercise showcased how ProtoPie could simulate IoT interactions effectively.

Multi-Screen Smart Home Control

The highlight of this lesson was creating a multi-screen smart home control interface. By using components and the Send & Receive feature, we linked multiple screens together seamlessly. This exercise emphasized the importance of reusability and organization in prototyping complex systems.

The final lesson was a wrap-up session that consolidated everything we had learned throughout the course. It included a knowledge exam, which tested our understanding of ProtoPie’s features. I was happy to pass the exam and receive my certificate of the crash course in Protopie.

Helpful Resources

Before the course ended, we were provided with a lot of resources to continue our ProtoPie journey. These included detailed documentation, community forums, and example projects. Knowing that I have these resources to look up gives me confidence to tackle even the most challenging prototyping tasks in the future.

The second half of the ProtoPie crash course, like the first, was interesting and full of useful skills and possibilities for future prototypes. It opened my mind to not only think about how to design interactions that are both functional and intuitive, but also that I am now able to test and prototype them myself. The hands-on exercises, as in the first part, allowed me to experiment with the more advanced features and gain practical experience, which, as I said before, is the only way I really learn, by trying things and doing them. By the end of the course, I felt equipped to create prototypes that go beyond static designs and truly mimic real-world interactions. Because ProtoPie’s is so easy to use, I think it will be my go-to tool for prototyping. It is also a good element for my Master’s thesis, in which I plan to connect the analogue and digital worlds in a calmer way by creating new ways of interacting between them. As I plan to build and test a physical prototype in the thesis, I will most likely need some sort of digital layer, which I now feel able to realise, or at least build a mock-up of.

→ Impulse_03 | Podcast (Visual Cast)

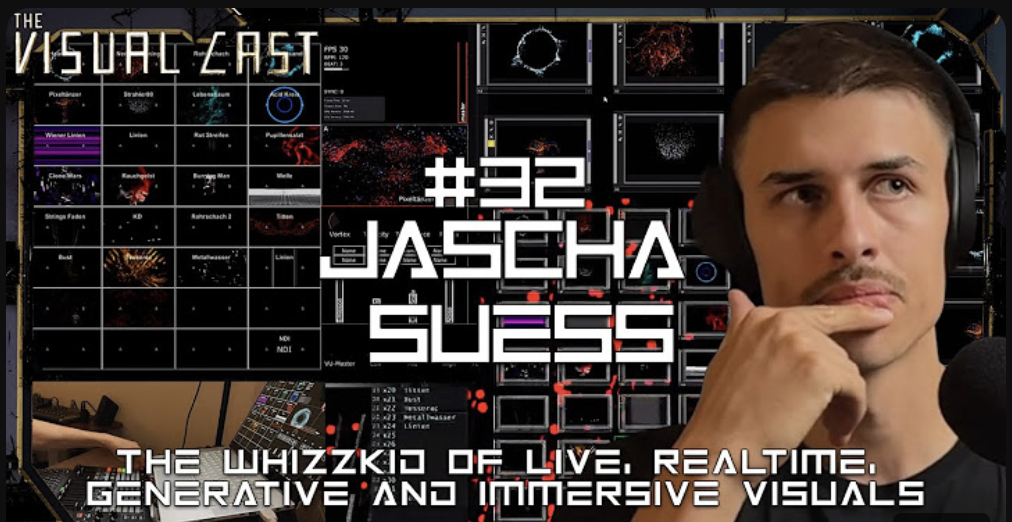
For my third impulse, I watched a podcast episode from Visual Cast featuring Jascha Suess, a very talented VJ who has worked on many projects with well-known DJs. I follow his work on Instagram, so I was curious to hear about the process and stories behind it.

Even though the podcast focused on VJing, it gave me new ideas for my own project about language visualizations. Jascha shared how he uses TouchDesigner to create visuals and build interactive systems. Hearing this made me realize again how powerful TouchDesigner is, and it inspired me to explore it even more.

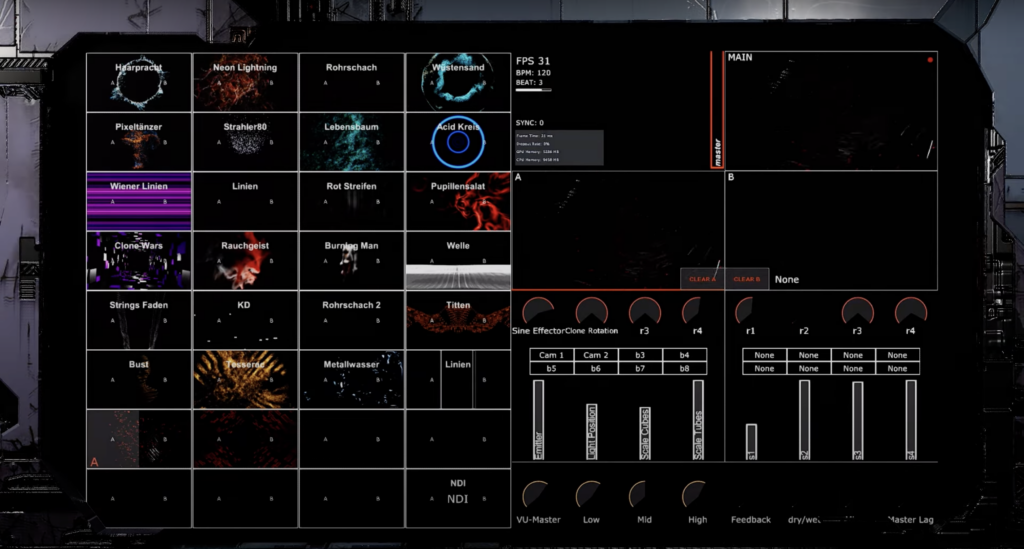
One thing that stood out to me was how Jascha builds entire UIs and patches in TouchDesigner. He talked about how flexible and creative the software is, which is something I’ve started to experience in my own experiments. It’s exciting to see someone use it at such a high level, and it motivates me to keep learning.

Jascha mentioned that he isn’t a programmer and doesn’t write much code, but he loves working with TouchDesigner’s node-based interface. He finds it easier and more intuitive than traditional coding, and he said it allows him to focus more on creativity. This made me feel more confident because I also don’t have strong coding skills, but I can still create complex systems using nodes.

While the podcast was about VJing, it gave me fresh ideas for visualizing languages. Jascha explained how he connects inputs like music or motion to create visuals that react in real-time. This made me think about how I could make my project more interactive. For example, instead of static visuals, I could create a setup where users speak into a microphone, and the visuals change based on the sounds of their voice.

He also talked about organizing projects into smaller steps. He starts with simple patches to test ideas and then builds on them. This approach feels very practical, and I plan to try it in my own workflow.

Conclusion

Watching this podcast helped me see new possibilities in my work. Jascha’s approach to using TouchDesigner is creative and inspiring, and I want to dive deeper into what the software can do. I also learned that even without coding expertise, it’s possible to create complex and meaningful projects by focusing on the tools and workflows that work best for me.

→ Link of the podcast: https://www.youtube.com/watch?v=MWsk_JaCiew&t=2s

IMPULSE #4

Studying ProtoPie – A No-Code UX Tool

Creating an Interactive Bouquet for January’s Exhibition

When our group began brainstorming for an upcoming exhibition in January, we wanted to create something truly unique and interactive – something that would leave a lasting impression. The idea we landed on was both creative and ambitious: an interactive flower bouquet where visitors could personalize and create their own virtual bouquets.

The concept was simple in theory: an app running on a screen would let users design their bouquet, while a 3D sculpture would serve as the physical centerpiece. Flowers would then be projected onto the sculpture, turning it into a dynamic, evolving artwork.

However, as exciting as the idea was, the execution quickly became a challenge. None of us were particularly skilled at coding, and when we began developing the app using Angular, we ran into roadblocks almost immediately. Progress was painfully slow, and we were stuck trying to figure out how to integrate live projection or connect the app with tools like Resolume software. It felt like we had hit a dead end.

That’s when Michi stepped in with a fresh perspective and a bunch of new ideas. „We need to change the strategy,“ he said, introducing us to ProtoPie -a no-code UX design tool. At first, we were skeptical. Could this tool really solve our problems?

Discovering ProtoPie

To our surprise, ProtoPie turned out to be exactly what we needed. Its intuitive and user-friendly interface made it accessible, even for a team like ours with limited coding experience. We quickly got the hang of it and realized how much fun it was to use.

One of the most helpful features was its integration with Figma. This meant we could take our designs directly from Figma and import them into ProtoPie without any hassle. From there, we „coded“ interactions using simple triggers, buttons, and actions-no complicated programming required.

ProtoPie’s component-based design system was another game-changer. We could build modular elements and reuse them across the project, making the process much faster and more efficient. And perhaps the most exciting feature was the ability to preview our work at any time, which made testing ideas and iterating on them incredibly easy.

Progress at Last

With ProtoPie, we made rapid progress on our interactive bouquet project. Suddenly, tasks that felt impossible just days ago became achievable. We could focus on creativity and user experience instead of getting bogged down in technical challenges.

This journey taught us the value of adaptability and the importance of finding the right tools for the job. ProtoPie empowered us to bring our vision to life without requiring deep coding knowledge, and it opened the door to possibilities we hadn’t even considered before.

As the January exhibition approaches, we’re thrilled to see our interactive bouquet take shape, and we can’t wait to share it with the world. If you’re ever looking for a no-code solution to create interactive prototypes or experiences, we can wholeheartedly recommend giving ProtoPie a try.

Stay tuned for updates on our project – and if you’re attending the exhibition, make sure to stop by and create your own personalized bouquet!

https://www.protopie.io/learn/docs/cloud/sharing-prototypes

Impulse 03 // Crash Course Protopie Part 1

ProtoPie 101 Crash Course | ProtoPie School

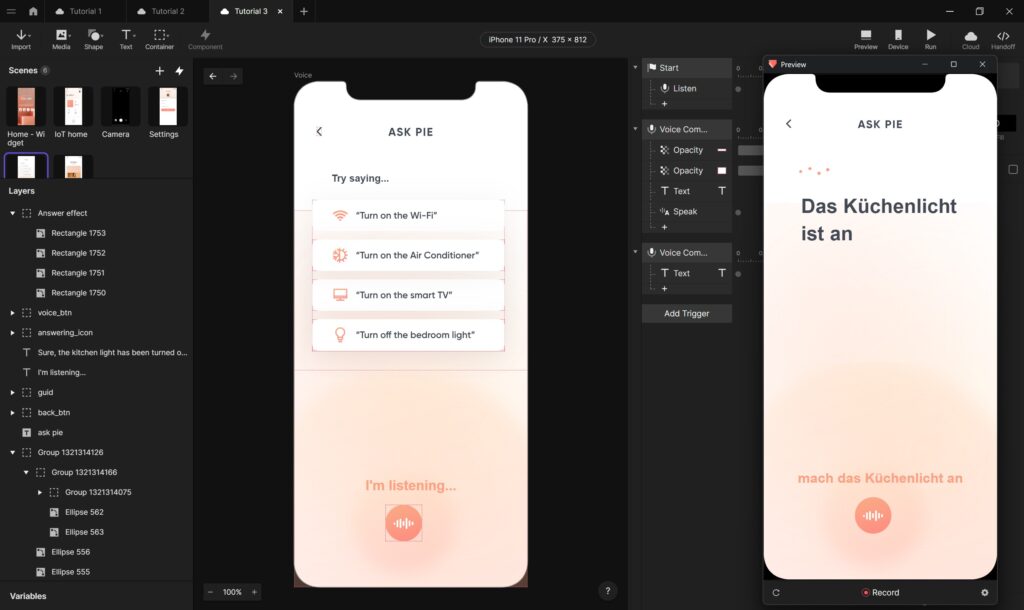
For this semester and next, we have been given the opportunity to use Protopie with a full licence as part of our studies. Because this was introduced in a subject where we could choose the topic, we wanted to work on ourselves, and the topic I chose was a group project to further develop a game we made in the first semester of the Masters. I decided to use two of my impulse blog posts to learn how to use and prototype with Protopie. Fortunately, Protopie offers a comprehensive crash course, divided into six lessons, to learn and master many of the possibilities it offers. As the course is quite extensive, I have split it into two parts, each covering three lessons of the course. So here is the first half of the course on the basics, interactive transitions & sensor-based interactions.

The course started off with a comprehensive introduction to ProtoPie. The first lesson covered the tool’s three main purposes: to create, test, and share prototypes. This was perfect for me, as I’d only ever worked with Figmas prototyping tools before. ProtoPie promised to enable more dynamic and realistic interactions.

Creating Prototypes

It started with learning how to set up our projects. The process was straightforward. Once the project was ready, we explored how to seamlessly import designs from tools such as Figma, Adobe XD or Sketch. Next, we were introduced to the basic features of ProtoPie. I learned how to create interactions by simply dragging and dropping elements. The interface was intuitive, even for someone with limited experience of advanced prototyping. Creating interactions felt like building with digital Lego – any action or trigger could be linked to create a seamless process.

Testing and Sharing

Once my prototype was ready, the next step was to test and share it. ProtoPie allows us to view our prototypes directly on devices such as smartphones and tablets, which made them tangible. I could see how the designs would work in real-life scenarios. Sharing was just as easy. I uploaded my project to the ProtoPie Cloud, which made it easy to collaborate with others. Another good feature is the interaction recordings. These allow you to document specific interactions. ProtoPie also has the functionality of Interaction Libraries, which allows teams to standardise design components. This can certainly save a lot of time on larger projects.

In the second lesson, it was time for hands-on with creating various types of interactions.

Screen Transitions

It started by teaching how to prototype automatic, semi-automatic, and fully custom screen transitions. I particularly enjoyed working on custom transitions because they allowed me to design interactions tailored to specific design case.

Scrolling and Paging

Next, the course dived into scrolling and paging interactions. I had always struggled to make scrolling interactions look good or useful in Figma. In ProtoPie the results were realistic, exactly like the scrolling you’d expect in a native app.

Sliding Menus

The last part of this lesson was designing sliding menus. We explored three different ways to create them, ranging from simple swiping gestures to more complex interactions that combined multiple triggers.

The third lesson took ProtoPie’s capabilities to the next level by introducing sensor-aided interactions. This feature truly sets ProtoPie apart from other prototyping tools because it enables designers to use device sensors without needing any coding knowledge.

Using Device Sensors

The workshop started with an introduction to using a phone’s camera in prototypes. I created interactions where the camera’s feed became part of the design. This was particularly useful for scenarios like augmented reality apps or interactive tutorials.

Input Fields and Native Keyboards

Next, the course explored prototyping with input fields and native keyboards. This feature was a pleasant surprise, as it allowed me to create realistic forms and search bars that behaved just like the ones in real apps. I can already see how this could improve user testing sessions, as participants would interact with the prototypes in a natural way.

Voice Interactions

The final part of this lesson focused on voice interactions. ProtoPie made it easy to incorporate voice commands and responses into prototypes. This feature opened endless possibilities for designing interfaces for voice-activated devices or accessibility features. I was amazed at how simple it was to implement this functionality.

The first three lessons of the ProtoPie crash course already showed a lot of possibilities in prototyping. Each lesson built on the previous one, gradually introducing more complex features. I appreciated the hands-on approach, as it allowed me to apply what I learned immediately, which is the best way for me to learn and retain things.

IMPULSE #6: Potentials and Ethical Challenges of Brain-sensing Technologies

During my research I came across multiple TED Talks, that sounded really interesting to my topic of first aid for epilepsy. I decided to run a TED Talk watching session to learn about the most recent extraordinary findings and discussions about brain-sensing technologies. I did this, because the concept of my existing prototype relies on seizure detection to start an app alert to nearby bystanders to provide first aid. I had a look on the following with TED Talks:

Forecasting and preventing epileptic seizures

David Garrett’s 2022 TED Talk, Listening to the Brain: A Functional Cure for Epilepsy, dives into how neuromodulation implants can provide a „functional cure“ for epilepsy. His research shows that it is possible to predict seizures by tracking electrical activity in the brain. Garrett explains how brain excitability levels that exceed a certain threshold lead to an electrical storm, triggering seizures. His team developed ultra-thin carbon fiber electrodes to be placed into brains of living humans. This sensor technology is integrated into an epilepsy management system. These electrodes wirelessly transmit data, allowing AI-powered algorithms to detect seizure patterns and intervene before a seizure occurs.

Garrett’s work makes an example of the immense potential of brain-sensing technology. Once it is accessible for consumers, such advancements could drastically improve the quality of life for epilepsy patients. The ability to predict and prevent seizures could make constant supervision or emergency first aid not needed anymore. However, continuous brain monitoring raises concerns about user acceptance – how comfortable would individuals be, if they know their brain activity is being monitored and potentially controlled? While the technology offers freedom from seizures, it may also introduce anxieties about privacy and autonomy.

AI wearables for seizure detection

Rosalind Picard’s 2018 talk, An AI Smartwatch That Detects Seizures, builds upon this concept by demonstrating how AI-powered wearables can recognize seizures and alert caregivers. Her work was inspired by cases of Sudden Unexpected Death in Epilepsy (SUDEP), which claims lives more frequently than sudden infant death syndrome. The smartwatch, developed by her company Empatica, runs real-time AI to detect generalized tonic-clonic seizures and has received FDA approval. This could be a game-changer for people with epilepsy, enabling immediate emergency response and reducing deaths. However, as with Garrett’s implantable devices, widespread adoption will depend on user trust and data privacy assurances. Real-time health data collection is extremely valuable for medical purposes, but it also opens the door for potential misuse.

Breaking the stigma around epilepsy

Besides technological advancements, societal perceptions of epilepsy significantly impact those affected. Sitawa Wafula’s 2017 TED Talk, Why I Speak Up About Living with Epilepsy, highlights the emotional and psychological struggles individuals face. She describes losing her job and dropping out of school due to her seizures, leading to isolation and frustration. Through online blogging and advocacy, she found a way to empower others and change the narrative around epilepsy. Wafula’s talk shows the importance of combining technological advancements with public awareness and support systems. Brain-sensing technologies can provide medical solutions, but addressing stigma and ensuring societal acceptance are equally crucial for improving patients’ lives.

Ethical dilemmas in brain data privacy

Nita Farahany’s 2023 TED Talk, Your Right to Mental Privacy in the Age of Brain-Sensing Tech, shifts the conversation towards the ethical aspects of neurotechnology. As major tech companies integrate brain sensors into everyday devices – such as headbands, earbuds and watches – brain activity is becoming increasingly transparent. Farahany warns that while brain-sensing technology has immense potential for treating conditions like epilepsy and PTSD, it also presents unprecedented privacy risks.

Brain data is more sensitive than any other form of personal data. It can reveal emotions, preferences and thoughts, raising concerns about microtargeting and behavioral manipulation. Farahany calls for the recognition of cognitive liberty as a fundamental human right, which means that individuals must have control over their own brain data. Without well-thought ethical frameworks, neurotechnology could become a tool for surveillance and control rather than empowerment.

Expanding Our Understanding of the Brain

Finally, Ed Boyden’s 2016 TED Talk, A New Way to Study the Brain’s Invisible Secrets, presents an approach to understanding the brain’s microscopically small structures. Boyden’s team developed a technique using expandable materials – similar to those found in baby diapers – to enlarge brain tissue for easier examination. By physically expanding the brain, researchers can distinguish between biomolecules and recognize structures that may be responsible for neurological diseases.

Boyden’s work emphasizes the importance of fundamental research in brain science. While neurotechnologies are advancing rapidly, they still rely on a limited understanding of brain function. By developing new ways to study the brain, scientists can create more effective examinations and medical professionals targeted treatments based on solid understanding rather than guesswork.

Conclusion

The concept for a first aid app for epilepsy I initially brought into a prototype, that is suppose to be powered by brain-sensing technology, could be of great importances in ensuring timely first aid by strangers and medical assistance. However, by integrating predictive algorithms and real-time AI monitoring, such an app would need to be shifted towards the scenario before a seizure occurs. Also if a unit is included, that prevents the brain to have electrical anomalies which would lead to non-occurring seizures, the usefulness of this app to provide first aid instruction to public bystanders significantly decreases.

However, the success of such a technology depends on trust and ethical considerations. Continuous brain monitoring comes with concerns about privacy, data security and user acceptance. If individuals are afraid how their brain data might be used or shared, they may not to use the technology. Regulatory measures and transparent policies must be in place to ensure that brain data remains protected and is only used for the benefit of the user.

Ultimately, while a first aid app for epilepsy has the potential to better first aid care, it must be developed with both innovation and ethical responsibility in mind. By addressing privacy concerns and prioritizing user autonomy, we can create a future where technology truly empowers those living with epilepsy.

Resources

https://www.ted.com/talks/david_garrett_listening_to_the_brain_a_functional_cure_for_epilepsy?subtitle=en&lng=de&geo=de

https://www.ted.com/talks/rosalind_picard_an_ai_smartwatch_that_detects_seizures?subtitle=en&lng=de&geo=de

https://www.ted.com/talks/sitawa_wafula_why_i_speak_up_about_living_with_epilepsy?lng=de&geo=de&subtitle=en

https://www.ted.com/talks/nita_farahany_your_right_to_mental_privacy_in_the_age_of_brain_sensing_tech?subtitle=en

https://www.ted.com/talks/ed_boyden_a_new_way_to_study_the_brain_s_invisible_secrets?subtitle=en
Impulse #3

CoSA – Center of Science Activities, Graz

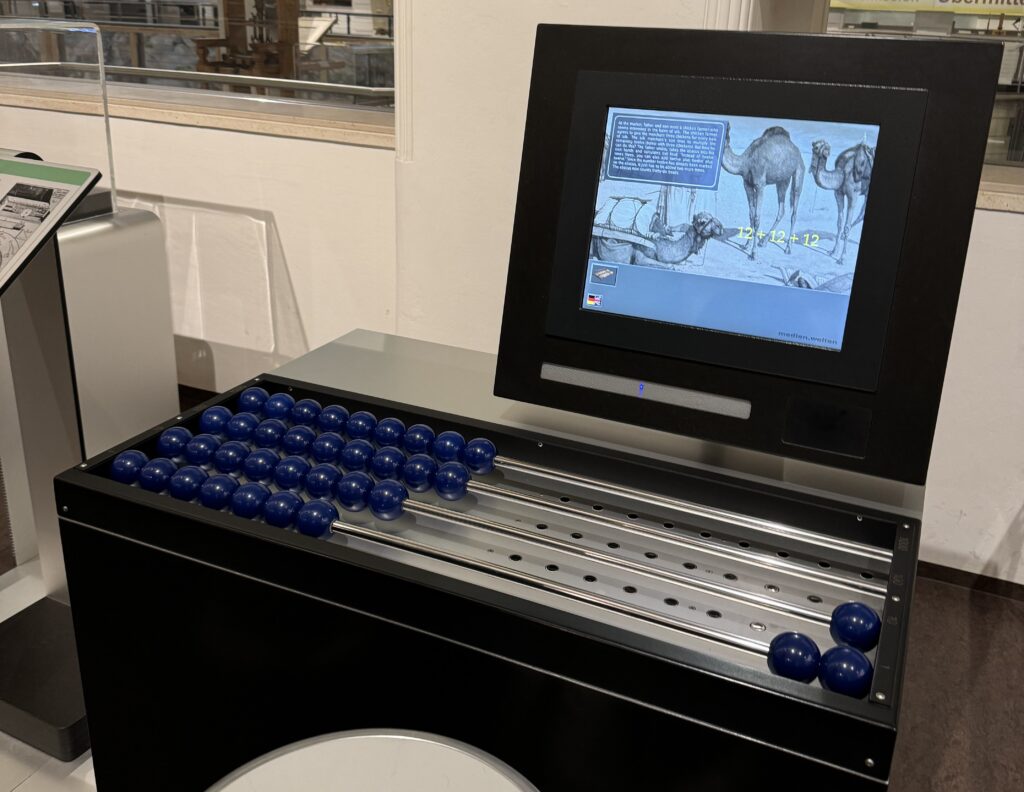
Visiting CoSA was such a cool experience, I was planning to do it for a long time, and it seemed like a perfect opportunity to somehow try to connect it to my research topic for my master thesis. The center is all about making science fun and hands-on, which got me thinking about how learning tools can be more engaging for kids, especially those with different needs.

CoSA has all kind of exhibits that approached different scientific topics, like math and physics. Instead of feeling like I was just passing through and absorbing information, I was actively involved in the learning process—solving puzzles, treating patients, building my own car… it felt more like a game than a lesson. All of this reminded me how important it is to make learning fun, rather than something stressful or overwhelming. This visit showed me that when learning is designed to be playful, it becomes more intuitive and natural for everyone.

I was really looking forward to checking out the AR exhibition, but unfortunately it was closed when I visited. I can only imagine how augmented reality could add another layer to these interactive experiences, and it made me think about the potential of digital tools in education.

I have to admit, I completely lost track of time while I was there. I felt like a kid again, excited to try everything. This made me realize how powerful interactive learning can be when it’s done right. It doesn’t just teach, it pulls you in, making you want to explore more. That’s exactly the kind of experience I want to create for my master thesis, learning that feels natural and fun.

What I Took Away From This Visit:

  • Multi-Sensory Learning Works
    CoSA does a great job of making science interactive by engaging different senses. This really connects to my research, especially for kids with autism.
  • Hands-On Learning is More Engaging
    Instead of just looking at information, visitors at CoSA get to experiment and explore. This made me think about how learning tools should focus more on interaction rather than passive learning.

My visit to CoSA really reinforced the idea that learning should be interactive, inclusive, and engaging. Seeing these concepts in action gave me a lot of ideas for my own research, and I hope to apply some of these insights to the educational tools I design in the future.

Impulse #5 – Technisches Museum Wien

Links

Medien.Welten: https://www.technischesmuseum.at/ausstellung/medienwelten

Klima. Wissen. Handeln.: https://www.technischesmuseum.at/ausstellung/klima_wissen_handeln

Energiewende: https://www.technischesmuseum.at/ausstellung/energiewende

IMPULSE #5: Last Gfü Meetup of the Year

© Institut für Epilepsie

Since I got in contact with the Institut für Epilepsie in Graz to conduct an feedback interview of my prototype earlier this year, I’ve been following their social media and website for any news regarding their institution. This was when I discovered the Gfü group („gemeinsam füreinander“), an initiative and a safe space for young people with and without epilepsy. This group meets once a month to do spare time activities and create community. It is driven by the ideas and impulses of its participants and is free of charge.

On 10th of December I got the opportunity to join one of the last meetings of the year. The Gfü group met at Hauptplatz in Graz to visit and take a walk along Graz‘ Christmas markets. We were a small group which consisted of five people. I met Tanja again, she is a certified epilepsy consultant and part of the team at Institut für Epilepsie. Along with her colleague Regina I got to know her when I had the mentioned feedback interview. Tanja was accompanied by her boyfriend. Two young persons in their twenties joined for the meetup. I was warmly welcomed and got to tell, how Tanja and I got in contact and what I do in the research for my master’s studies. It appeared to be a bit complicated to explain what I do in my research, but I knew to break it down to the core. Tanja’s boyfriend showed interest in my field of study and my topic which led us to have a nice exchange. He, who studied at FH JOANNEUM himself, works in software testing and knew about the importance of usability for digital products. He reflected my topic and its complexity would definitely be worthy of a master’s thesis.

After we went along Herrengasse and crossed Landhaushof, we got to the crossing at Schmiedgasse and Landhausgasse to have hot beverages at one of the Christmas stalls. That’s when I got to know both of the young people – for privacy reasons names and genders are not mentioned in this blog post. They asked me about my field of study and seemed interested as well. In course of the conversation we got to what they do in their lives. Without my asking and without any hesitation, they started talking about their individual forms of epilepsy. Previous to this meetup, it was important to me not to ask people about their disease actively and just have a conversation if people open up to this topic themselves. And this is what happened in the conversation between Tanja, the two young people and me.

The first person was diagnosed with focal seizures which are accompanied with side effects. This limits the person to the amount of visual and auditory stimuli that can be managed to perceive. The person told us that it was initially a plan to study music, but had to abandon the studies when the diagnosis with epilepsy came up. In general focal seizures emerge from just one part of the brain. Symptoms can greatly vary such as intense feelings, loss of sensory like smelling or tasting, change in consciousness, unusual and repetitive behavior. Before a focal seizure affected persons experience an aura, an upcoming feeling that a seizure is about to occur. When a focal seizure is over some people experience headache or muscle pain.

The other person has experienced generalized seizures. It must have been a drunken feeling with a narrowed field of vision and muffled hearing. The person was on their own and and watering plants in the garden when the first seizure occurred. While having a seizure the person picked up the phone, but was not able to speak properly. After this incident the person did not remember anything that has happened. Because of the diagnosis, the person decided not to go abroad for a year. Generally speaking, generalized seizures are originating from both sides of the brain. It can be characterized with loss of consciousness, falls, massive muscle contractions and weakness, staring into empty space and repeated jerking movements.

As I quickly noticed, both persons in their twenties were limited in their life choices due to the fact that they were diagnosed with epilepsy. This contact with people with epilepsy was important to me. This contact with people with epilepsy was important to me. Not only did I get in touch with people with epilepsy, but I also learned something for my own life. The disease with a thousand faces, but rarely visible, is not something you would expect a person standing in front of you to have. Reflecting on this, but not wanting to feel sorry for anyone, makes me realize how fortunate I am for my physical health. Epilepsy can affect one in ten people during their lifetime, but the majority remain unaffected. The fact that there are a lot of other possible diseases a person can have, which comes with a certain probability of being affected, makes us unaffected extremely lucky. It is something we should not take for granted.

Resources

https://www.facebook.com/photo?fbid=995075082664321&set=a.479284970910004
https://www.institut-fuer-epilepsie.at/gfue-gruppe/


https://www.ninds.nih.gov/health-information/disorders/epilepsy-and-seizures

IMPULSE #2 – World Usability Congress – Day 2

On the second day, I particularly liked the lecture by Karen Hawkins called Accessible Design Considerations for Styles, Components, Patterns, and Pages. I liked the design and the way the content was presented, but she also covered all the essentials when designing in the digital world. Accessible design is not just a technical item that we „add“ at the end – it should be the foundation of the design process, ensuring that digital products are accessible to everyone, including people with vision, mobility or cognitive challenges. Below, I’ll share key things I learned from the talk and how I can use them in design.

Karen compared design systems to Lego bricks – they contain reusable components, clear standards, and guides. I especially liked the systems approach – instead of adding accessibility as an afterthought, it’s built into the foundation of the design. However, to be accessible, each layer of the design system must include specific accessibility requirements:

  1. Styles: Colors, typography and grid must be designed with clear contrast and proper hierarchy.
  2. Components: Interactions should support a variety of input methods – keyboard, voice commands, touch gestures.
  3. Patterns: Reading order, navigation, and feedback should be logically laid out.
  4. Page templates: Users should be provided with additional navigation options, such as skip links and orientation elements.
  5. Pages: Content should be simple, clear, and understandable.

One of the first steps in design is choosing colors and typography, but we often forget how crucial they are for accessibility. She said that the minimum contrast for text should be 4.5:1, and for key elements like button 3:1. If we want AAA standard, the contrast should be 7:1. Also, the typography must be large enough, with good spacing between letters and lines. Also very important is avoiding color as the only visual signal – instead, we can use icons, underlining or bold font for emphasized information. Designers often use color to indicate an error (e.g., red text for a form error), but Karen pointed out that not everyone can see red text. The solution is to add icons, text descriptions or animations. Also, she mentioned the components, this part was new to me and because of that very interesting. Components are the building blocks of digital products, so it is important that they support different input methods. For example keyboard interactions – every element must be accessible without a mouse, with clearly defined focus indicators. She also mentioned support for screen readers such as buttons, links and forms. They must have clear descriptions, not just visual labels. The last thing she mentioned about it is the size of the target areas. Clickable elements must be at least 24×24 px (and ideally 44×44 px). Karen also shared an example of a button and its states – normal, hover, focus, inactive – to show how consistency is key.

She talked about how navigation and forms are often problematic points in design, and if we don’t structure them properly, users easily get lost or need too many steps to complete a task. As a solution, we can introduce skip links that allow users to skip repeating elements (like long menus). A clear content hierarchy is also important because screen reader users need a logical reading order, without jumping around. And we must not forget about feedback. When a user fills out a form or clicks on a filter, they need to get a clear answer as to what happened (text message, animation, change colors). Finally, Karen highlighted how the structure of the page and language are key to accessibility. What she mentioned was that headings need to clearly show the structure of the content and that using simple language helps people with cognitive disabilities. For example, instead of complicated instructions, it is better to is to use short, clear sentences.

What have I learned?

Small changes, like better contrast or larger buttons, can make a big difference. I can see how I could apply these principles to my work – whether through better readability of content, clearer navigation elements, or a combination of physical and digital design. I’m very glad I attended this lecture.