Introduction
After conducting a thorough analysis of different research papers and exploring various existing authoring tools, I embarked on the journey of developing my own prototype. This process involved the examination of the strengths and weaknesses of each tool, as well as an in-depth understanding of the theories and methodologies presented in each research paper. With this knowledge, I then proceeded to apply what I had learned to the creation of my prototype. The objective of this blogpost is to document the process that I underwent during the prototyping phase.
Methodology
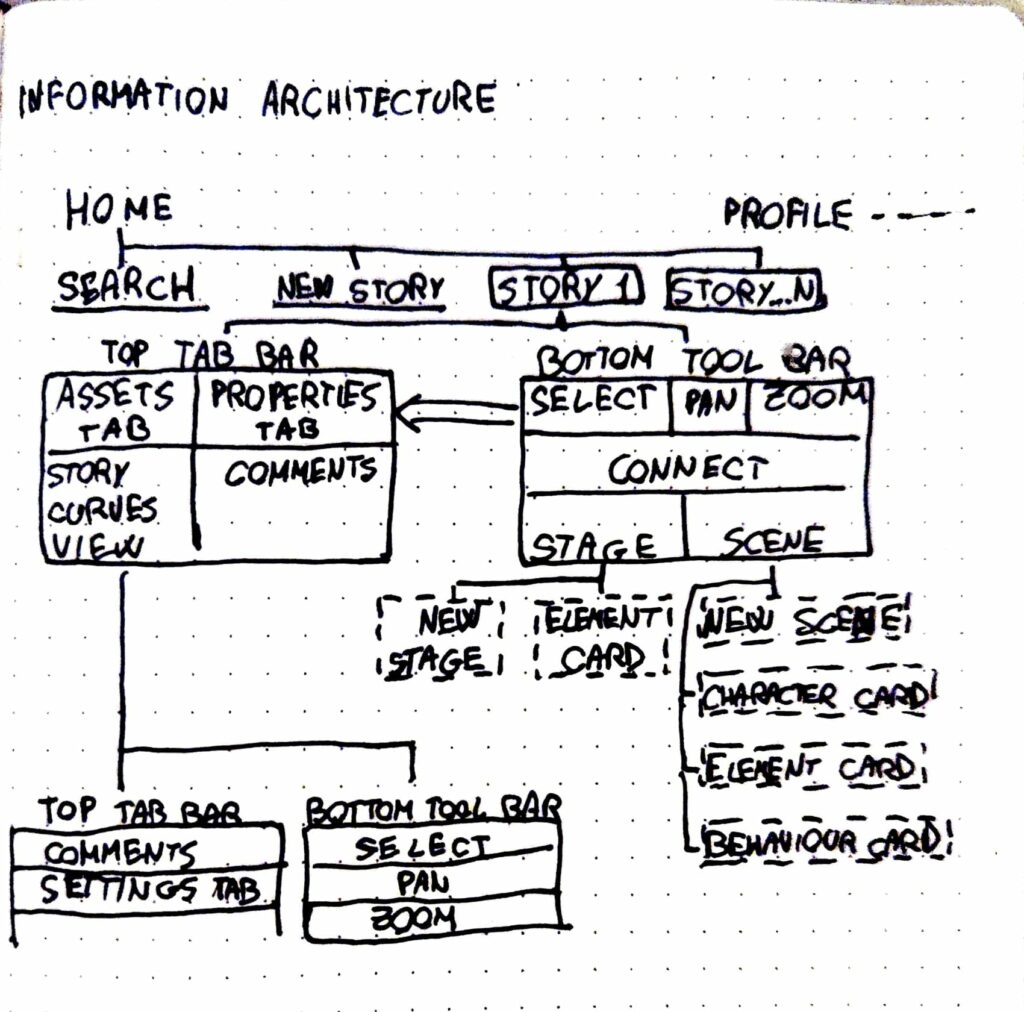
I began by listing all the sections I wanted to reimplement from StoryTec, including the G-Flash card system and Story Curve Visualization mode.
- Story Editor: This is a free canvas where users can drag, resize, move, and zoom in and out of elements.
- Scenes: These contain characters, interactive elements, and behaviors such as actions, dialogue, and events.
- Complex Scenes (which I’ll refer to as Stages): These are the environments where scenes take place. They contain stage-specific elements and, of course, the scenes themselves.
- Stage Editor: In StoryTec, this was a pluggable framework capable of constructing scenes in various ways. For ease of use, I will integrate this as a function of the Story Editor, utilizing a toolbar with drag-and-drop flashcards, similar to G-Flash. In my version, the cards will be fully customizable through the Property Editor.
- Property Editor: This is a separate tab that adapts based on the selected item. It can add any kind of property to any element.
- Action Set Editor: In StoryTec, this was a separate editor for setting the logic between element interactions. In my prototype, it will become a button in the Tool tab, connecting elements similarly to how Figma handles prototyping.
- Asset Manager: A separate tab where uploaded assets can be dragged and dropped either onto the open canvas as images, videos, or sound, or onto elements as properties.
- Story Curve Visualization: This is an option in the top bar that changes how the scenes are displayed, toggling from the free canvas to a double-axis view of the Story Curve.
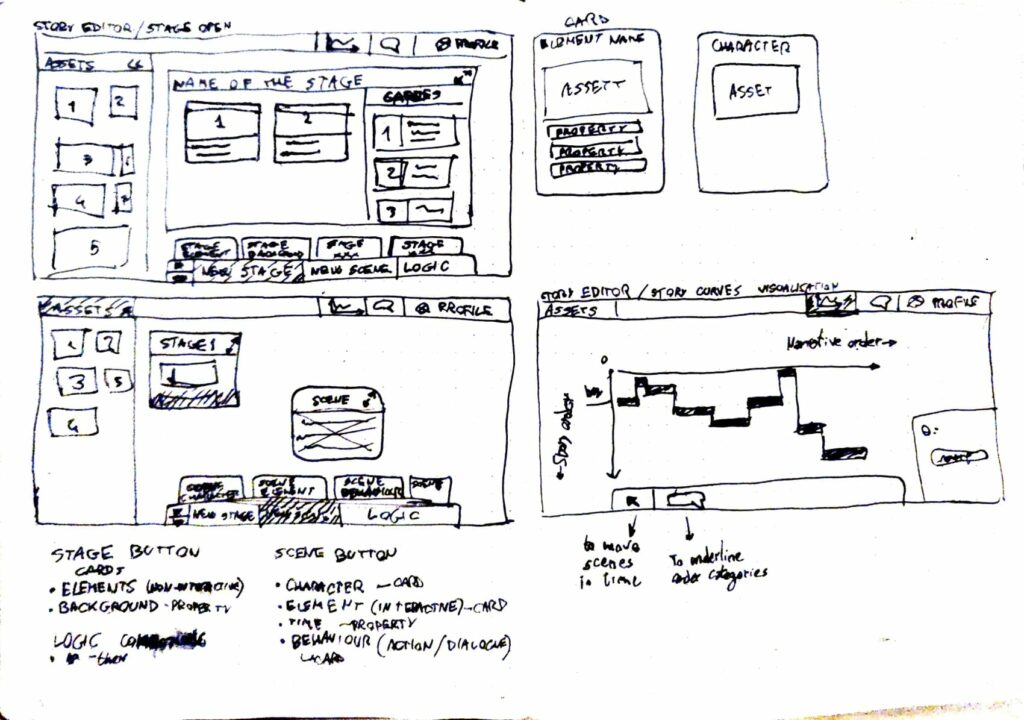
After identifying the core features and buttons for my tool, I sketched a basic information architecture on paper. Following this, I created preliminary wireframes to visualize the page’s layout.
Pages, tabs and cards
Starting from the sketches, I prototyped a low-fidelity version of the main pages for my authoring tool.
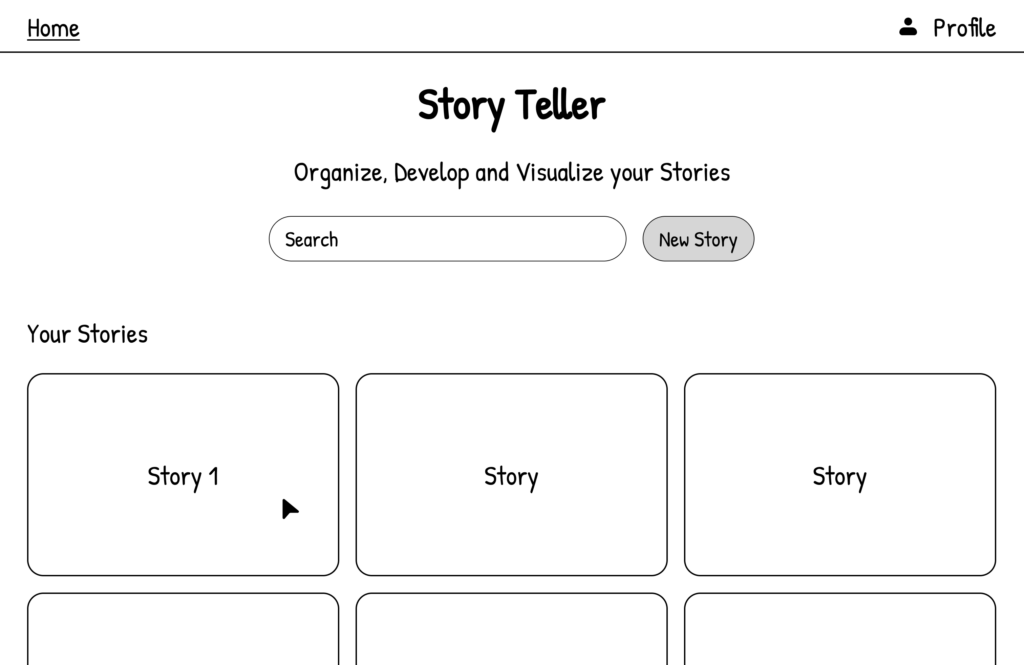
The home page displays all the stories that a user might want to create, presented in a straightforward gallery.

Each Story file features an „infinite“ zoom canvas where elements, cards, and assets can be dragged and dropped, resized, opened, and minimized. This design maximizes flexibility of thought.

When an element is clicked, the Properties tab displays all details of that specific instance, and allows the creation of new properties if necessary. These properties can be used and referenced as logic variables when establishing connections between elements.
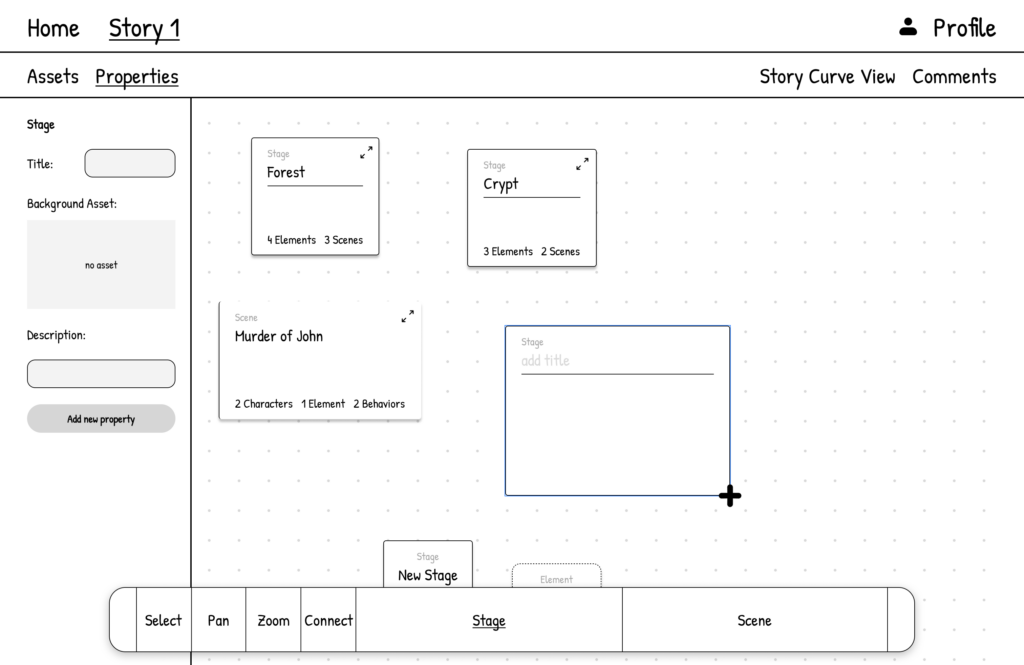
The Stage button in the Bottom Tool Bar offers two main interactions: the New Stage card and the Element card. Both can be dragged onto the canvas and resized to create the desired composition.

Similarly, the Scene button in the Bottom Tool Bar enables the user to draw a new scene or select one of the cards for characters, elements, or behaviors.
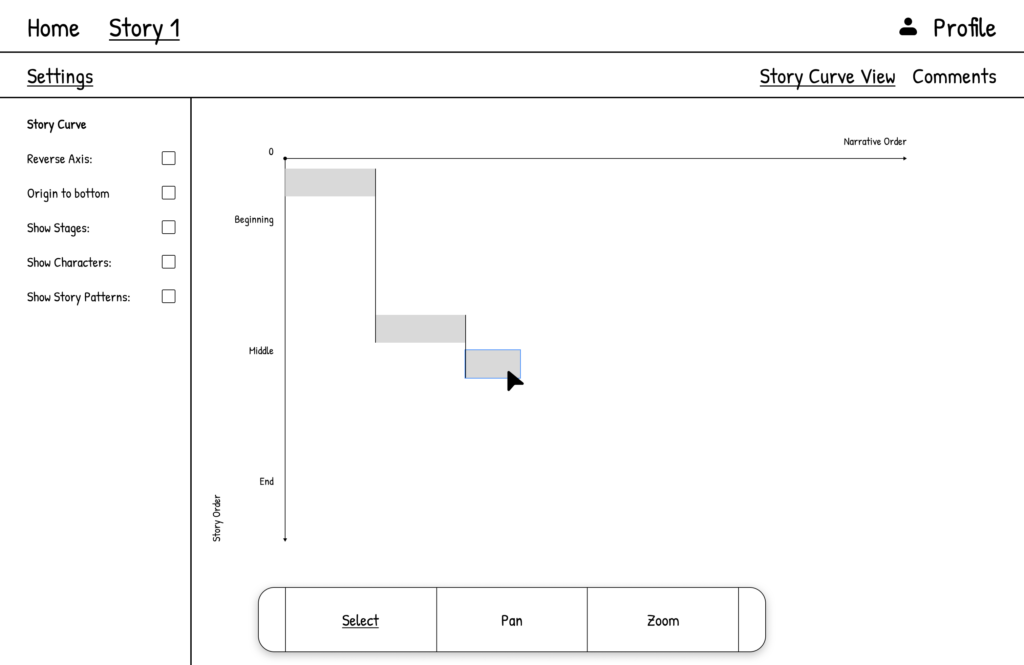
Finally, the Story Curve View visualizes different scenes on the Narration order/Story order axis. You can personalize this visualization using the settings tab.
Goals & Conclusion
The main goal of this prototype is to thoroughly test the usability of various complex features, particularly for beginners and new storytellers. I aim to conduct an extensive user test to gain insights into whether the basic principles of User Experience (UX) are being followed and function as intended.
After initial testing and result analysis, I’ll create a higher fidelity prototype. This version will focus more on the user interface, using feedback from the initial tests to ensure a smoother, more intuitive user experience.
In my next blog post, I’ll show the main features of this prototype through a detailed demo video. This will help me show the tool’s functionality and potential.