Schlagwort: UnrealEngine
Unreal Journey 7 – Final Steps
Unreal Journey 7: Final Steps
With all the core functionality in place, the final steps of my Unreal Engine project involve fine-tuning interactions, decorating the scene, and setting up the final camera. These steps are crucial for transforming the technical elements into a cohesive and visually stunning piece of interactive art.
Interaction
The first task was fine-tuning the interaction mechanics. This stage involved several iterations to ensure that the interactions felt natural and intuitive. I spent a significant amount of time adjusting the responsiveness and fluidity of the controls, ensuring that the user experience was smooth and engaging. This fine-tuning is essential for maintaining immersion and enhancing the overall quality of the scene.
Importing Assets
To enrich the visual appeal of the scene, I imported various assets and materials from the Quixel library. Quixel’s high-quality assets significantly improved the realism and detail of the environment. Additionally, I imported a futuristic eye model from the internet, which I planned to control via OSC. Integrating these assets required careful adjustment to ensure they blended seamlessly with the rest of the scene.
Post-Processing
A considerable amount of effort went into post-processing to achieve the desired aesthetic. I aimed for a colder, more eerie look to match the futuristic theme of the scene. This involved tweaking color grading, contrast, and adding effects such as bloom and vignette. Post-processing is a powerful tool in Unreal Engine, allowing me to significantly alter the atmosphere and mood of the scene.
Terrain
I sculpted the terrain to match the envisioned layout of the scene. This step involved shaping the landscape to create a believable and immersive environment. The terrain sculpting tools in Unreal Engine are intuitive and powerful, allowing for detailed and realistic terrain creation. After sculpting, I applied textures and materials to give the terrain a polished look.

Camera
Setting up the camera was a critical step in finalizing the scene. I positioned the camera to capture the most compelling view of the environment, ensuring it worked like a real camera. Unreal Engine’s camera system allows for advanced setups, including the use of camera cranes and dollies, although for this project, a simpler setup sufficed.
One challenge I encountered was getting Unreal to render the scene through the camera in Play mode. This process is less straightforward compared to Unity, where switching to the camera view in Play mode is more intuitive. Despite this, I managed to configure the camera to achieve the desired perspective and visual impact.
Final Thoughts
These final steps were integral to bringing my project to life. Fine-tuning interactions, importing and integrating assets, enhancing the scene with post-processing effects, sculpting the terrain, and setting up the camera all contributed to creating a polished and immersive piece of interactive art.
You will see the Final Result of thiis semesters prototype in my next Blog Post.
Unreal Journey 6 – Interaction
Unreal Journey 6: Interaction
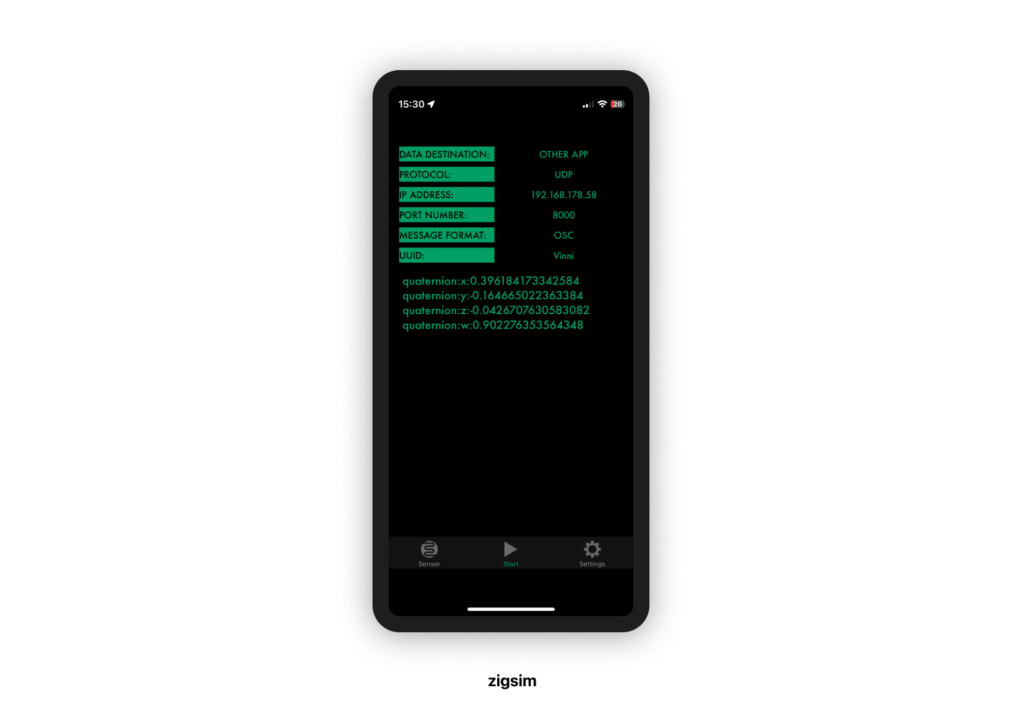
Creating an interactive scene is crucial for immersive experiences, so my goal is to implement smartphone-controlled interaction within Unreal Engine. This involves using Zigsim for iOS to capture Quaternion x, y, and z values from my iPhone, sending these values via OSC (Open Sound Control) to my Unreal project, and building a Blueprint to read these values and control the rotation of a 3D object.
Setting Up Zigsim
First, I set up Zigsim on my iPhone. It’s essential to choose the correct sensors in the app and configure it to send data to the IP address of the computer running Unreal Engine. The port number must also be correctly set—in my case, it’s 8000.
Working with Blueprints
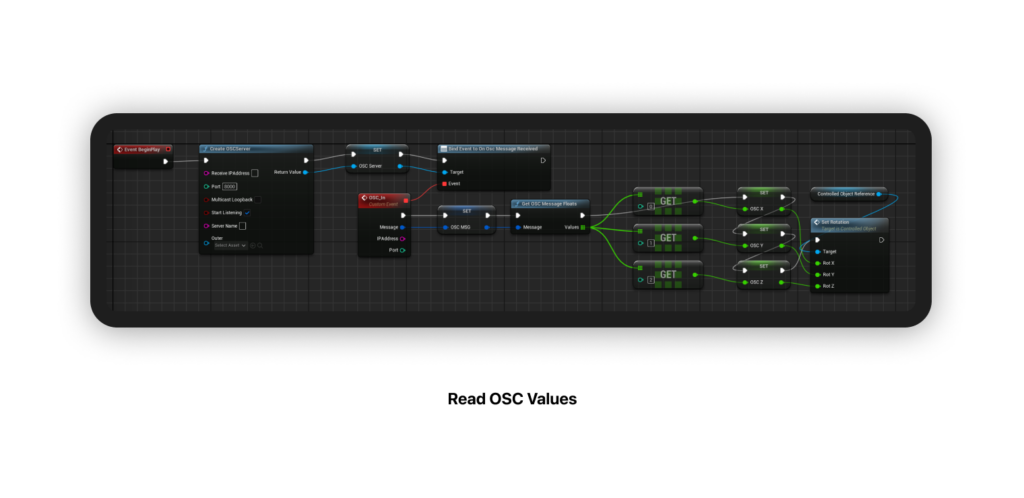
The next step was integrating the OSC data into Unreal Engine using Blueprints. This process was more complex than anticipated, especially figuring out how to read the OSC data and split it into three separate variables for x, y, and z.
Receiving OSC Data
To extract the Quaternion values from the OSC message, I used the „Get OSC Message Floats“ node. This node retrieves all float values from the received OSC message as a float array. To isolate the first three values (representing x, y, and z), I employed three „GET (a copy)“ nodes, indexed at 0, 1, and 2. These values were then stored in variables OSC X, OSC Y, and OSC Z.
Implementing Rotation Logic
Next, I created another Blueprint to manage the 3D object’s rotation. This Blueprint included the mesh of the object and an event graph to handle the rotation logic. I introduced a custom event, „SetRotation,“ with three float parameters: Rot X, Rot Y, and Rot Z, which received values from the previous Blueprint. These parameters were fed into a „Make Rotator“ node to control the self-rotation of the actor.

Fine-Tuning and Testing
The final step involved fine-tuning the rotation values and adjusting the axes to ensure natural movement. This required several iterations to get the interaction feeling intuitive and responsive.
Conclusion
Implementing smartphone-controlled interaction in Unreal Engine was a challenging but rewarding experience. By leveraging Zigsim and OSC, I could create a dynamic and interactive scene that adds significant depth to the project. The complexity of setting up Blueprints to handle real-time data highlights the flexibility and power of Unreal Engine in creating interactive environments. I am very excited to die deeper into this Interaction methods in the future!
Unreal Journey 5 – Materials
Unreal Journey 5: Materials
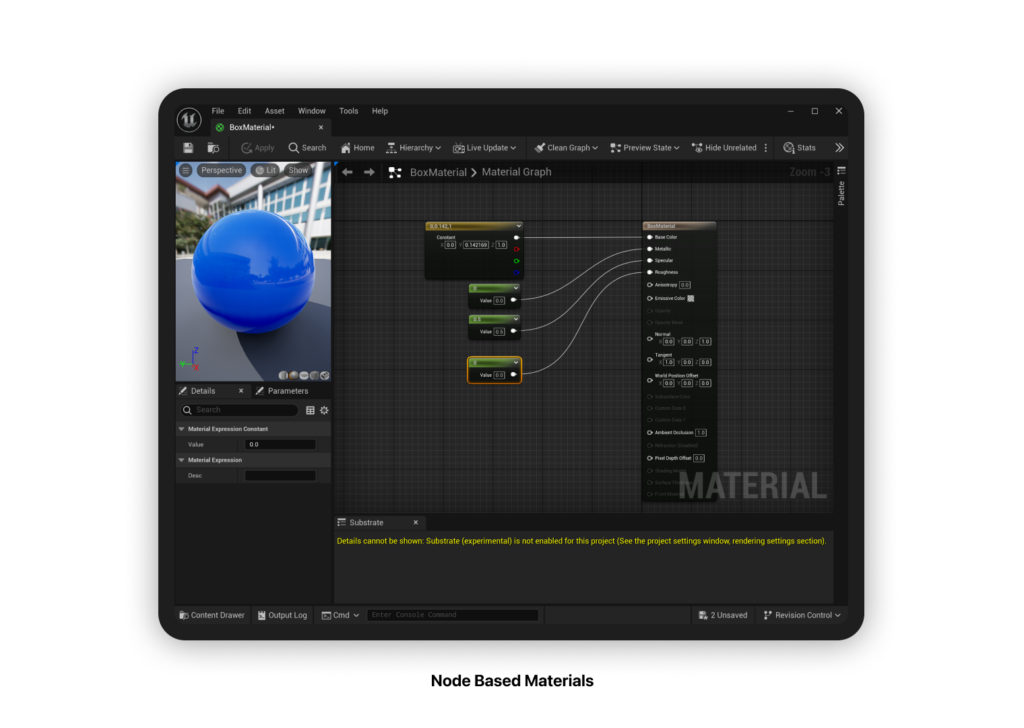
In Unreal Engine, materials are created using a node-based system, similar to Unity’s Shader Graph. This approach offers a flexible and powerful way to create complex materials and shaders.
Real-Time Global Illumination with Lumen
One of the standout features in Unreal Engine is the Lumen system, which provides real-time global illumination. This means that the colors of your assets can actually bleed onto other objects, enhancing the realism of your scenes.

Quixel <3
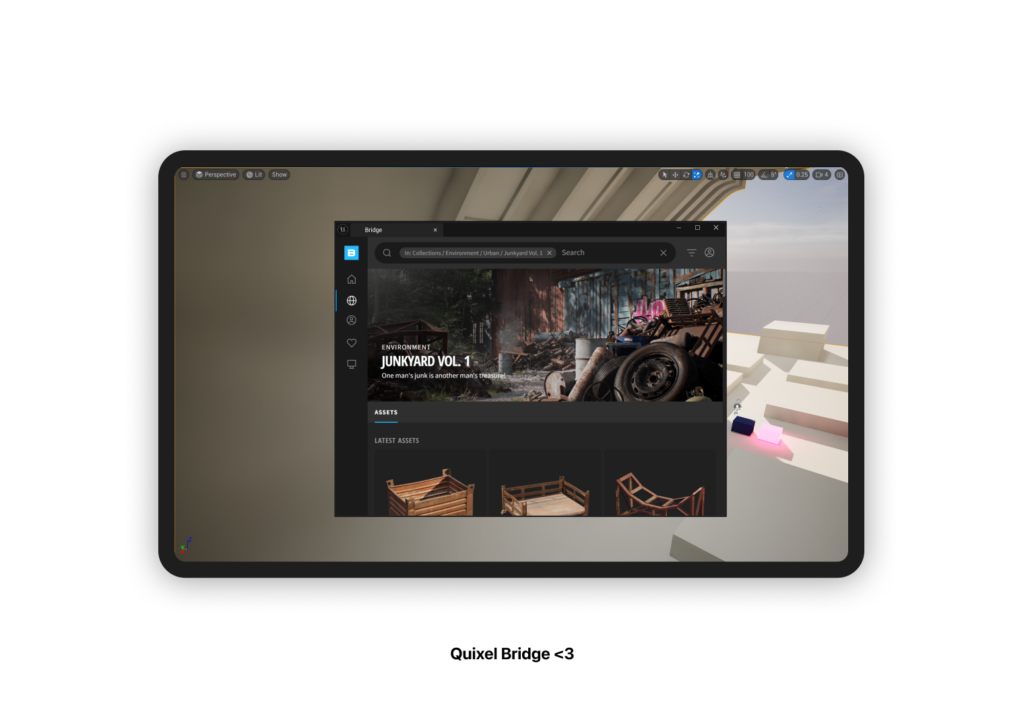
Epic Games‘ acquisition of Quixel is a game-changer. Now, I have free access to the entire Quixel Library, which includes a vast array of 3D scans, materials, and imperfections. The integration with Unreal Engine through Quixel Bridge makes this a seamless workflow.
Prototype
I started texturing my hangar using materials from the Quixel Library. However, I quickly encountered an issue with noticeable repetition on large surfaces like the hangar floor. To address this, I borrowed material setups from Unreal’s starter assets, which come pre-configured with various imperfections and overlays to create a seamless look.

Unreal Engine’s modeling feature includes a UV unwrap tool, which is essential for ensuring that materials don’t stretch on certain surfaces. I used this tool to unwrap the UVs of the hangar, achieving more uniform and professional-looking textures.
Conclusion
Unreal Engine’s material system, combined with the power of the Lumen global illumination and the vast resources from the Quixel Library, provides an incredible toolkit for creating high-quality textures and materials. The built-in UV unwrap tool further enhances the workflow, ensuring that textures are applied correctly and look great. This journey into materials has been enlightening, and I’m excited to see how these tools will elevate my hangar project.
Unreal Journey 4 – Lighting
Unreal Journey 4: Lighting
In this chapter, I want to share my experience with lighting in Unreal Engine. Setting up the lighting for a scene can be overwhelming, especially when you’re used to Unity’s system. Fortunately, Unreal Engine offers a handy tool under Window > Env. Light Mixer. This tool allows you to easily create and manage all the necessary game assets for lighting.

One of the coolest aspects of Unreal’s lighting system is that light intensity is measured in lux, similar to Unity’s HDRP. This allows for physically accurate lighting setups using real-life settings. All other light parameters can also be adjusted to match their real-life counterparts, which is fantastic for achieving realistic renders.
Key Features
Lux Measurement:
- Allows for physically correct images using real-life light settings.
Adjustable Point Light Length:
- You can change the length of a point light and utilize real-time area lights. This is something Unity lacks, making Unreal stand out in terms of flexibility.
Built-in Volumetrics:
- Unreal Engine comes with built-in volumetrics, eliminating the need for HDRP or third-party plugins to achieve cinematic volumetric fog. This is a significant improvement over Unity, where such features often require additional plugins.

Practical Application
For my scene, I aim to simulate large lights on top of the hangar. Using area lights, I experimented with different settings until I achieved a satisfactory result. At this stage, the lighting doesn’t have to be perfect as I can always tweak it later on.
Conclusion
Unreal Engine’s lighting tools provide a comprehensive and flexible system for creating realistic and visually stunning scenes. The integration of real-life light settings and built-in volumetrics makes it a powerful tool for any developer looking to create high-quality visuals. Stay tuned for more updates as I continue to explore and refine my scene.
Unreal Journey 3 – Modelling pt. 2
Continuing my exploration of Unreal Engine’s modeling capabilities, I discovered a feature-rich tab called “Model” within the Modeling Mode. One particularly powerful option here is “PolyGroup Edit,” which allows for extensive mesh manipulation similar to what you’d find in 3D software like Blender or Cinema 4D.
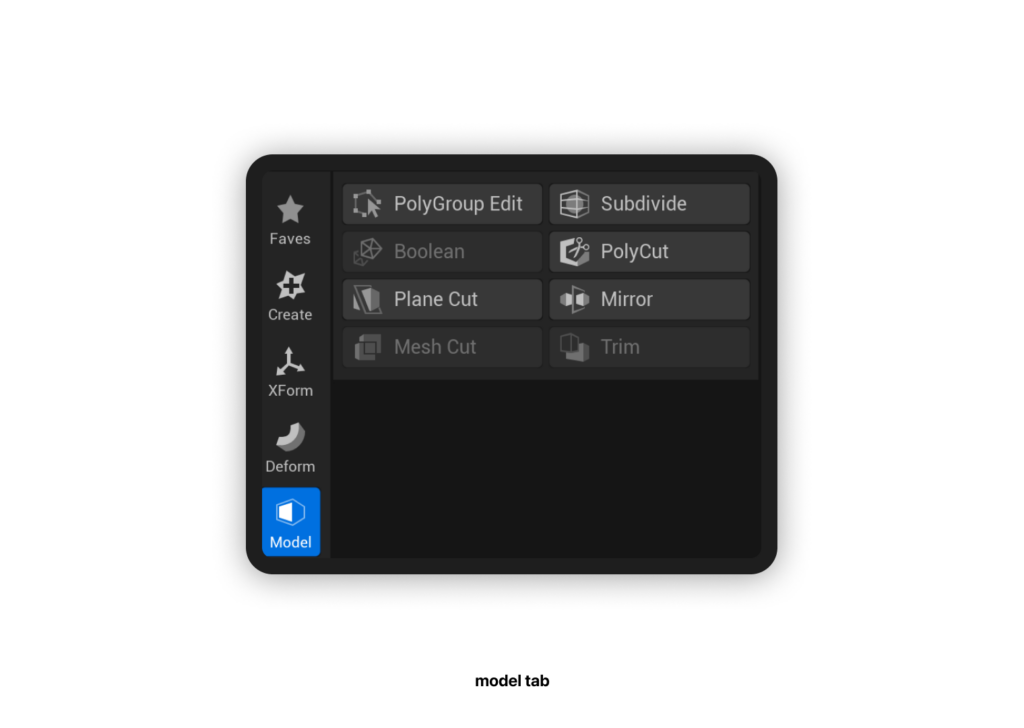
PolyGroup Edit:
This tool offers the flexibility to edit and refine your mesh directly in Unreal Engine, eliminating the need to switch between different software for detailed modeling tasks.
To further develop my hangar, I wanted to add some intricate details to the walls. Using Unreal Engine, I created edge loops directly within the platform. This seamless integration means I no longer need to export my models to Blender for such modifications, which I find incredibly efficient and convenient.
After creating the edge loops, the next step was to extrude them to add depth and detail. As shown in the video, it’s crucial to extrude faces along the direction of their normals. Extruding in a single world direction can result in unintended distortions. This method allows for more precise and accurate modeling within the scene.
One challenge I’m still facing is getting used to Unreal Engine’s camera controls, as I’m accustomed to Unity’s layout. This adjustment period is evident in the video, where my navigation isn’t as smooth as I’d like. However, I’m confident that with more practice, I’ll become more proficient.
Finally, I added some finishing touches, like beveling edges, to refine the model further. Beveling helps soften edges and adds a more polished look to the overall structure, enhancing the visual appeal of the hangar.
Overall, the ability to handle complex modeling tasks within Unreal Engine without needing external software is a game-changer for my workflow. This integrated approach not only saves time but also keeps me more engaged in the creative process. I’m excited to continue refining my skills and sharing my progress.
Unreal Journey 2 – Modelling
Discovering Unreal Engine’s Built-In Modeling Tools
As I dive deeper into Unreal Engine, I’ve been pleasantly surprised by its sophisticated modeling capabilities, which are now natively built into Unreal Engine 5.4. This feature is incredibly useful for quickly prototyping various elements within the engine itself.
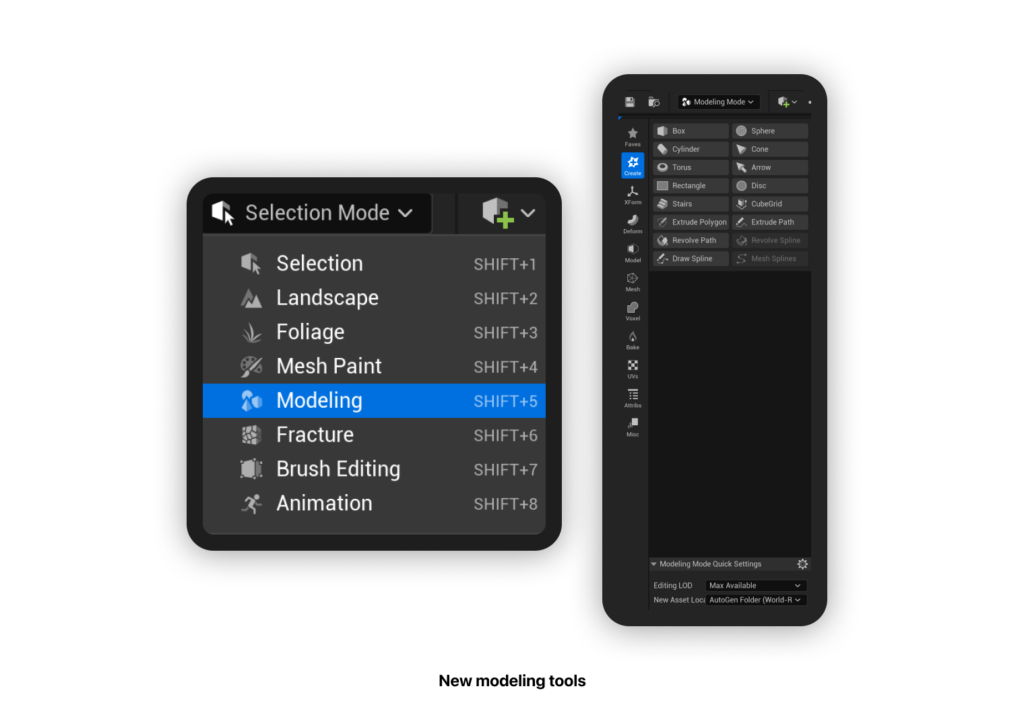
Unreal Engine allows the creation and manipulation of high-poly models directly within the platform. This integration is particularly advantageous compared to traditional 3D modeling software because it includes preset models, like stairs, which are essential for building game levels swiftly.
Powerful Tools for Rapid Prototyping
One of the standout tools for quick prototyping and blocking is the Cube Grid tool. This tool enables developers to rapidly create shapes and structures, facilitating a more streamlined workflow when sketching out ideas and concepts.
Given my goal to create a spaceport for my prototype scene, I found the extrude box tool incredibly helpful. This tool allows the creation of complex shapes by extruding boxes, making it easier to design intricate structures and environments.
Advantages Over Traditional 3D Modeling Software
Model Presets:
- Since Unreal Engine is primarily a game engine, it includes various model presets designed for game development. This feature is perfect for quickly building levels and environments without the need for extensive modeling from scratch.
Integrated Environment:
- Working within Unreal Engine eliminates the need to switch between different software. You can model, texture, and implement your assets all within one ecosystem, which speeds up the development process and reduces compatibility issues.
Real-Time Feedback:
- The ability to see real-time feedback and adjustments in the game engine is a significant advantage. This feature allows for immediate testing and iteration, ensuring that your models look and perform as expected in the final environment.
Looking Ahead
With these powerful modeling tools at my disposal, I’m excited to continue developing my hangar scene that I chose for this prototyping project. The ability to create and manipulate high-poly models directly within Unreal Engine has streamlined my workflow and enhanced my creativity. The only problem I already encountered is that Unreals modelling Tool is still very buggy.
Unreal Journey 1 – The Beginnings
Why Unreal Engine?
Unreal Engine currently holds a technological edge over Unity, particularly in terms of visual fidelity and feature releases. While Unity is beginner-friendly, Unreal offers more sophisticated tools for creating AAA-quality graphics. I’m particularly interested in developing interactable art pieces and motion graphics, a type of media that is gaining increasing attention. This blog will document my journey of learning Unreal Engine, culminating in the creation of a small, interactive art piece prototype.
Differences Compared to Unity
- Camera Movement in Viewport:
- The camera doesn’t pan around the selected object but „looks around.“
- Use the right mouse button to navigate with WASD keys.
- One-handed navigation is possible by pressing the left mouse button.
- Content Drawer:
- Closed by default, open with Ctrl+Space.
- Transforms:
- Measured in centimeters (cm) instead of meters (m).
- Sun Position:
- Hold Ctrl+L and move the mouse to change the sun’s position.
Difficulties at This Stage
I encountered an issue where the exponential height fog did not show in the viewport. The fix was to press Alt+F.

Current Worries
I’m concerned about whether ChatGPT can assist me as effectively with Unreal Engine as it did with Unity. Since Unreal Engine heavily relies on Blueprints, I can’t simply copy and paste code from ChatGPT.
XR 12.1 // New Start
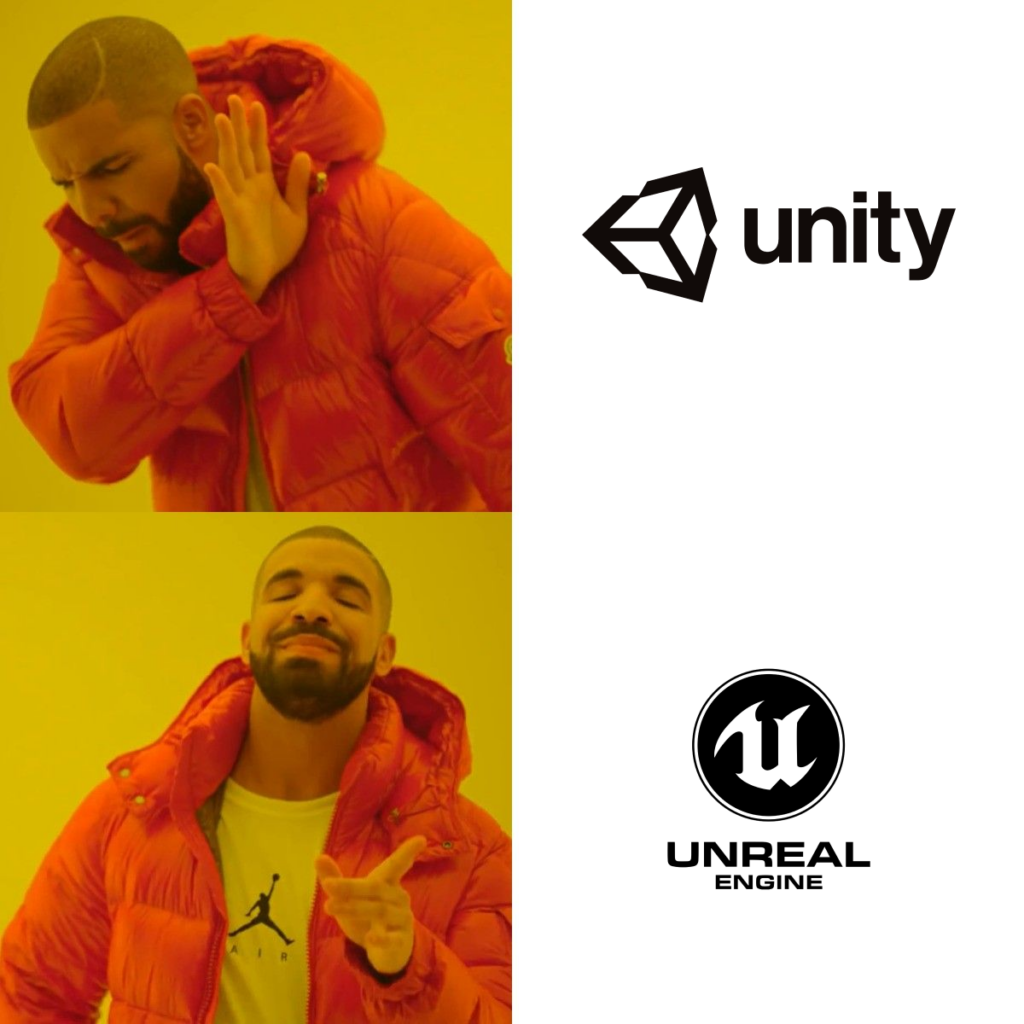
I got so frustrated with Unity’s increasing restrictions and issues, I’ve decided to temporarily abandon my current prototype and shift to learning Unreal Engine. My goal for this semester is to create an interactive prototype using Unreal, starting with a sci-fi scene to grasp the basics, then adding interactivity through a smartphone or game controller. This change aims to leverage Unreal’s capabilities for more complex and visually stunning interactive and XR experiences.
