🟦 03_Diving into TouchDesigner

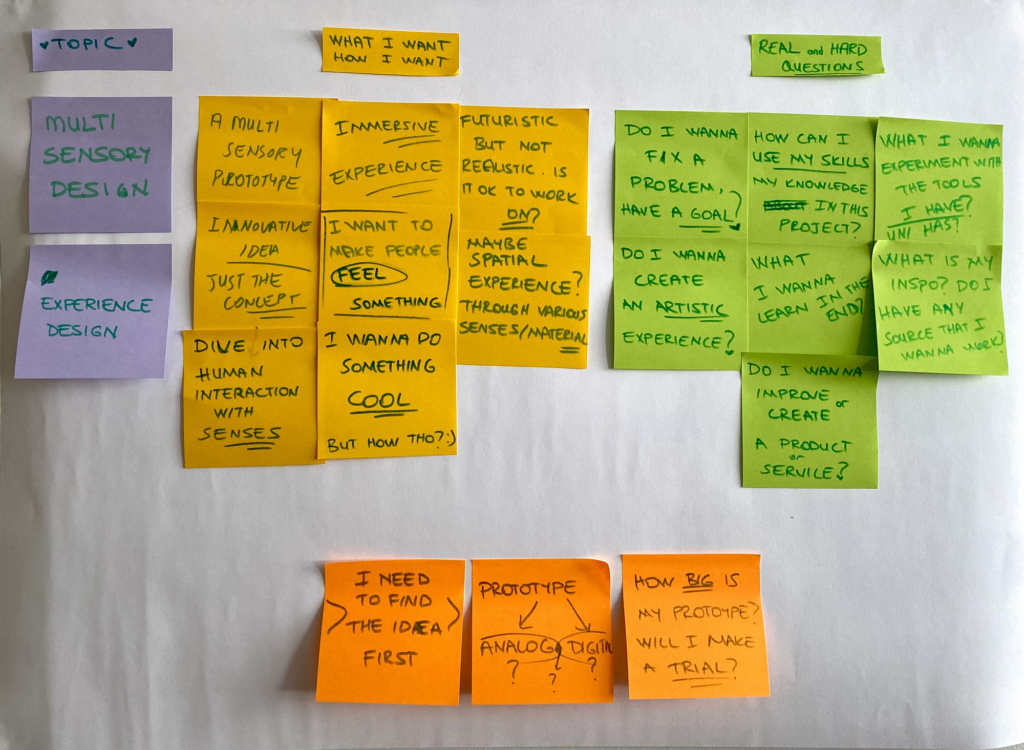
After deciding on my topic, I gathered some tutorials from YouTube to help with my data visualization project. I aimed to create something using lines so I could showcase the differences between various languages.

Moodboard for visualization

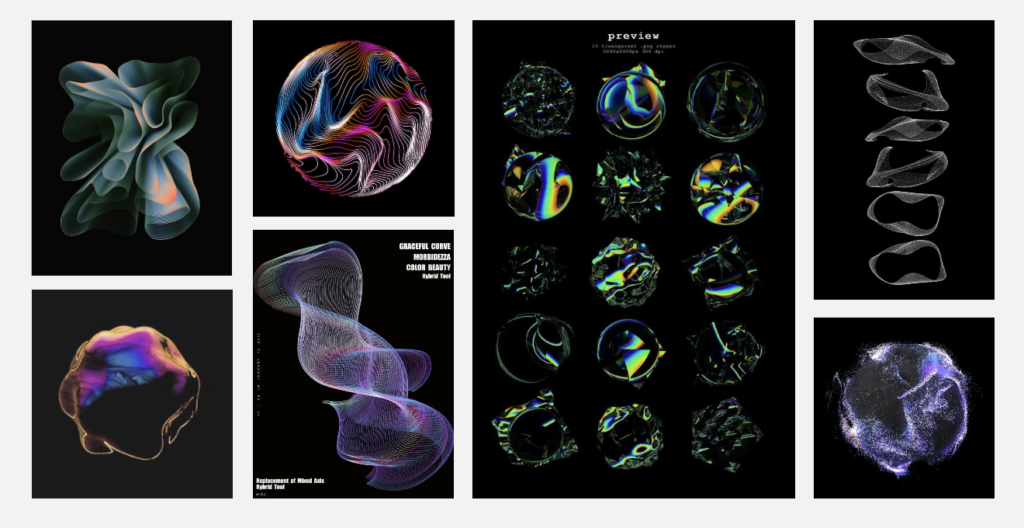
I believe using line shapes will effectively highlight the audio differences between different language inputs. Lines also have a clean, aesthetic look that I think will result in a visually appealing project. However, with my limited knowledge in TouchDesigner, I am not sure if I can achieve the exact outcome I envision. Therefore, I will experiment with some tutorials and see which ones work best. I’m really excited to dive into TouchDesigner and learn more!

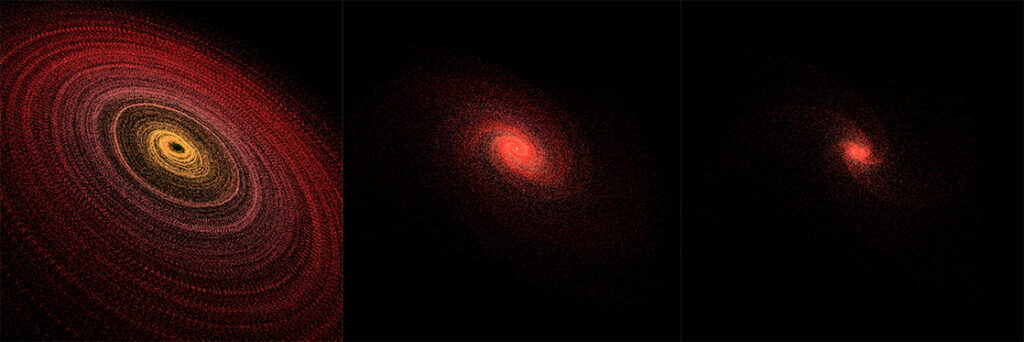
First Attempt – Successful!

I followed this tutorial and found the beginning challenging because it focused on making the project audio-reactive from the start. My first step, however, was to create the visual aspect. The initial outcome didn’t quite meet my expectations as it resulted in a line that moved randomly. Randomness might not be ideal for my project since I want to compare different letters clearly.

Above, you can see my initial outcome. With some modifications and added audio reactivity, it might work for the prototype phase. I’m satisfied with the progress so far, but I plan to either refine this outcome further or try other tutorials. I believe having multiple visualization options will be beneficial during the testing phase.

Next Step

I will continue working through more tutorials, focusing on making the visualizations audio-reactive. Then, I’ll choose the one that fits the best! My goal is to create a dynamic, clear and aesthetic visualization that shows the differences between various languages through their audio characteristics.

17 | MB > CO2 by Thijs Biersteker 🌱

🟦 02_Ideation Feedback & Topic

After my long and confusing ideation process, I had my 15-minutes talk with Birgit Bachler that really got me thinking about my topic and helped to make my mind clear in some points.

My notes from her Feedback:

She highlighted how important it is to look at things from different angles and use unexpected changes to keep it interesting. Birgit also suggested starting with what I personally care about, as this makes my writing more genuine and relatable.

We talked about asking „what if“ questions to explore new ideas, which can bring more depth to my research and make it more interesting. She also stressed the importance of knowing exactly what message I want to share—this clarity helps me write more effectively. Overall, my talk with Birgit has inspired me to approach the project in a more creative and focused way.

Choosing Topic:

After my conversation with Birgit, I realized that I was following a path of thought from the general to the personal, with her feedback, I turned inward and thought about my own interests and problems, thinking about the personal and the general helped me and I decided on my topic!! FINALLY!

Project Description:

I’ve been thinking about how I’m learning German, hearing different languages in class and around the city, noticing the varied and sometimes funny ways words are spoken. It’s interesting to see these things from an artistic angle.

So, my current project is to visualize the difference and similarities of audios from different languages. „How does the same words/letters/sentences “look” like in different languages?“ is my research question. I want to analyze the outcome of these visuals and experiment possible ways to use them. Another experiment can be asking to deaf people, if they notice a pattern in those visuals, for another point of view.

Hopefully, at the end of my prototype I can effectively demonstrate the unique acoustic properties of different languages ​​by analyzing sounds with creative visualizations, and perhaps this will also provide an interesting way to explore and understand differences in linguistic expression.

Next Step:

My next step will be creating a visual in touch designer. I will look for some tutorials and experiment with which visual representation will suit best to my project.

🟦 01_Ideation

Hi! Last semester, my research topic was „Approaching Basic Senses Using Interaction: A Journey Into The Multi-Sensory Experience.“ I gathered extensive information on how and where multi-sensory design is used and its importance.

This semester, I want to continue exploring multi-sensory and experience design. I began with a brainstorming session using the card sorting method, writing down my wishes, inspirations, and questions.

What I want? How I want?

  • A multi sensory protoype
  • Immersive experience
  • Futuristic but not realistic?
  • Innovative idea
  • I want to make people FEEL something
  • Maybe spatial experience? Through various senses/materials
  • Dive into human interaction with senses
  • I wanna do something cool!!!! But how tho? 🙂

Real and Hard Questions

  • Do I wanna fix a problem, have a goal?
  • How can I use my skills, my knowledge in this project?
  • What I wanna experiment with the tools I have?
  • Do I wanna create an artistic experience?
  • What I wanna learn in the end?
  • What is my inso? Do I have any source that I wanna work on?
  • Do I wanna improve or create, a product or service?

Reflection of Card Sorting

After this exercise, I realized I wanted to create something cool with an artistic approach. Seeing all my questions and concerns together was helpful, even though I didn’t land on a specific idea during the process.

I then placed potential ideas on post-it notes and asked ChatGPT for additional inspiration. Despite this, none of the ideas fully satisfied me, and the wide range of topics left me feeling lost.

Next step

The next step is to continue searching for ideas. I plan to discuss my project with Ms. Bachleri, hoping her feedback will help me find a clear direction.

16 | Arduino with TouchDesigner 🌱

Arduino Controller made of an ESP8266 12-F board, an HW-040 Rotary Encoder, and a 3D-printed knob.
TouchDesigner Visuals (left to right: good state, neutral state, bad state)

15 | Data Visualization with TouchDesigner 🌱

(From left to right: Tornado, Galaxy, Lava Flow)

“Intergenerational Digital Storytelling” | 03.2

In my last blog entry, I mentioned that our discussion provided me with valuable insights and new ideas on how to move forward. I was excited to implement the strategies we discussed and explore the possibilities for my app. However, after talking to people who are familiar with my idea in depth, thanks to hours of discussion, I realized that our 15-minute intense discussion was not enough for me to present my idea accurately. We ended up discussing a concept that resembled Facebook or social media for family, but that wasn’t quite what I had in mind.

Social media typically revolves around individuals talking about themselves, whereas my idea is more about others writing about you. The concept of a ‚Tinder for family‘ where you swipe left and right, and answer yes or no questions, didn’t resonate with me in the end.

So now, I am planning to take a more gradual approach to showcase my idea. I will start by developing a Figma prototype with a login/register page, allowing users to input their information for the first time and answer simple questions about their immediate family, such as questions about their parents, siblings, partner, and/or children. I say it will be quite a lot of work already because almost all info needs its own page. For instance, there will be pages for login/register, password reset, a dashboard prompting users to fill in personal information, and separate pages for entering details about parents, siblings, spouse/partner, children, and so forth.

This alone will take me some time to create, and I believe that in addition to these, including information about siblings‘ partners, their children, details about grandparents, their siblings, spouses, and children would sufficiently flesh out this prototype.

I’m eager to see how this structured approach will unfold, what insights it will bring and how big of a rabbit whole will I dig for myself this time.

19 | User Testing Insights: Adaptation of „Mensch ärgere dich nicht“ with Sustainability Twist

Recently, I also conducted the first user testing for my adaptation of the classic board game „Mensch ärgere dich nicht“, infused with sustainability elements. The aim was to assess the game mechanics and gather feedback on how well it integrated sustainability concepts. Here’s a rundown of what I discovered during the testing session with three adult players.

  • Self Throw Dilemma: It wasn’t clear if they HAVE to move their piece for e.g. two spaces, if a card says so (cause it is meant to be a bonus for the player, not a penalty), if they would need to kick out their own player. Could they just accompany another player of their own or not execute the move at all? Or are they allowed to use another piece of their own to fulfill the moving?
  • Integration of Energy-Saving Fields: The energy-saving fields weren’t integrated enough into the game, leading to questions about their role and impact.
  • Incoherent Rewards: The distribution and significance of rewards based on the complexity of questions or actions on the „Good News“/“Bad News“ cards weren’t clear or consistent.
  • Broad Questions: Some sustainability concepts/questions were perceived as overly broad, with lots of potentially correct answers.
  • Rules Clarification: Many questions arose about the general rules of „Mensch ärgere dich nicht,“ especially when sustainability elements were introduced.
  • Answer Ambiguity: Uncertainty arose when a potentially correct answer conflicted with the actual answer on the card.
  • Penalty Questions: Players questioned what happens if they don’t have enough points but are required to give one away.
  • Overall Enjoyment: Carla expressed (more than once) liking the game, indicating initial appeal despite the need for refinements.
  • Clear Structure: Players appreciated the clear distinction between questions and actions that simply occur during gameplay.
  • Humorous Element: The rule requiring players without enough points to take an extra round added a humorous twist that kept the game engaging.
  • Enhanced Engagement: Max found the game more exciting than traditional „Mensch ärgere dich nicht,“ appreciating the sustainability angle.
  • Example „Auto-in-die-Schule“ Card: There was the idea to really ask players if they drove to school with the car instead of just deciding for them and giving them sustainability points.
  • Multiple Choice Answers: Introducing ABC answer choices for questions could enhance player engagement and clarity.
  • More Penalties: Considering adding more penalties, e.g. forcing a player to sit out the next round.
  • Excess Points Utilization: Allowing players to use excess environment points for strategic advantages could add depth to gameplay.
  • Refining Energy-Saving Fields: Either integrate energy-saving fields more meaningfully and often or reconsider their inclusion.
  • Mini-Games Addition: Incorporating mini-games like drawing a recycling icon could diversify gameplay and reinforce learning.
  • Separation of Elements: Separate questions and good/bad news events into specific event fields or other designated spots to better utilize both.

This initial test provided valuable insights into the existing game mechanics. While there are refinements to be made, the positive reception and constructive feedback indicate potential for this game to successfully blend fun with learning about sustainable practices. Because of that and also because I think in a board game I might have more possibilities for adaptions and introducing more elements, I will most probably develop this game further rather that the card game GOPS.

Unreal Journey 4 – Lighting

Unreal Journey 4: Lighting

In this chapter, I want to share my experience with lighting in Unreal Engine. Setting up the lighting for a scene can be overwhelming, especially when you’re used to Unity’s system. Fortunately, Unreal Engine offers a handy tool under Window > Env. Light Mixer. This tool allows you to easily create and manage all the necessary game assets for lighting.

One of the coolest aspects of Unreal’s lighting system is that light intensity is measured in lux, similar to Unity’s HDRP. This allows for physically accurate lighting setups using real-life settings. All other light parameters can also be adjusted to match their real-life counterparts, which is fantastic for achieving realistic renders.

Key Features

Lux Measurement:

  • Allows for physically correct images using real-life light settings.

Adjustable Point Light Length:

  • You can change the length of a point light and utilize real-time area lights. This is something Unity lacks, making Unreal stand out in terms of flexibility.

Built-in Volumetrics:

  • Unreal Engine comes with built-in volumetrics, eliminating the need for HDRP or third-party plugins to achieve cinematic volumetric fog. This is a significant improvement over Unity, where such features often require additional plugins.

Practical Application

For my scene, I aim to simulate large lights on top of the hangar. Using area lights, I experimented with different settings until I achieved a satisfactory result. At this stage, the lighting doesn’t have to be perfect as I can always tweak it later on.

Conclusion

Unreal Engine’s lighting tools provide a comprehensive and flexible system for creating realistic and visually stunning scenes. The integration of real-life light settings and built-in volumetrics makes it a powerful tool for any developer looking to create high-quality visuals. Stay tuned for more updates as I continue to explore and refine my scene.

Unreal Journey 2 – Modelling

Discovering Unreal Engine’s Built-In Modeling Tools

As I dive deeper into Unreal Engine, I’ve been pleasantly surprised by its sophisticated modeling capabilities, which are now natively built into Unreal Engine 5.4. This feature is incredibly useful for quickly prototyping various elements within the engine itself.

Unreal Engine allows the creation and manipulation of high-poly models directly within the platform. This integration is particularly advantageous compared to traditional 3D modeling software because it includes preset models, like stairs, which are essential for building game levels swiftly.

Powerful Tools for Rapid Prototyping

One of the standout tools for quick prototyping and blocking is the Cube Grid tool. This tool enables developers to rapidly create shapes and structures, facilitating a more streamlined workflow when sketching out ideas and concepts.

Given my goal to create a spaceport for my prototype scene, I found the extrude box tool incredibly helpful. This tool allows the creation of complex shapes by extruding boxes, making it easier to design intricate structures and environments.

Advantages Over Traditional 3D Modeling Software

Model Presets:

  • Since Unreal Engine is primarily a game engine, it includes various model presets designed for game development. This feature is perfect for quickly building levels and environments without the need for extensive modeling from scratch.

Integrated Environment:

  • Working within Unreal Engine eliminates the need to switch between different software. You can model, texture, and implement your assets all within one ecosystem, which speeds up the development process and reduces compatibility issues.

Real-Time Feedback:

  • The ability to see real-time feedback and adjustments in the game engine is a significant advantage. This feature allows for immediate testing and iteration, ensuring that your models look and perform as expected in the final environment.

Looking Ahead

With these powerful modeling tools at my disposal, I’m excited to continue developing my hangar scene that I chose for this prototyping project. The ability to create and manipulate high-poly models directly within Unreal Engine has streamlined my workflow and enhanced my creativity. The only problem I already encountered is that Unreals modelling Tool is still very buggy.