Episode #4 from the series: New things I learned this semester – Frame by Frame

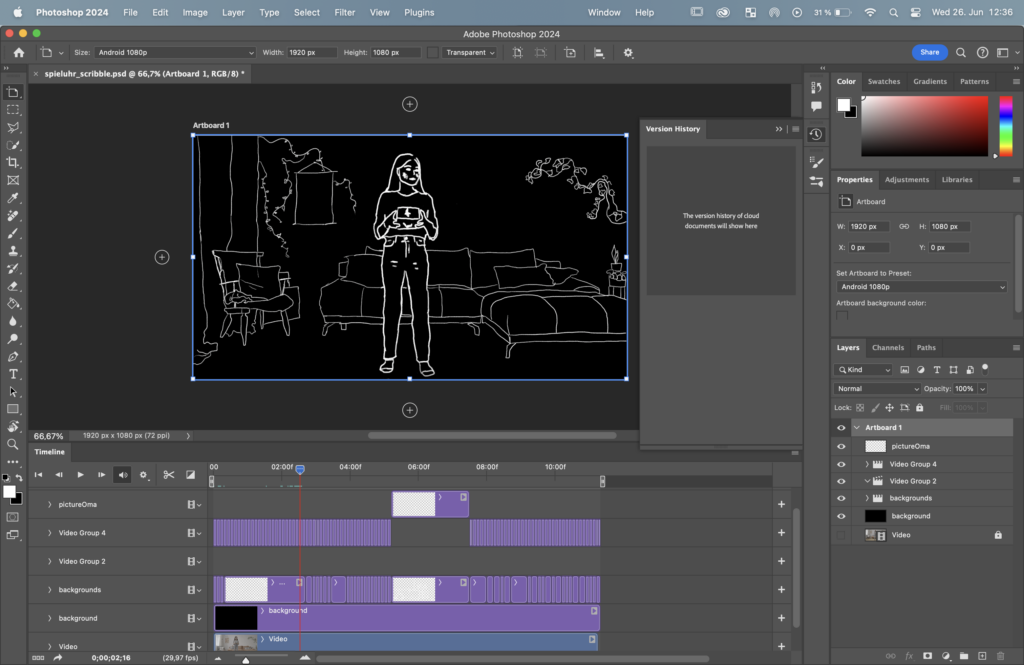
Working on the „Spieluhr“ scribble-style frame-by-frame animation has been an experience, especially using Photoshop and a drawing tablet. My process began with looking for a perfect brush style and how I can logically devide the different parts in the frame to ensure that I don’t work in chaos. Using a reference video was incredibly helpful in this stage, providing a solid foundation for the key actions and transitions.

The next step involved establishing keyframes. These pivotal moments captured the essence of each movement, marking the start and end points of actions. Working in Photoshop, I used layers to separate different elements of the animation, which made it easier to manage the complexity. The drawing tablet proved invaluable, offering the precision and fluidity needed for detailed work. At first I was really sceptical because of the drawing tablet but in the end it was really a gamechanger. This setup allowed me to create the inbetweens, or „tweens,“ which were crucial for achieving smooth, continuous motion between keyframes.

Maintaining consistency throughout the animation was a challenge, but tools like onion skinning in Photoshop made it manageable. By seeing previous and next frames, I could ensure that character proportions, shapes, and the overall scribble style remained uniform. This consistency was key to making the animation look professional and cohesive.

Attention to detail was another critical aspect. Secondary actions, such as subtle movements of hair or clothing, added layers of realism. Follow-through and overlapping action were techniques I applied to make movements more lifelike, ensuring that different parts of the body or objects moved with a natural delay.

Lighting and shadow consistency was crucial, even in a scribble-style animation. Keeping these elements uniform ensured visual coherence, and shadows moved correctly with the objects or characters, adding to the overall realism.

Throughout the process, frequent playback was essential. This allowed me to check for smoothness and coherence, making necessary adjustments along the way. Feedback from peers was invaluable, providing different perspectives and highlighting areas for improvement. Multiple revisions were part of the journey, each one bringing the animation closer to perfection.

Using Photoshop and a drawing tablet made the technical aspects of frame-by-frame animation more manageable. The software’s features, combined with the precision of the tablet, allowed for detailed and nuanced drawings. Synchronizing sound effects and any potential dialogue or background music with the animation added another layer of depth, making the visual experience more immersive.

Overall, working on the „Spieluhr“ scribble-style frame-by-frame animation was a blend of creativity and technical skill. I was happy that I took on that challenge and I may also use this for the practical part of my master thesis.

Episode #2 from the series: New things I learned this semester – Resolve

A big step for me this semester was to try out in depth cutting with Davinci Resolve. I was always a big fan of Adobe Premiere Pro and used to do everything with this programme. Especially the workflow within the Adobe products (Premiere-AfterEffects) was one of the main reason for that. Like I wrote in my last post, we had a project for the Springfestival where we could do basically everything so there was time to try out new things!

At first I was kind of overwhelmed with the user interface of Resolve. The arrangement of the tabs is totally different than in Premiere and therefore the workflow is totally different. Once I got used to the interface I surprisingly was very fond of this tool! At first glimpse it looks overpowered and complicated but the interface makes more sense than the interface of premiere – at least for me. It feels like in Resolve I have more control over my clips and also I like the arrangement of the tabs much more. In Premiere Pro I hardly ever worked with short cuts or effect control but now that I work in Resolve I am more willing to learn how to use stuff efficient. It really helped my workflow and output when it comes to cutting videos.

Here are some of the differences I have noticed:

Interface: Premiere Pro is often considered easier to learn, especially for those who have experience with other Adobe products. Its interface is customizable and user-friendly. While DaVinci Resolve has a more complex interface, it is highly powerful and comprehensive. The learning curve can be steeper, especially for beginners, but it’s favored by professional colorists and editors for its depth.

Color Grading/Correction: Premiere Pro offers a solid set of color grading tools within the Lumetri Color panel, which is integrated into the editing workflow. Meanwhile DaVinci Resolve is renowned for its advanced color grading capabilities, Resolve originated as a color grading tool and still excels in this area. Its color grading features are considered industry-leading, offering extensive controls and professional-grade tools.

Features: Premiere Pro is integrated with other Adobe Creative Cloud applications like After Effects, Photoshop, and Audition enhances its functionality. DaVinci also offers comprehensive editing features, with the added benefit of a fully integrated suite that includes Fusion (for visual effects), Fairlight (for audio post-production), and its top-notch color grading. This integration allows for a seamless workflow within a single application.

Here is the finished video for the Stage Visuals of the Springfestival Opening 2024. The main video I edited in DaVinci Resolve which I later put into the AfterEffects template, that is divided into different sections that are the same size as the LED walls on the main stage.

Here I especially focused on making cool transitions, which turned out pretty good because we graded everything in a similar color! On the day of the opening we had to look if the faces in the video would look disturbed or if my arrangement for the LED walls was accurat! The front penal at the venue was actually really overlapping the main wall so I had to adjust the video.